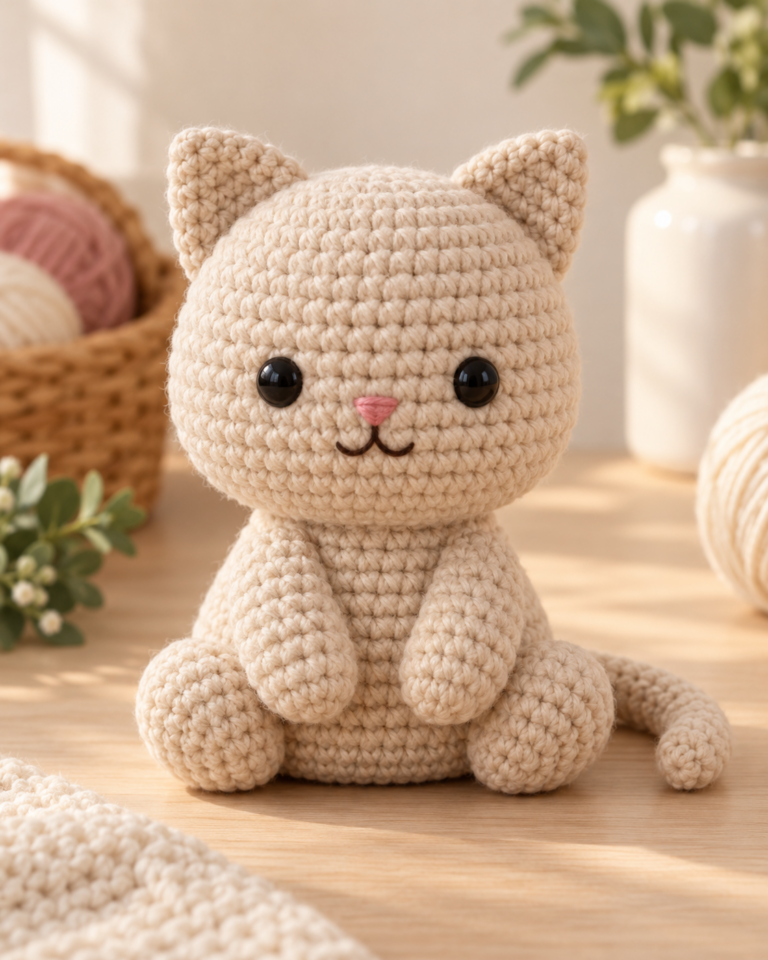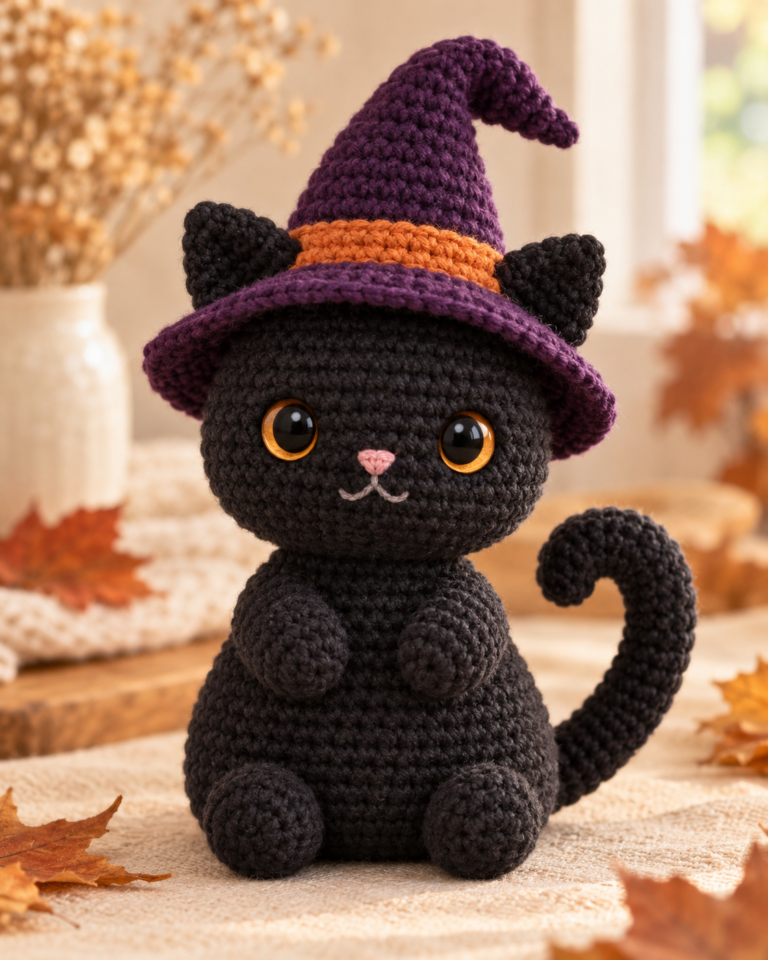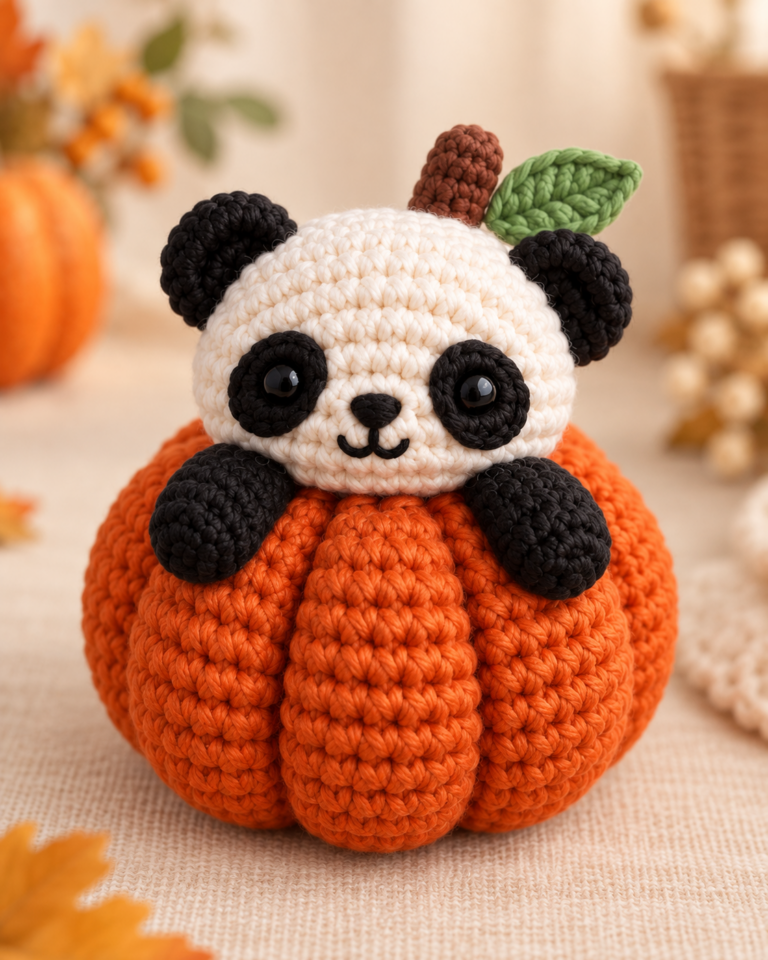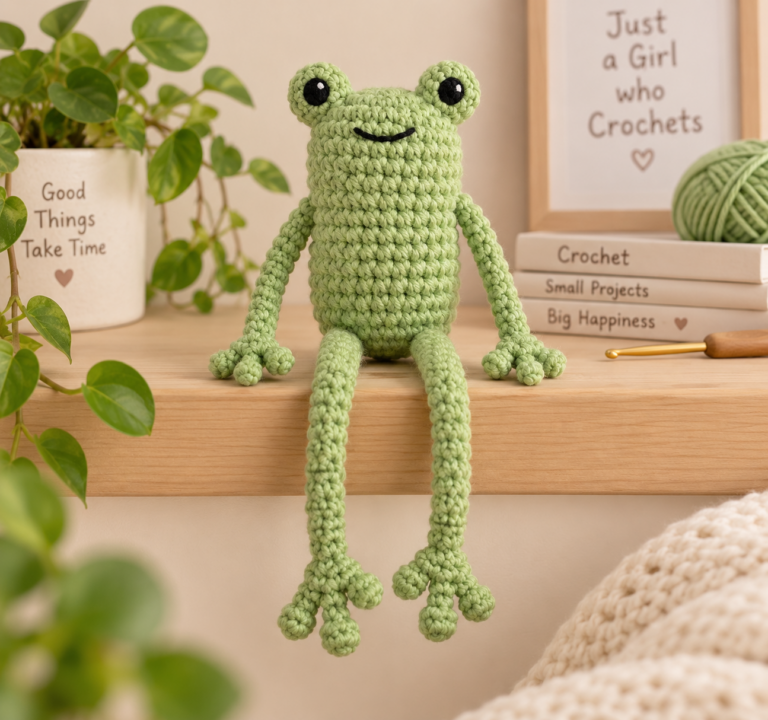

This free pumpkin frog crochet pattern makes a cute sage-green frog with a removable ribbed pumpkin costume and a matching little pumpkin topper. The frog is complete underneath the costume, so you can display it as a regular amigurumi or dress it up for fall and Halloween.
The frog’s body and head are crocheted continuously as one piece. The raised eye bumps, short rounded arms, hind legs, pumpkin costume, and pumpkin topper are made separately. The costume body slips over the lower frog, while the small topper ties gently behind the head so the seasonal pieces can be removed.
Pattern status: This original pattern is a working draft and has not been physically tested. The tutorial photos are AI-generated visual construction guides. Exact finished size, yarn quantity, gauge, fit, and real-world balance have not yet been verified. Follow the written stitch counts and construction instructions rather than counting stitches visible in the images.
Pumpkin Frog Crochet Pattern Overview
This project is designed for an advanced beginner who is comfortable with a magic ring, single crochet, increases, invisible decreases, working in continuous rounds, simple rows, stuffing, embroidery, and basic amigurumi sewing.
Construction note: This is not a no-sew pattern. The frog body and head are continuous, but the eye bumps, arms, and legs are separate pieces. The pumpkin body and topper are also separate so the costume can remain removable.
Table of Contents
Pumpkin Frog Crochet Pattern Materials
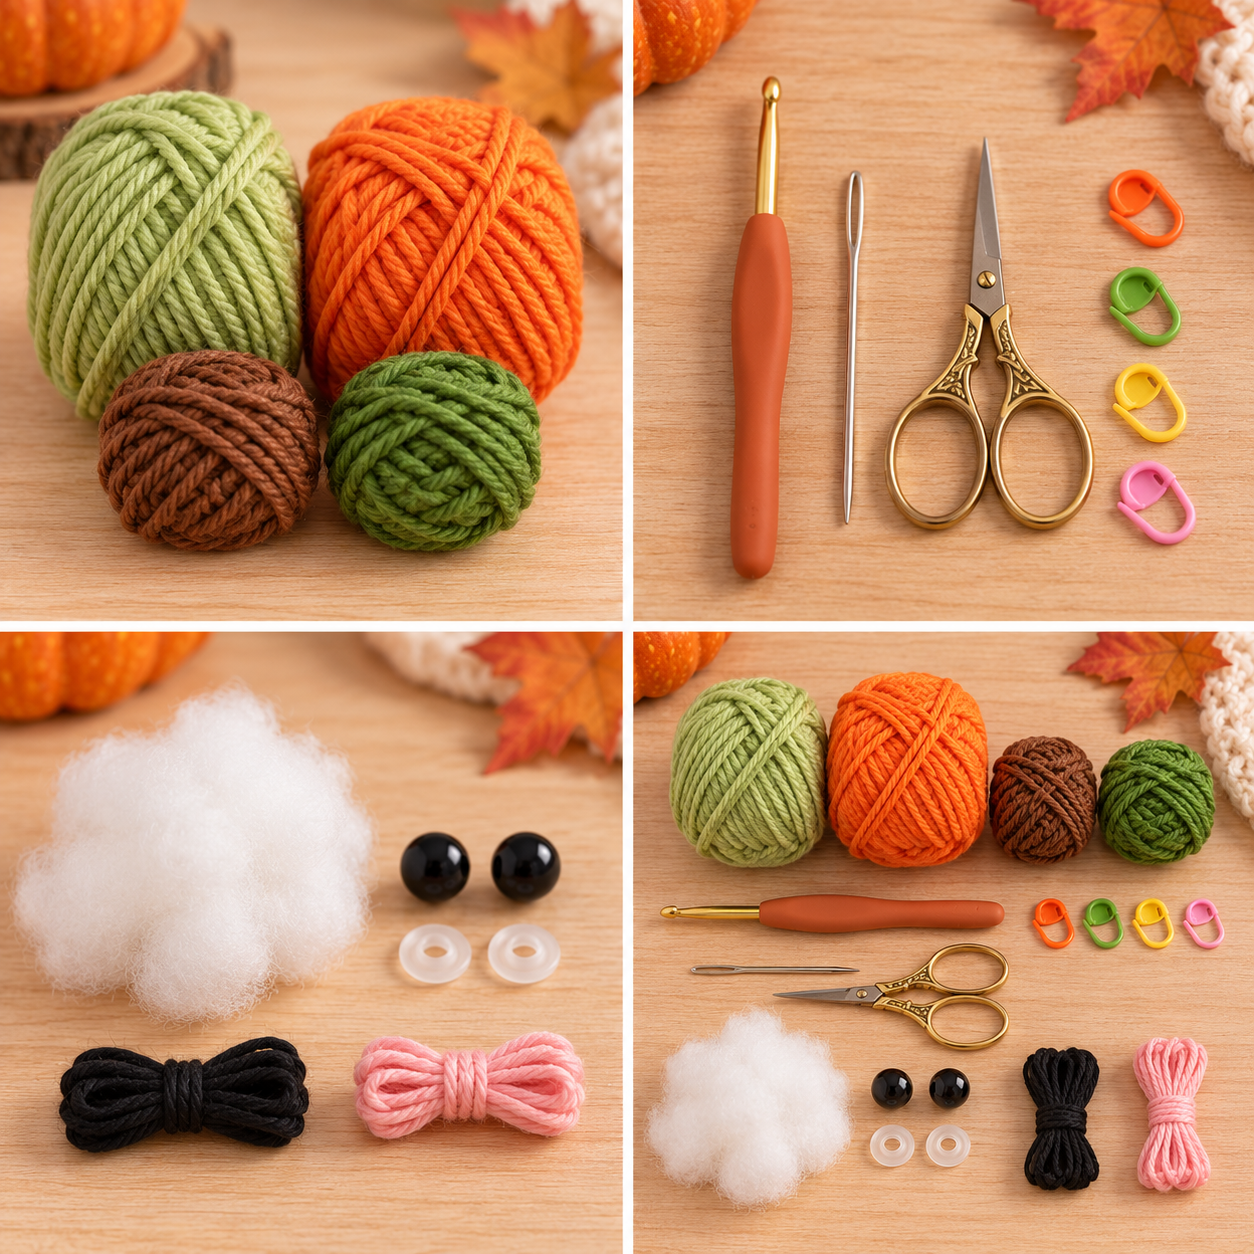
- #4 worsted-weight smooth yarn in sage or pistachio green for the frog
- #4 worsted-weight orange yarn for the pumpkin costume and topper
- Small amount of brown yarn for the pumpkin stem
- Small amount of deeper green yarn for the leaf
- Small amount of black yarn or embroidery thread for the smile
- Small amount of soft pink yarn for the cheeks
- 3.5 mm crochet hook
- Two 8 mm black safety eyes with washers
- Polyester fiberfill
- Yarn or tapestry needle
- Stitch marker
- Scissors
Safety note: Plastic safety eyes can be a choking hazard. If this frog is intended for a baby or very young child, skip the plastic eyes and use securely embroidered eyes instead.
Crochet Abbreviations
This pumpkin frog crochet pattern uses standard US crochet terminology. For a broader reference, see the Craft Yarn Council crochet abbreviation guide.
| Abbreviation | Meaning |
|---|---|
| MR | Magic Ring |
| ch | Chain |
| sc | Single Crochet |
| inc | Increase — 2 sc in the same stitch |
| dec | Invisible Decrease |
| sl st | Slip Stitch |
| hdc | Half Double Crochet |
| BLO | Back Loop Only |
| st / sts | Stitch / Stitches |
| FO | Fasten Off |
Important Pattern Notes
- Work the frog in continuous spiral rounds unless a section specifically says to work in rows.
- Use a stitch marker to mark the first stitch of each round.
- The frog body and head are one continuous piece.
- Keep the head opening accessible until both safety-eye washers have been secured.
- The eye, arm, leg, mouth, and cheek placement described below is provisional because the pattern has not been physically tested.
- Leave long sewing tails on the arms, legs, and eye bumps.
- Lightly stuff only the rounded sections of the limbs. The narrower attachment areas should stay relatively soft.
- The pumpkin body is an open wearable tube, not a stuffed pumpkin.
- The pumpkin topper should remain unstuffed and is tied gently behind the frog’s head.
- The written stitch counts and construction instructions are the technical source of truth if an AI-generated photo appears different.
Step 1 — Crochet the Frog Body Base
Begin at the bottom of the frog with sage-green yarn. The first four rounds expand into a flat circle, then the straight rounds begin forming the rounded lower body.
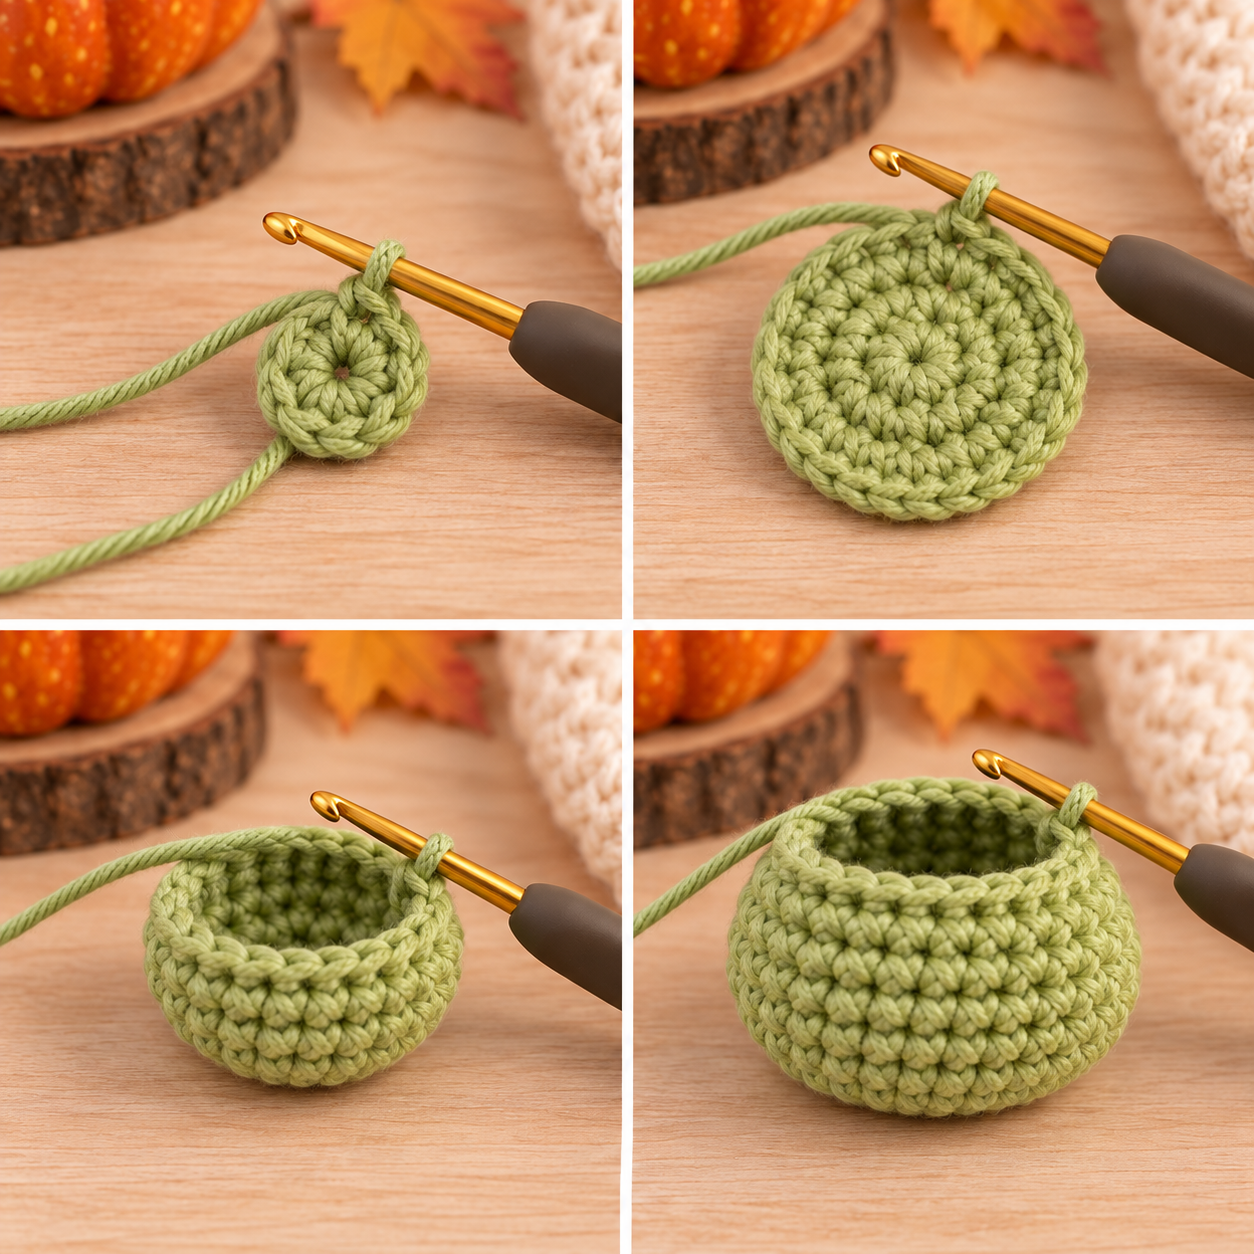
Do not fasten off. The same piece continues directly into the upper body and head.
Step 2 — Shape the Body and Head
The next round narrows the upper body briefly before the stitch count increases again to create the wider frog head. This short transition helps keep the body and head visually distinct without making them separate pieces.
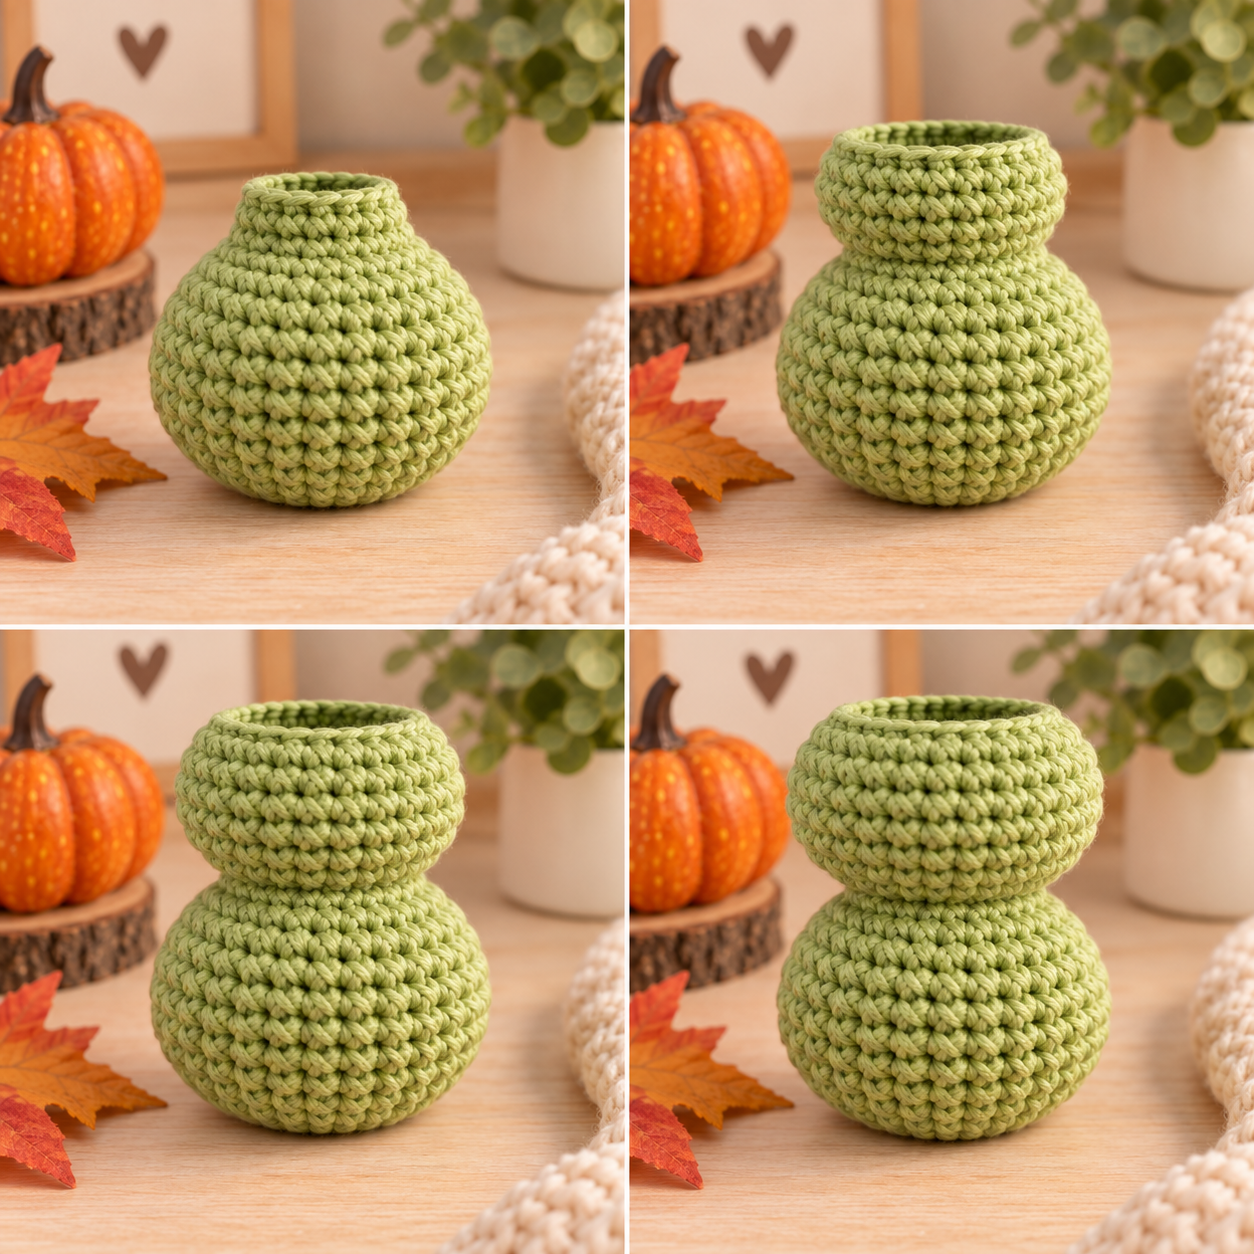
Keep the top open. The safety eyes need to be installed while you can still reach the inside of the head.
Step 3 — Make the Raised Eye Bumps
The two small green eye bumps create the classic frog silhouette. Make both before attaching either one so you can compare their size and placement from the front.
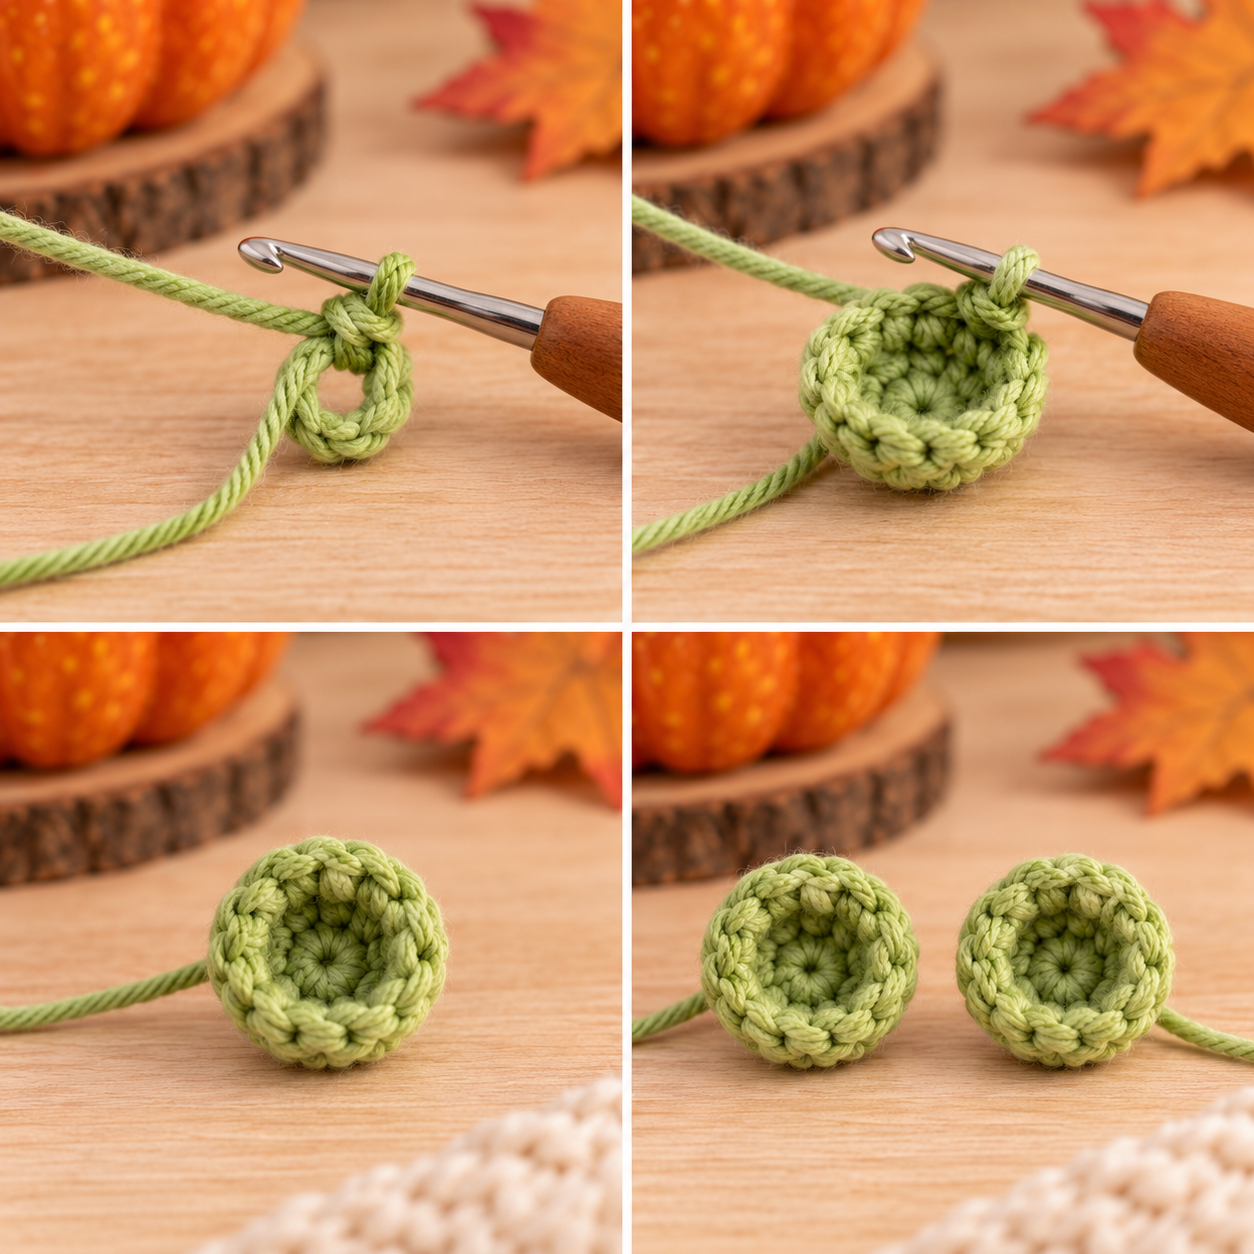
Eye Bumps — Make 2
FO and leave a long tail for sewing. The bumps should remain shallow rather than becoming heavily stuffed balls.
Step 4 — Install the Safety Eyes
Insert one safety eye through the front center of each green eye bump. Position both bumps on the upper front of the still-open head before permanently securing them.
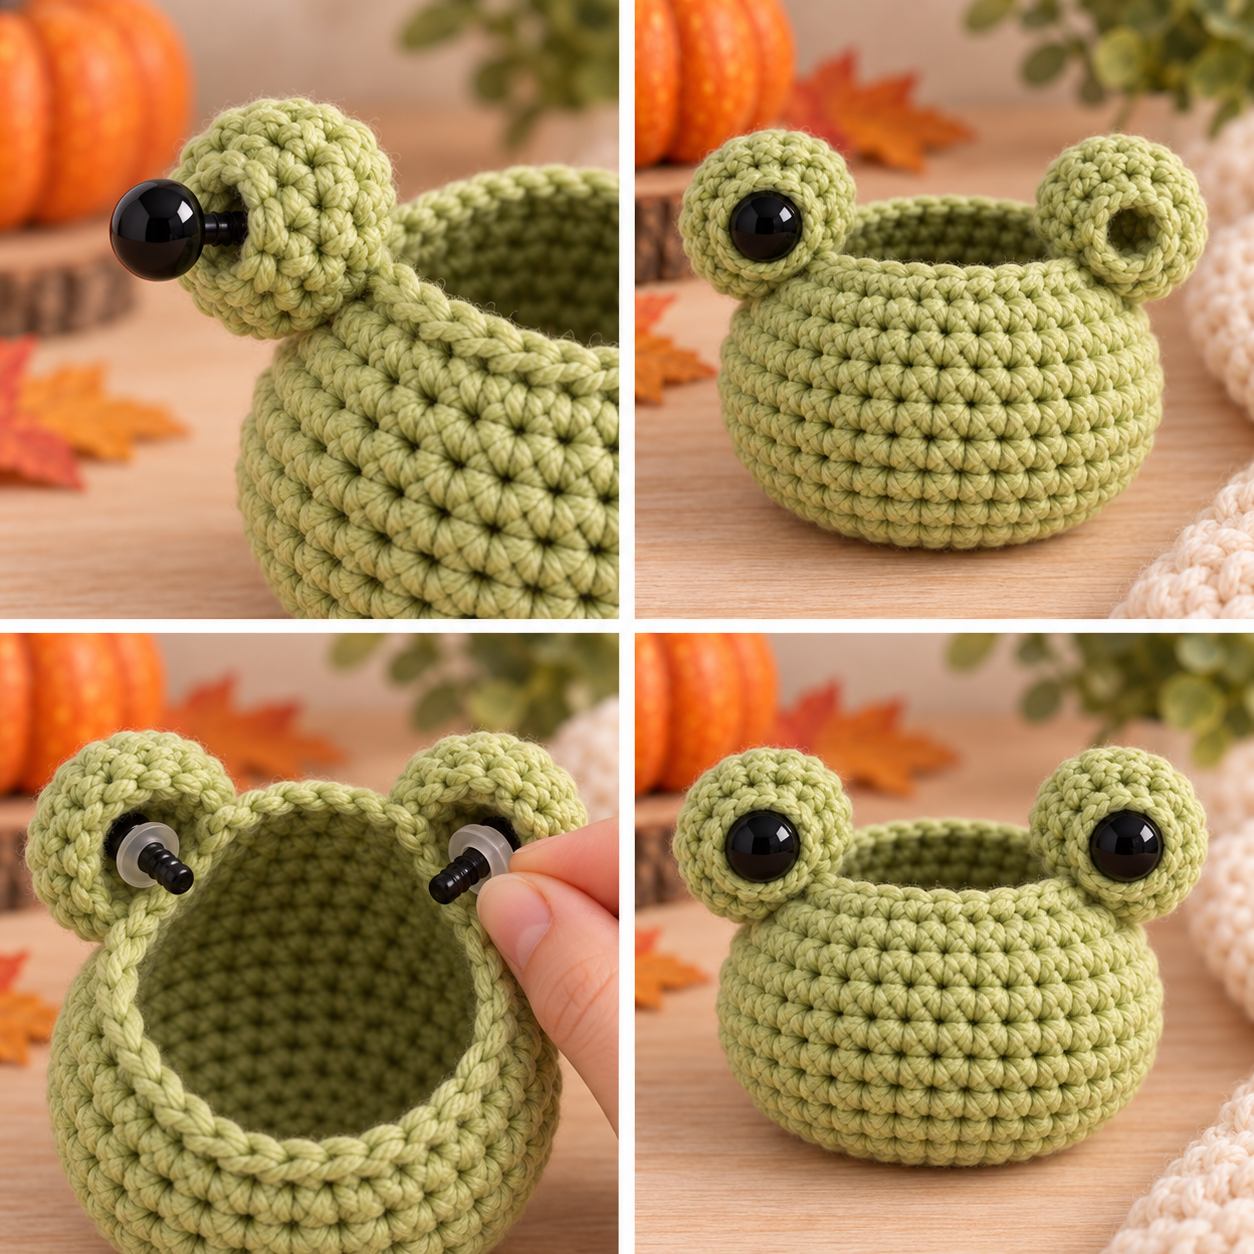
Provisional placement: A useful visual starting point is around the R12–R13 area, with roughly 4–5 visible stitches between the inner sides of the eye bumps. This placement has not been physically verified, so check the frog from the front before committing.
Push each safety-eye stem through both the eye bump and the frog head. Secure the washer from inside the head while you still have full access. Once both eyes appear balanced, sew neatly around the base of each eye bump.
If you are using embroidered eyes instead of plastic safety eyes, skip the washers and add the embroidered eyes after the frog has been assembled.
Step 5 — Stuff and Close the Frog
With the eyes secured, begin decreasing the top of the head. Add the fiberfill before the opening becomes too small to reach comfortably.
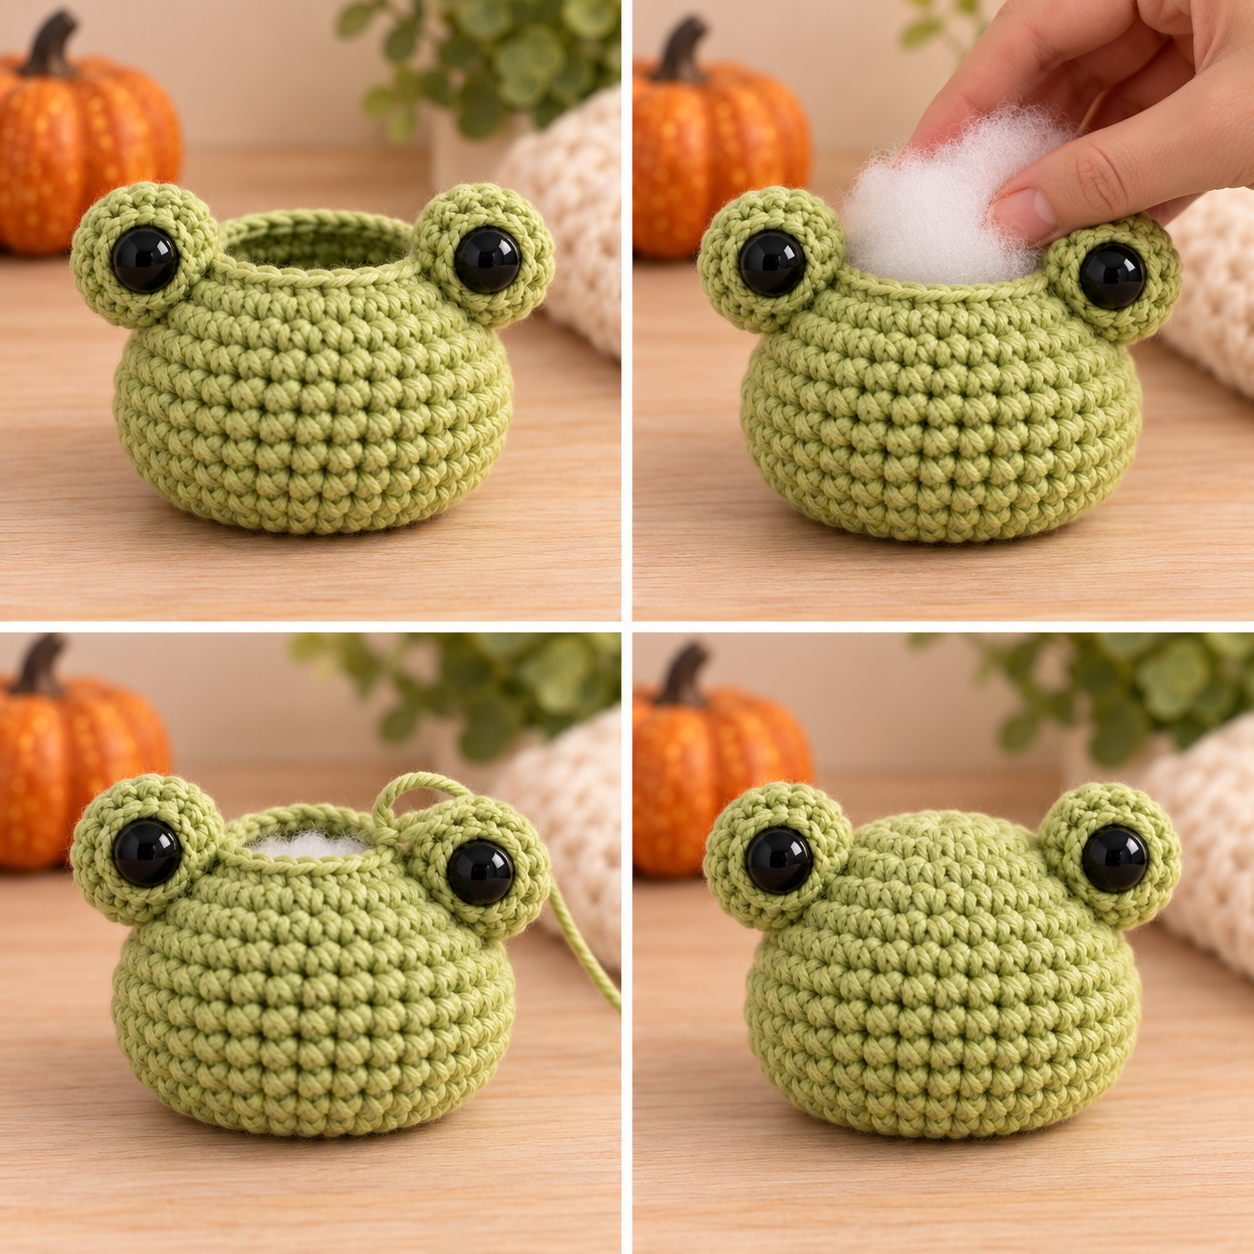
Stuff the lower body first, then continue adding small pieces of fiberfill into the head. Shape the piece as you work rather than pushing in one large handful.
FO. Thread the yarn tail through the remaining front loops, pull gently to close the opening, secure, and weave in the end.
Step 6 — Crochet the Rounded Arms
Each arm begins with a slightly wider rounded hand and narrows into a short arm. Make two matching pieces.
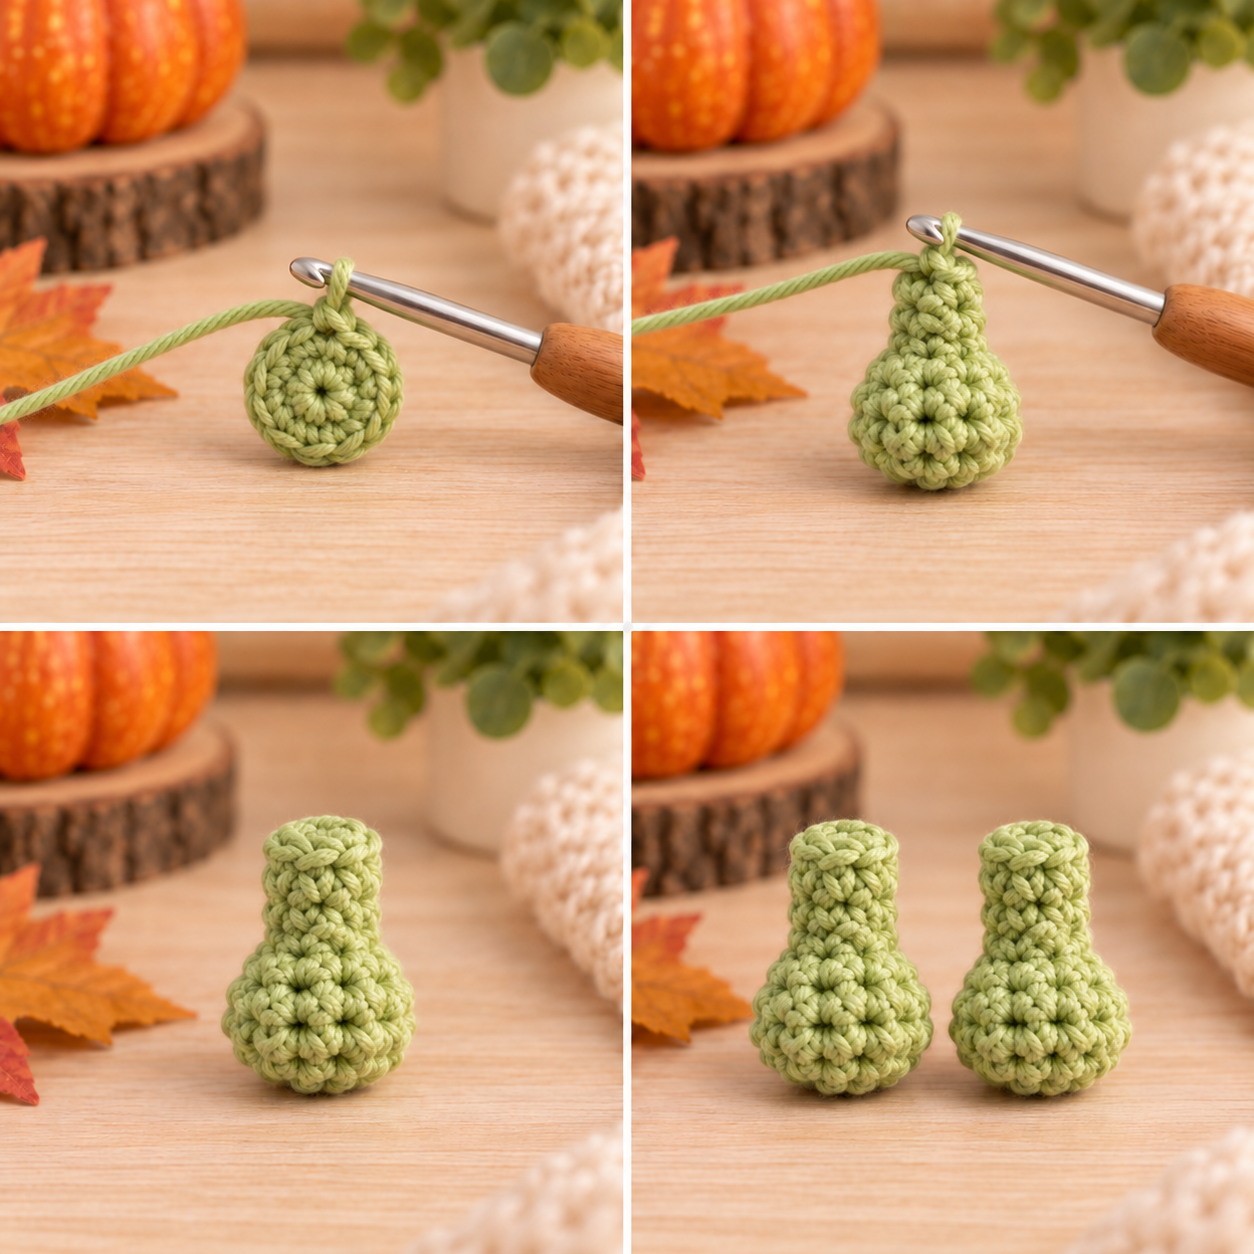
Arms — Make 2
Leave the arm unstuffed or add only a very small amount of stuffing inside the rounded hand. Flatten the top and work 3 sc through both layers to close. FO and leave a long sewing tail.
Step 7 — Crochet the Hind Legs
The hind legs have a rounded foot and a narrower upper section. Only the foot needs a little stuffing so the attachment section stays flexible.
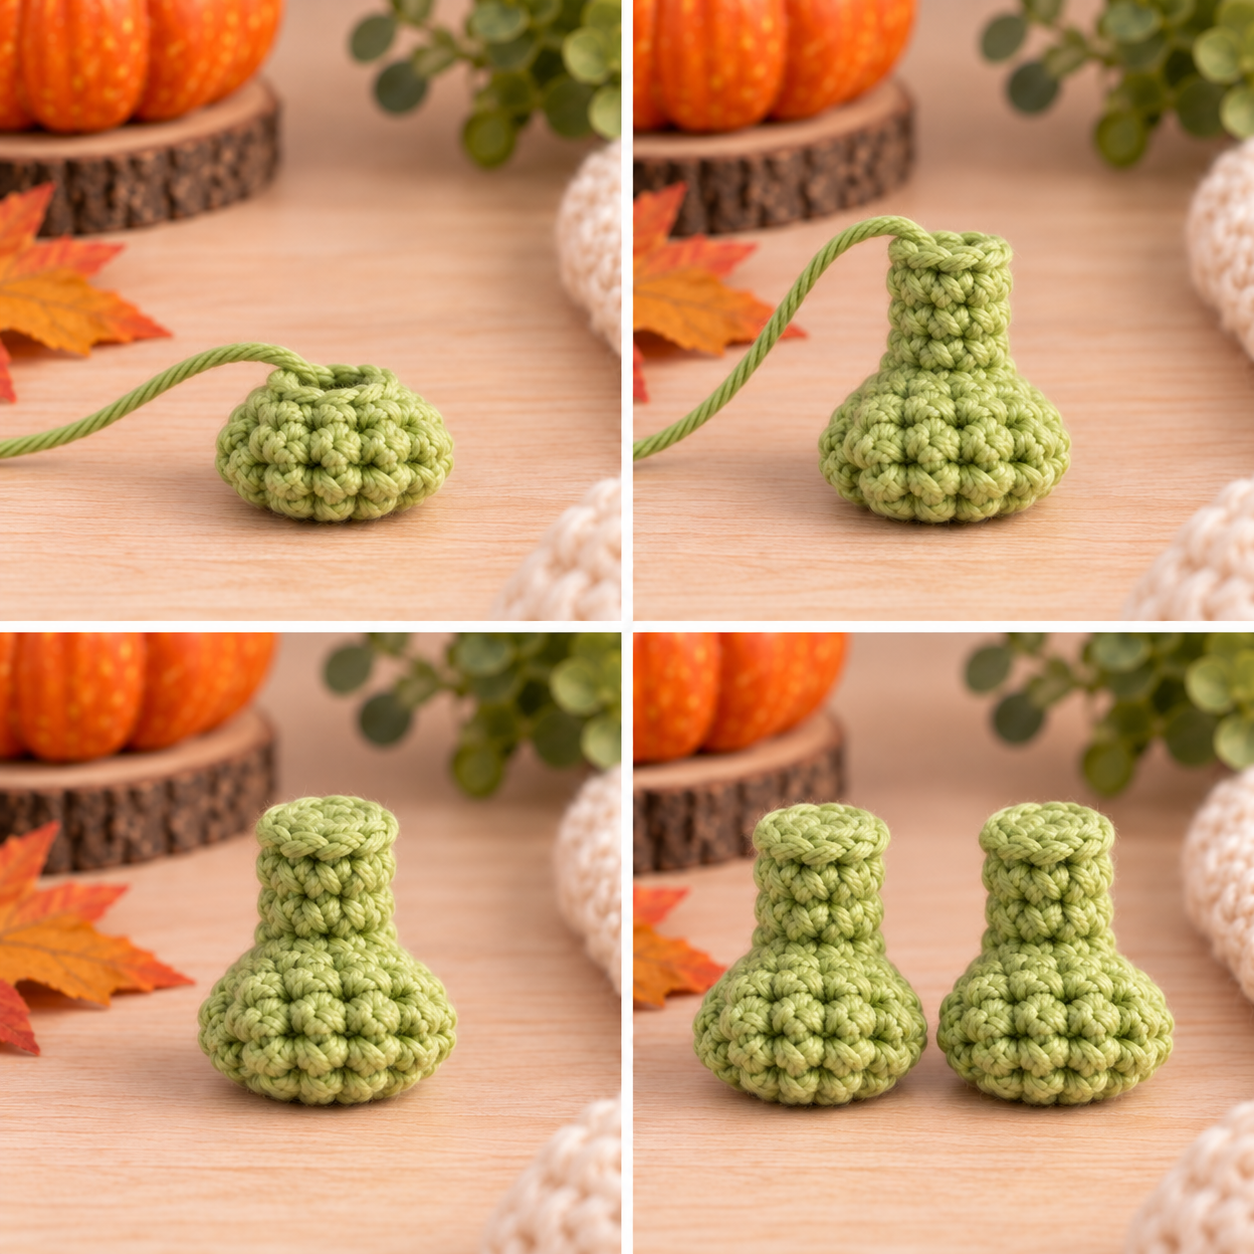
Hind Legs — Make 2
Lightly stuff the rounded foot section. Leave the narrow upper leg mostly unstuffed. Flatten the top opening and work 3 sc through both layers to close. FO and leave a long tail for sewing.
Step 8 — Assemble the Frog and Add the Face
Before adding the pumpkin pieces, finish the complete green frog underneath. Pin the arms and legs first so you can compare the left and right sides before making the placement permanent.
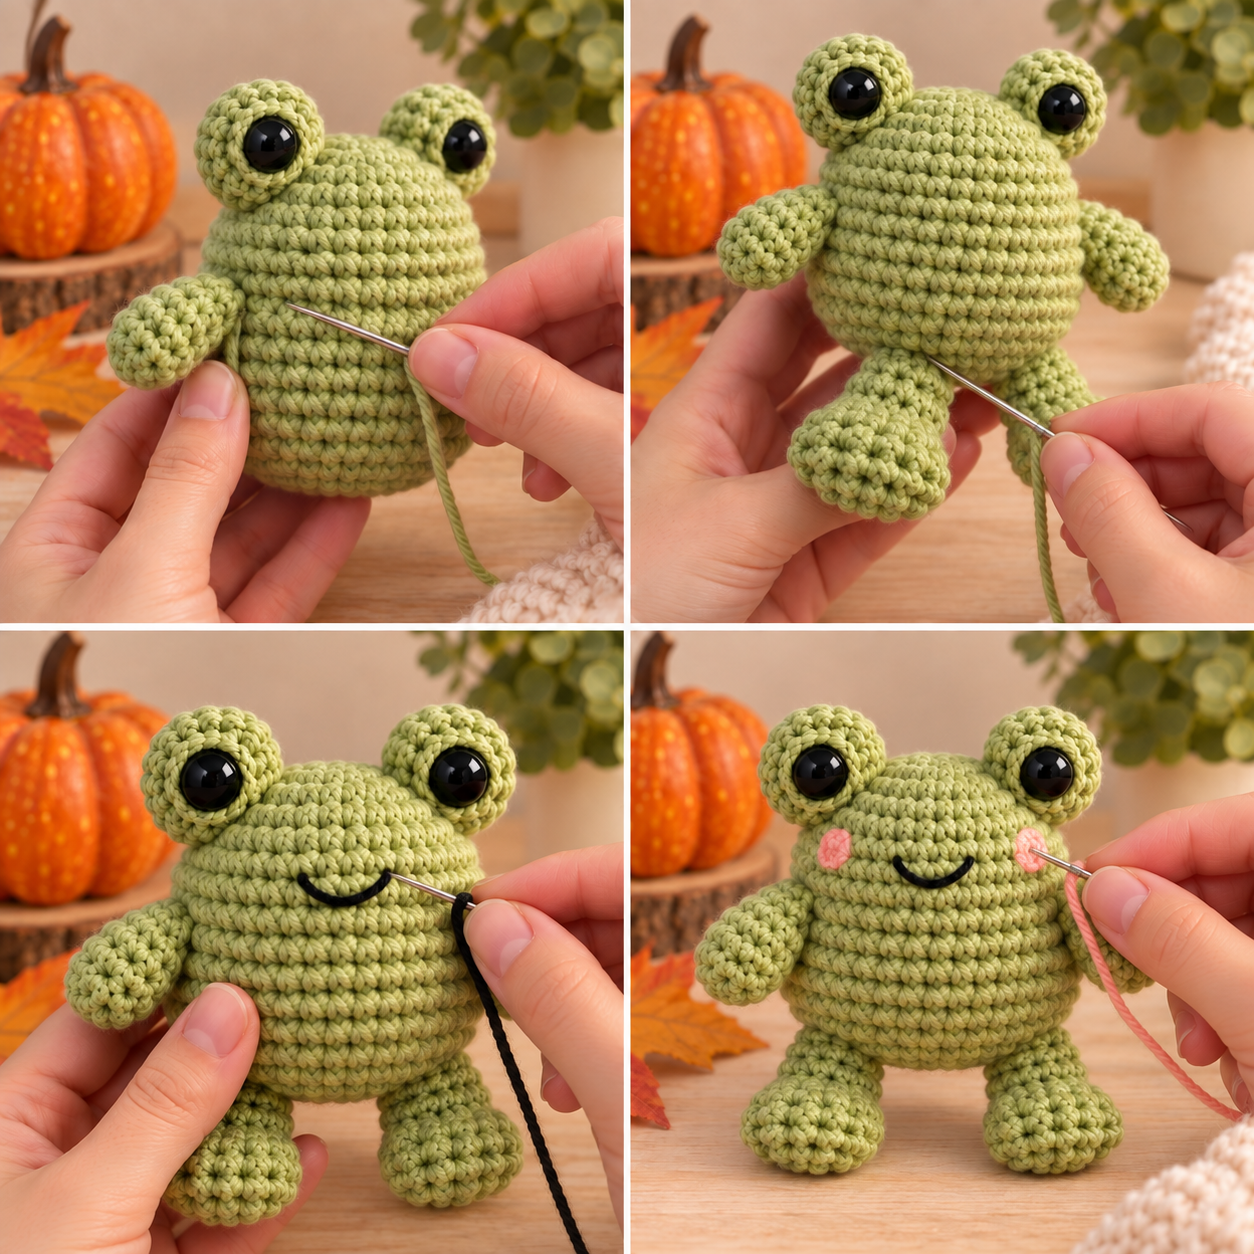
Attach the arms. Pin one arm on each side of the upper body. A provisional starting area is around R8–R10. Compare both sides before sewing securely.
Attach the legs. Pin the legs symmetrically around the lower body, using approximately the R3–R6 area as a provisional starting point. Check that the frog can stand or sit evenly before sewing.
Embroider the smile. Use black embroidery yarn to make a small shallow curved smile centered approximately 2–3 rounds below the eye line.
Add the cheeks. Use soft pink yarn to make 2–3 short stitches on each side of the face. Keep the cheek placement balanced below the eyes and outside the smile.
The frog itself is now complete. The next two sections create the removable seasonal pieces.
Step 9 — Crochet the Mini Pumpkin Topper
The little pumpkin topper sits between the raised frog eyes. It is worked separately, left unstuffed, and finished with a brown stem, green leaf, and two orange ties.
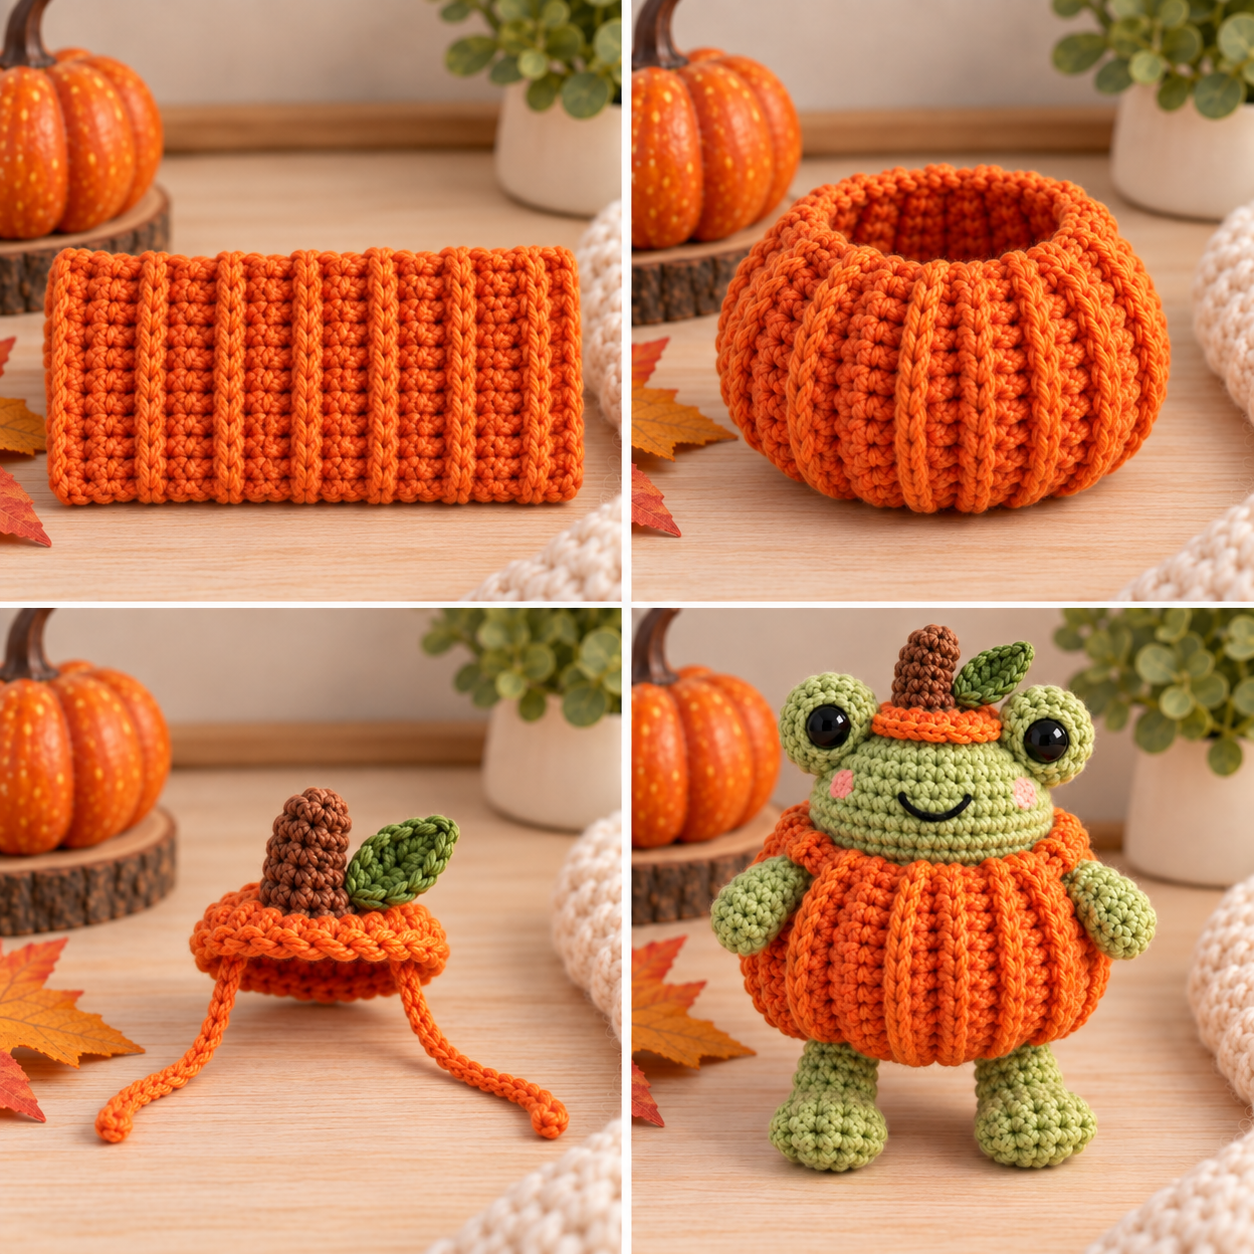
Orange Pumpkin Topper
FO. Do not stuff the topper. Gently shape it into a shallow miniature pumpkin cap.
Brown Stem
FO with a sewing tail. Sew the stem securely to the center of the orange topper.
Green Leaf
FO with a tail and sew the leaf beside the stem.
Add the Removable Ties
Attach orange yarn to one underside edge of the topper, ch 10, and FO. Repeat on the opposite underside edge to create a second tie.
Place the topper between the raised eyes and tie the two chains gently behind the frog’s head. Do not pull tightly.
Step 10 — Make the Removable Pumpkin Costume
The main pumpkin costume starts as a flat ribbed rectangle. The first and last rows are joined to turn the panel into an open tube, then gentle shaping lines create the pumpkin lobes.
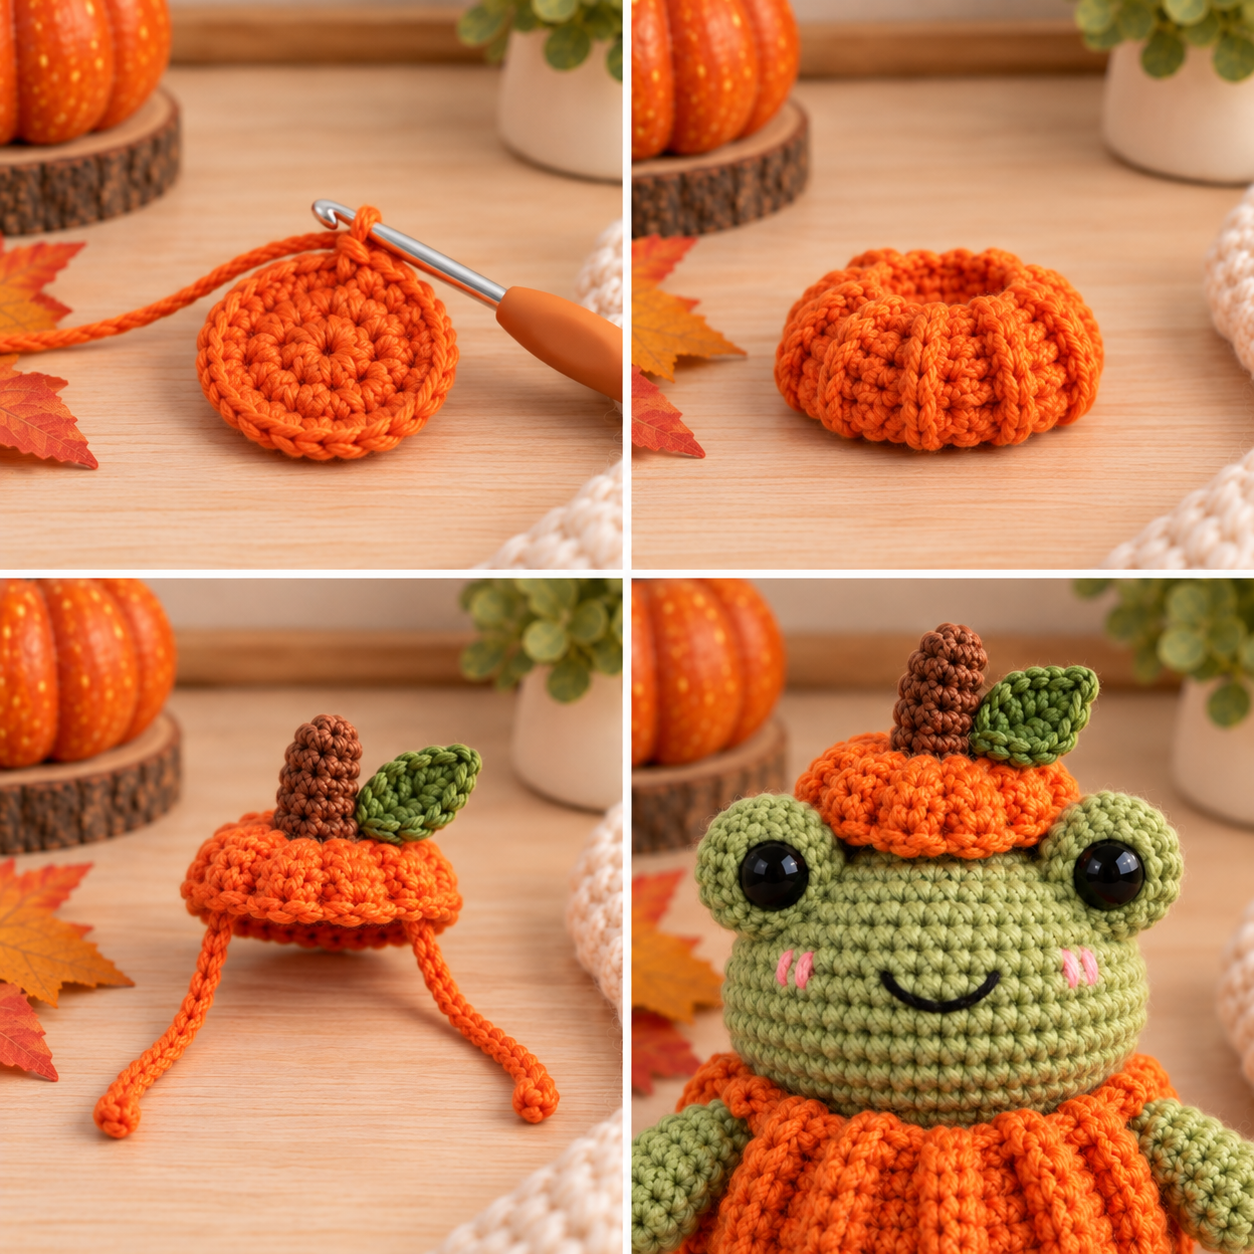
Ribbed Pumpkin Body
Bring Row 24 to Row 1. Join the two short edges with slip stitches or sew them together neatly to form an open ribbed tube.
Shape the Pumpkin
Thread a yarn needle with a long strand of orange yarn. Make 6 evenly spaced vertical shaping lines around the tube, working from the top edge toward the bottom edge and following the ribbed channels.
Pull each shaping line gently—only enough to suggest pumpkin lobes. Secure the yarn and weave in the ends. The costume should stay soft and slightly stretchy rather than becoming tightly cinched.
Keep it removable: The pumpkin body is not sewn permanently to the frog. It should remain an open wearable piece.
Dress the Frog
Slide the pumpkin body upward over the frog’s legs and lower body. Position the upper edge below the arms so the frog’s head and arms remain clearly visible and the feet show beneath the costume.
Add the finished pumpkin topper between the eyes and tie it lightly behind the head.
Finished Pumpkin Frog Amigurumi
Your finished pumpkin frog should still read clearly as a complete frog underneath the seasonal pieces: sage-green raised eyes, a small embroidered smile, pink cheeks, rounded arms and feet, a ribbed orange pumpkin body, and the matching stem-and-leaf topper.
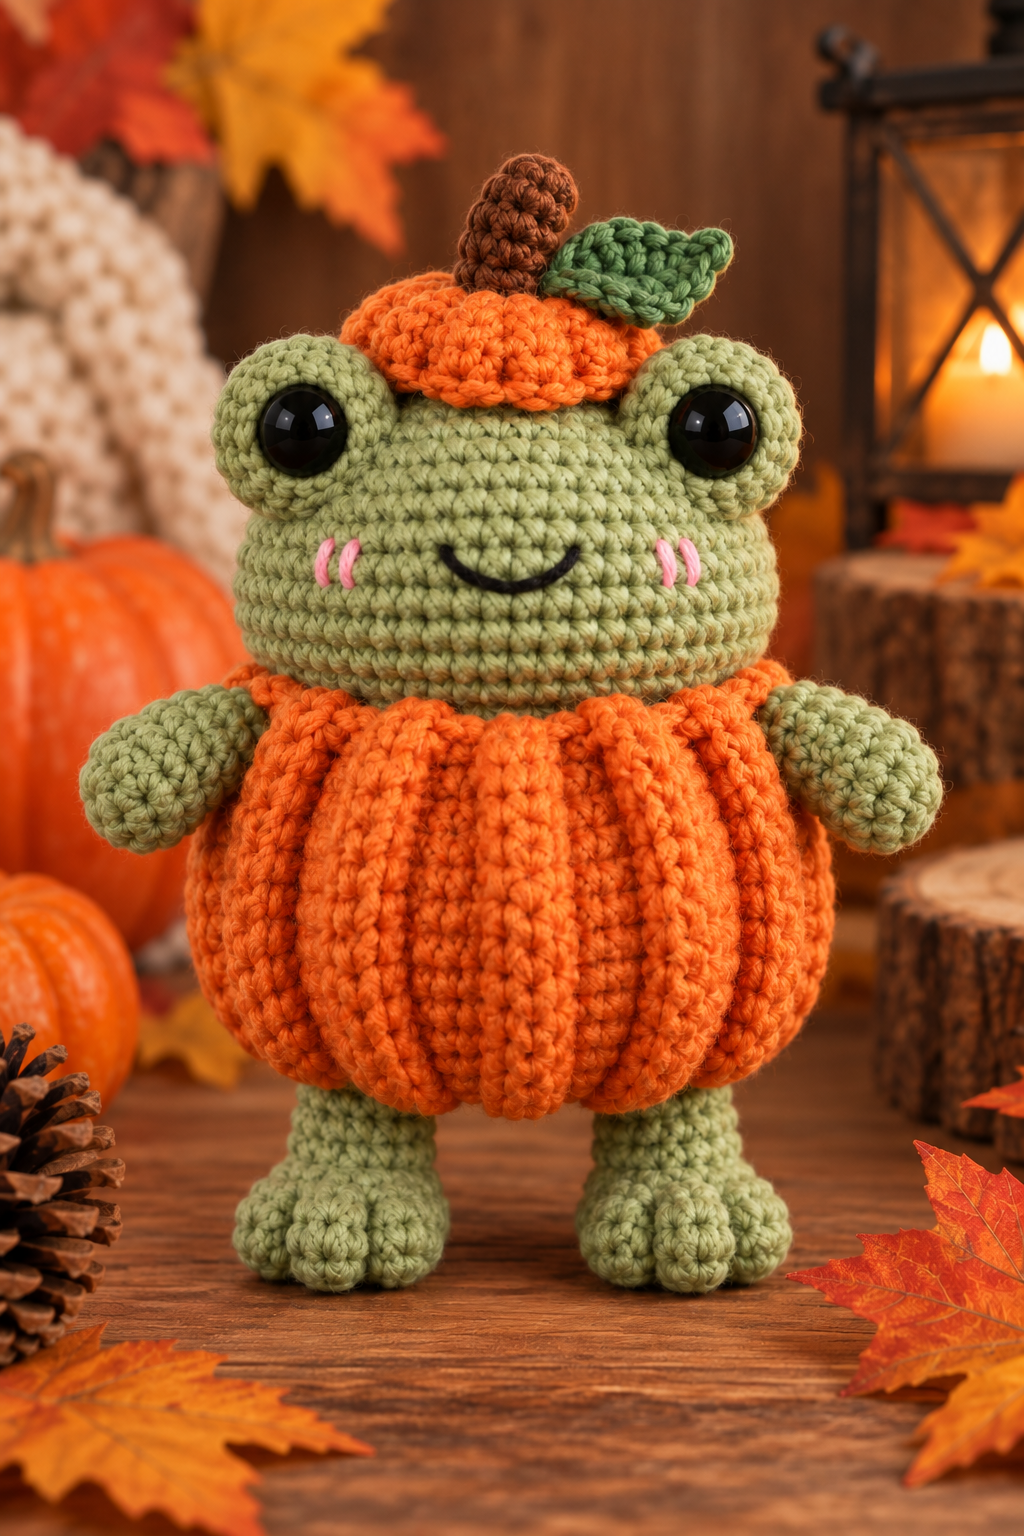
Because both pumpkin pieces are separate, you can remove the costume and topper after the season and keep the little green frog on display by itself.
Tips for a Better Pumpkin Frog
- Count each round carefully. The short waist transition and wider head depend on the increases and decreases happening in the correct rounds.
- Compare both eye bumps before sewing. Small differences are much easier to correct before the washers and sewing are fully secured.
- Use small amounts of stuffing. Gradual stuffing helps keep the frog smooth and prevents the stitches from stretching.
- Keep the limb attachment areas soft. Overstuffing the narrow ends makes the arms and legs harder to sew neatly against the body.
- Pin before sewing. Check left/right symmetry for both arms and both legs from the front.
- Do not over-tighten the pumpkin shaping lines. The costume needs enough flexibility to remain wearable and removable.
- Tie the topper gently. The chains are intended to hold the topper in place, not cinch the frog’s head.
Pumpkin Frog Crochet Pattern FAQ
Is this pumpkin frog crochet pattern beginner-friendly?
It is best for an advanced beginner who already knows how to make a magic ring, single crochet, increases, invisible decreases, continuous rounds, simple rows, stuffing, embroidery, and basic sewing.
Is the pumpkin costume removable?
Yes. The ribbed pumpkin body is an open wearable tube and is not permanently sewn to the frog. The mini pumpkin topper is also separate and uses two ties behind the head.
Is this a no-sew pumpkin frog?
No. The main frog body and head are crocheted continuously, but the eye bumps, arms, and hind legs are made separately and attached to the body.
How big is the finished pumpkin frog?
The exact finished measurement has not yet been physically verified. Your final size will depend on the yarn, hook, tension, stuffing, and individual crochet style.
Can I make the frog without safety eyes?
Yes. Skip the plastic safety eyes and embroider the eyes instead. Embroidered eyes are the preferred option when making amigurumi for babies or very young children.
Can I use plush or chenille yarn?
You can experiment with another yarn type, but the working pattern was designed around smooth worsted-weight yarn. Thick chenille may change the proportions and the fit of the removable pumpkin pieces.
Why is my pumpkin costume too tight?
Check that the shaping lines have not been pulled too tightly. The ribbed tube should stay flexible enough to slide over the lower frog. Because this working draft has not been physically tested, final fit can also vary with yarn thickness and tension.