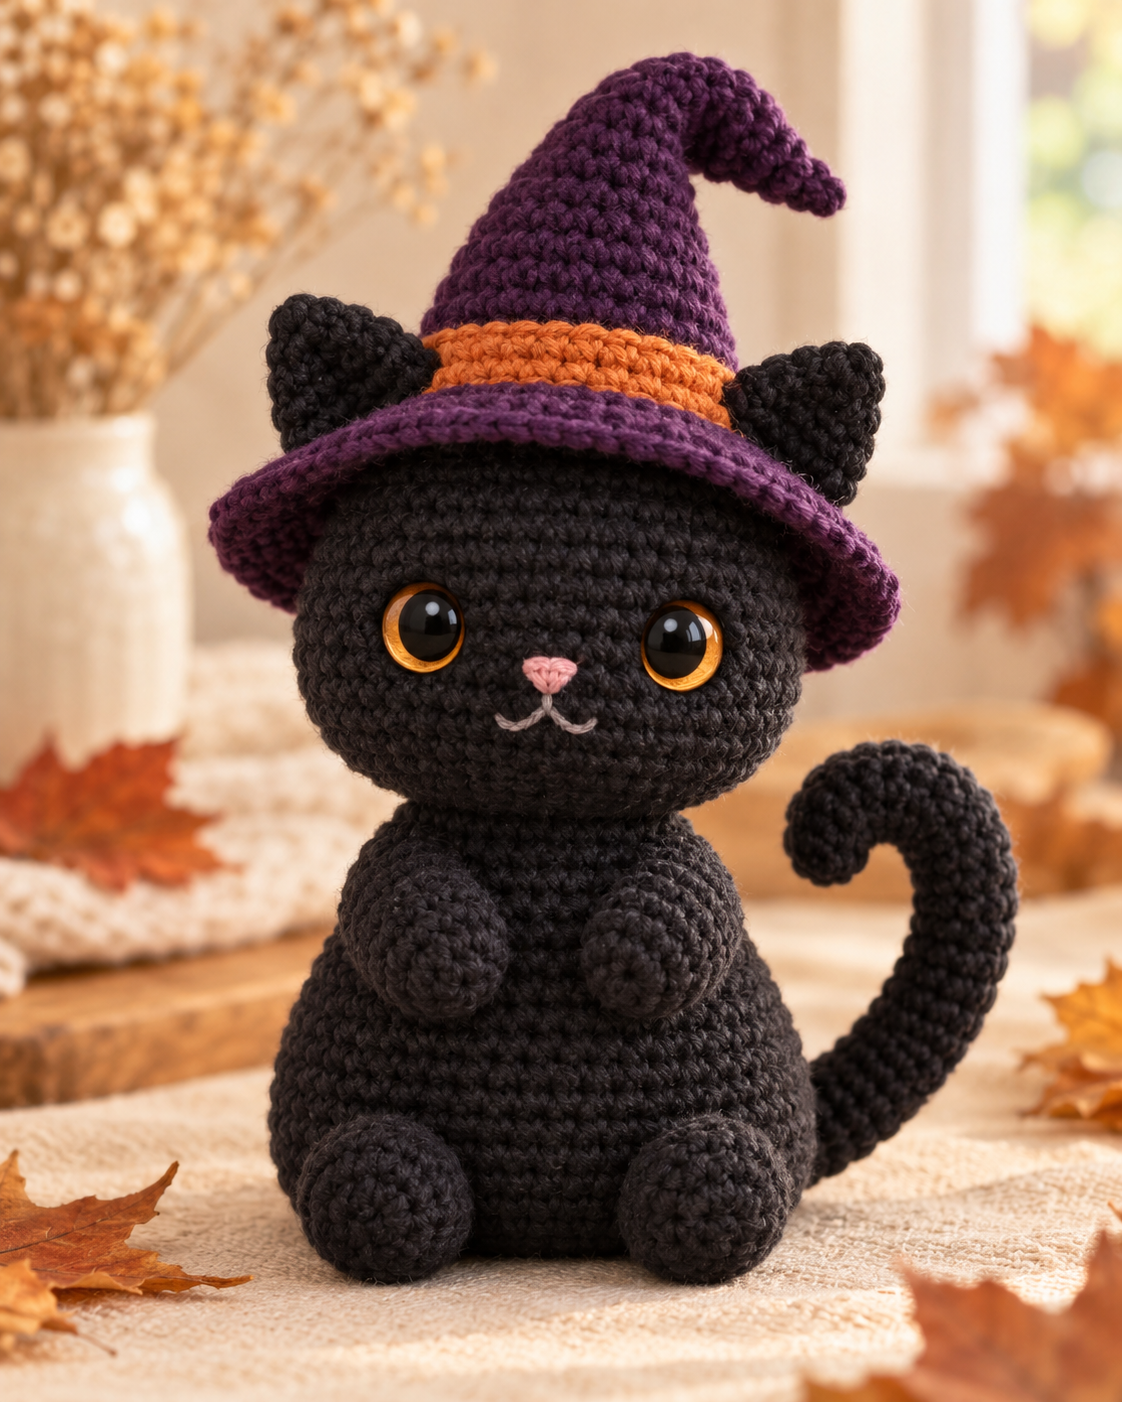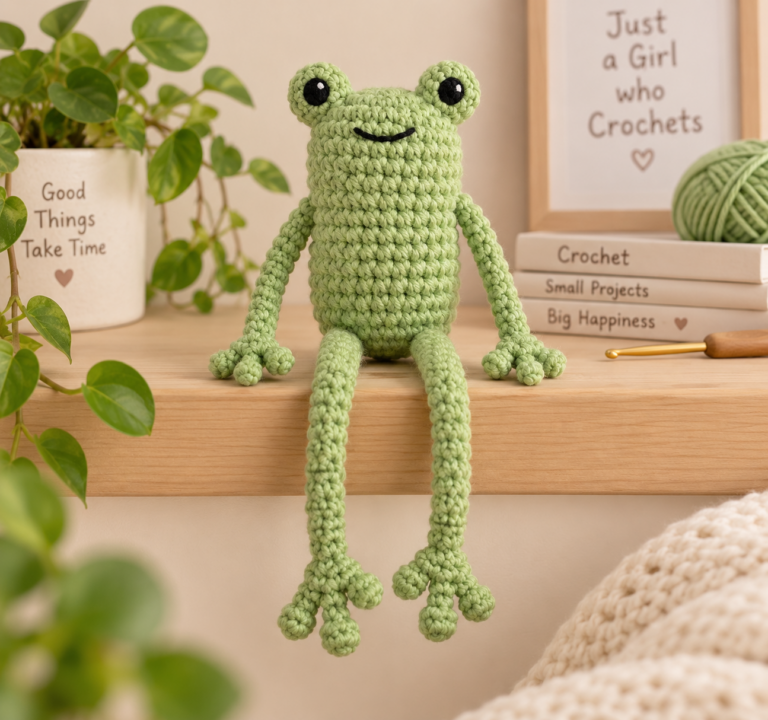

This black cat crochet pattern makes a compact seated amigurumi with warm amber eyes, a shaped curved tail, and a deep-plum witch hat that can be removed whenever you want the cat to lose its Halloween look.
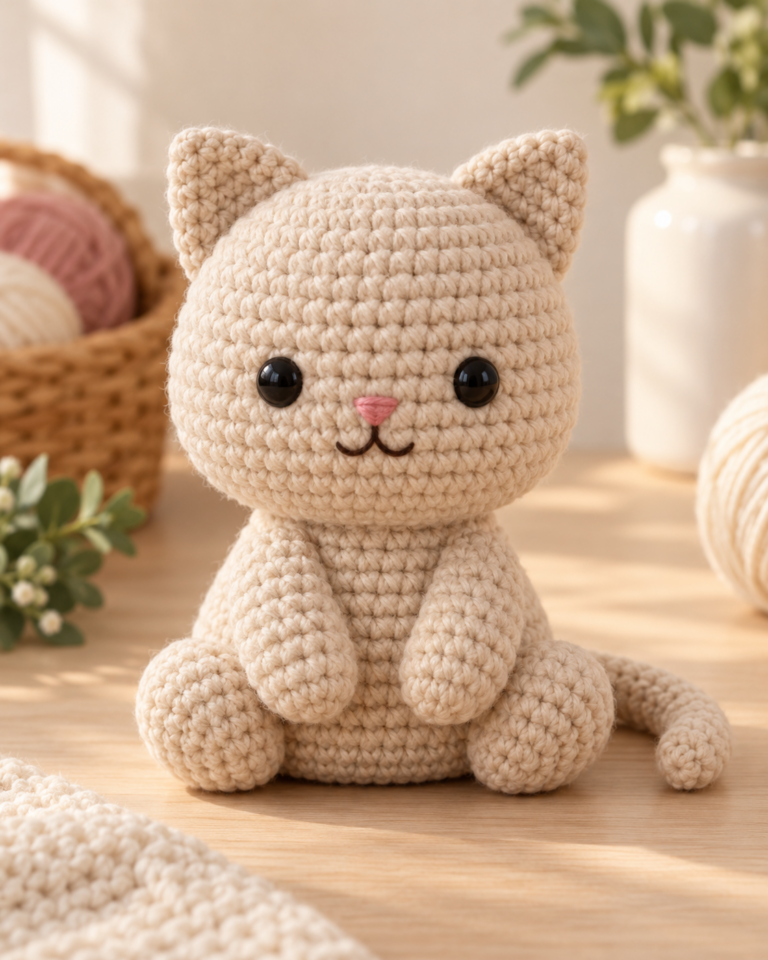
If you want an evergreen kitty without the seasonal costume, start with our Free Cat Crochet Pattern for an easy seated amigurumi cat.
The body and head are crocheted continuously as one piece. The ears, paws, tail, and hat are made separately, and the tail gets its curve from the crochet shaping itself—no wire is required.
Pattern status: This original pattern is a working draft and has not been physically tested. The AI-generated visuals illustrate the intended construction; follow the written stitch counts and instructions rather than counting stitches visible in the images. Finished size, gauge, yarn quantity, hat-loop fit, and real-world balance are not yet verified.
Black Cat Crochet Pattern Overview
Table of Contents
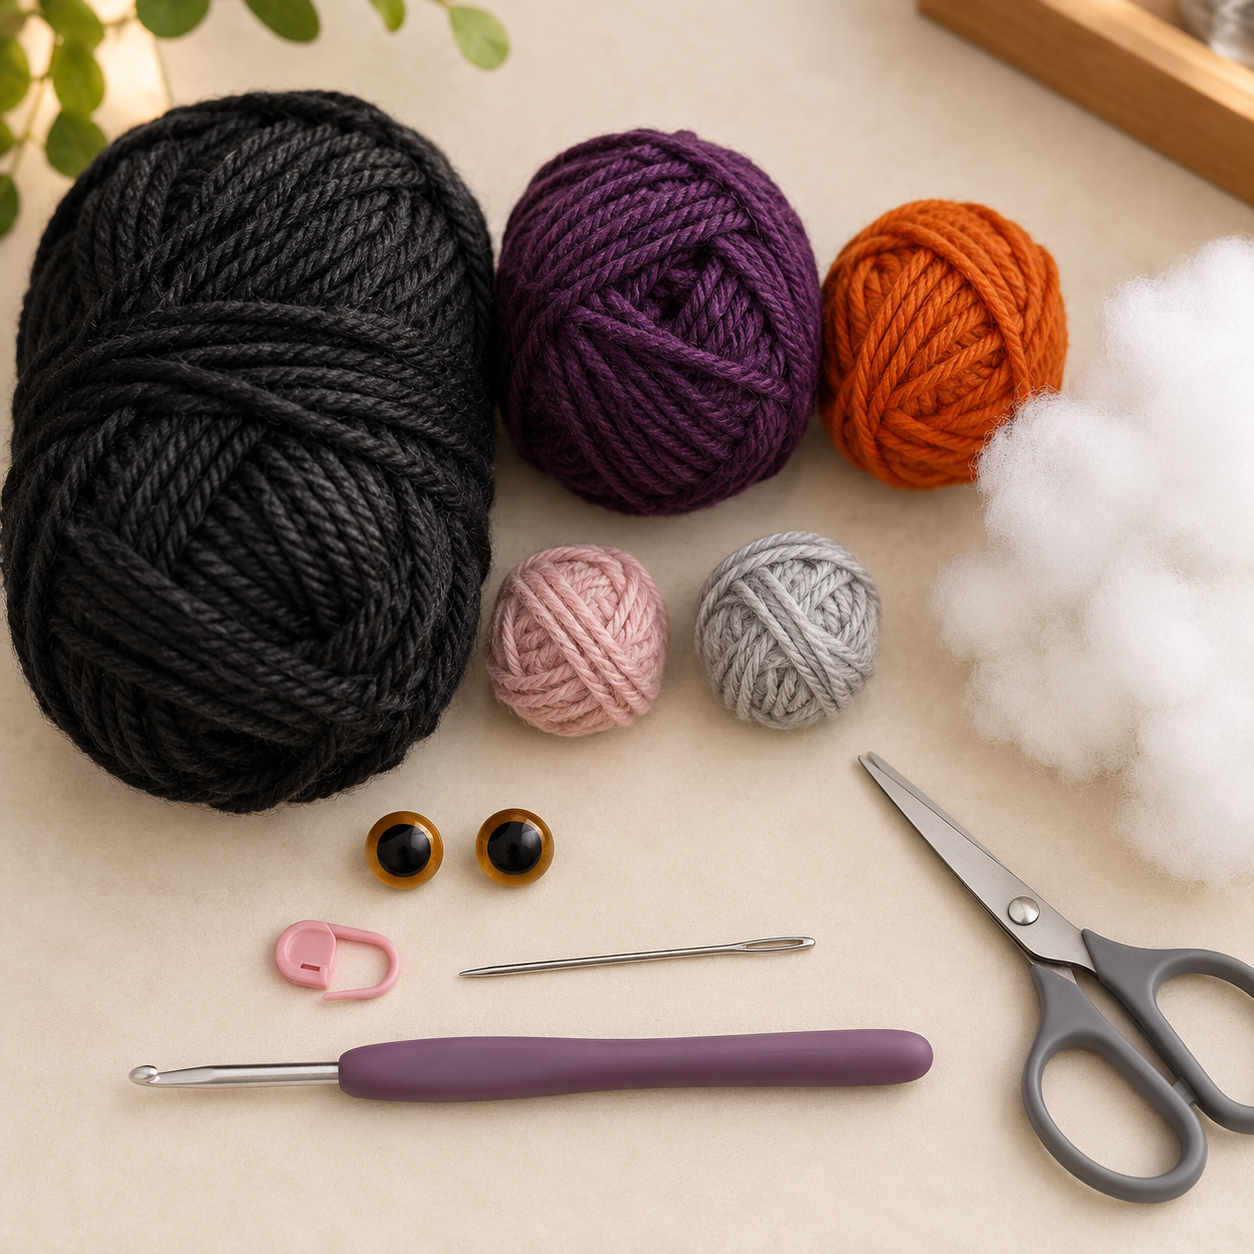
Materials
- #4 medium/worsted yarn in charcoal-black for the cat
- #4 medium/worsted yarn in deep plum for the witch hat
- Small amount of burnt-orange yarn for the hat band
- Small amount of dusty-pink yarn for the nose
- Small amount of light-gray yarn for the mouth
- 3.25 mm crochet hook, or a hook that creates firm amigurumi fabric
- Two 10–12 mm amber/gold safety eyes
- Polyester fiberfill
- Tapestry needle
- Stitch marker
- Scissors
Safety: Plastic safety eyes are small parts and can present a choking hazard. For babies or very young children, use securely embroidered eyes instead. See the CPSC small-parts guidance for general safety information.
Crochet Abbreviations
| Abbreviation | Meaning |
|---|---|
| MR | Magic ring |
| ch | Chain |
| sc | Single crochet |
| inc | Increase — 2 sc in the same stitch |
| dec | Invisible decrease |
| sl st | Slip stitch |
| st / sts | Stitch / stitches |
| FO | Fasten off |
Important Pattern Notes
- Use standard US crochet terminology.
- Work the main body/head, paws, tail, and hat in continuous rounds unless a section specifically uses rows.
- Use a stitch marker to track the first stitch of each round.
- The cat body and head are one continuous piece.
- Install the safety-eye washers while the head is still open and accessible.
- The ears stay flat and unstuffed.
- The front paws are stuffed only at the rounded paw ends; the upper sections stay mostly unstuffed.
- The tail remains unstuffed. Its curve comes from repeated increase/decrease shaping, not wire.
- The witch hat is removable and uses exactly two small yarn loops under the brim to slip over the ear bases.
- All placement guidance is provisional because the pattern has not yet been physically tested.
Step 1 — Crochet the Black Cat Body Base
Start at the bottom of the cat with charcoal-black yarn. The first rounds create a flat circle, then the straight rounds build the rounded lower body before the torso narrows toward the neck.
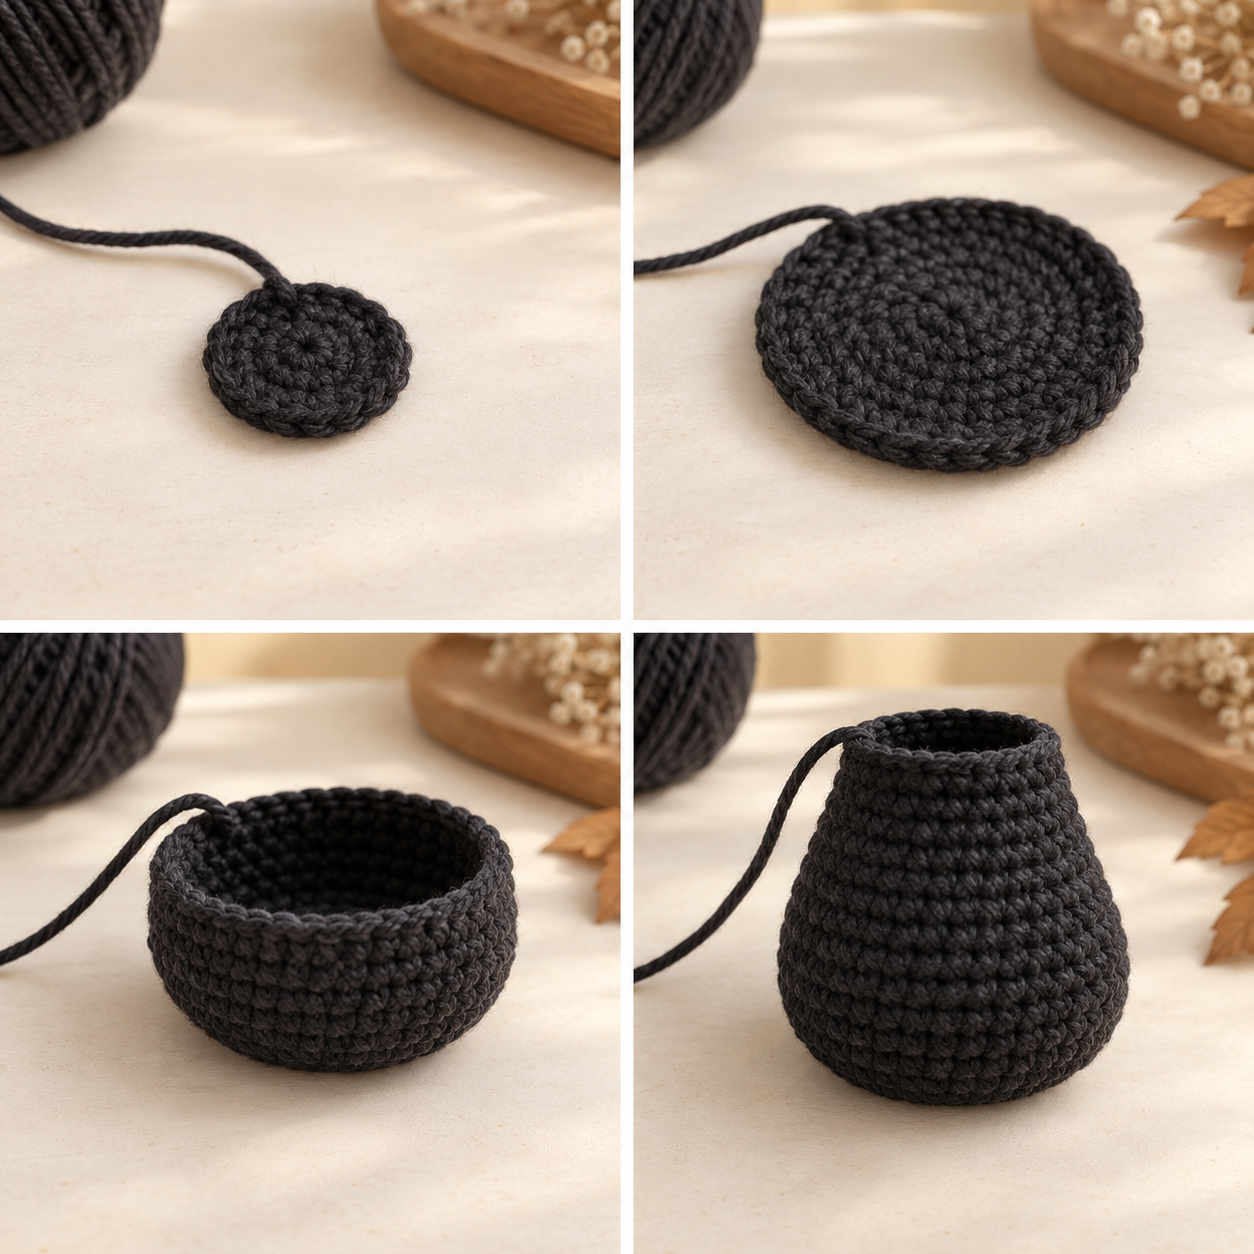
Do not fasten off. This same piece continues into the head.
Step 2 — Shape the Neck and Head
The stitch count widens again after the neck to create the larger round cat head without making a separate head piece.
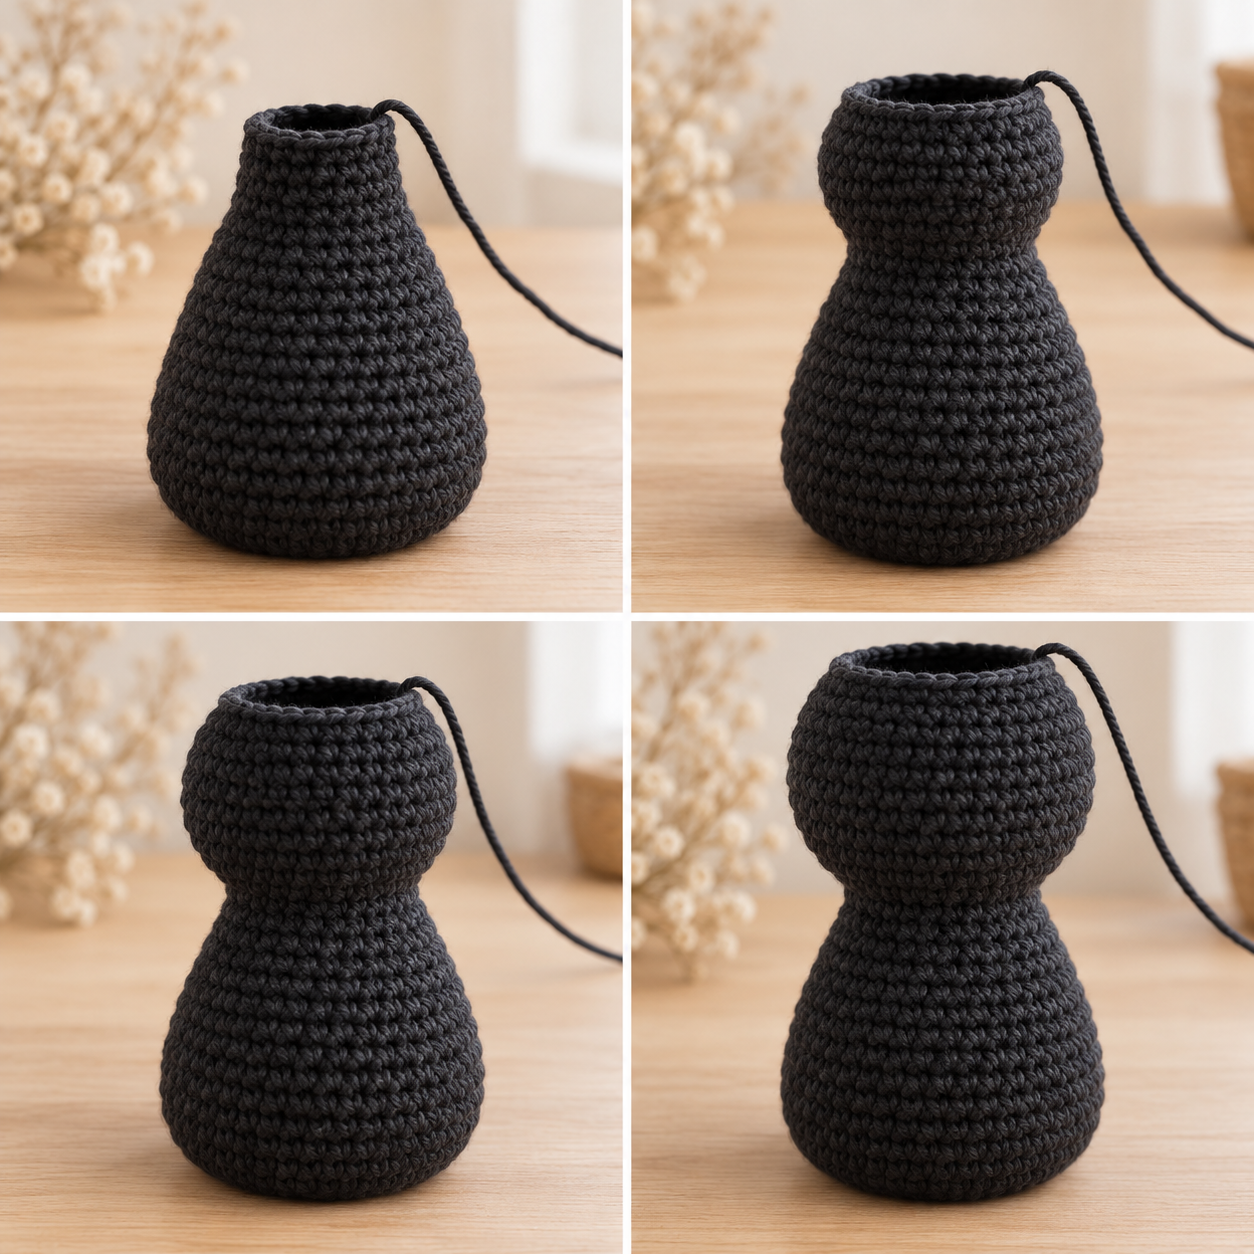
Keep the top open. You still need inside access for the safety-eye washers.
Step 3 — Add the Face, Stuff and Close
Establish the front using the round marker and the natural body shape. Placement is a provisional starting point, so view the face straight on before securing anything permanently.
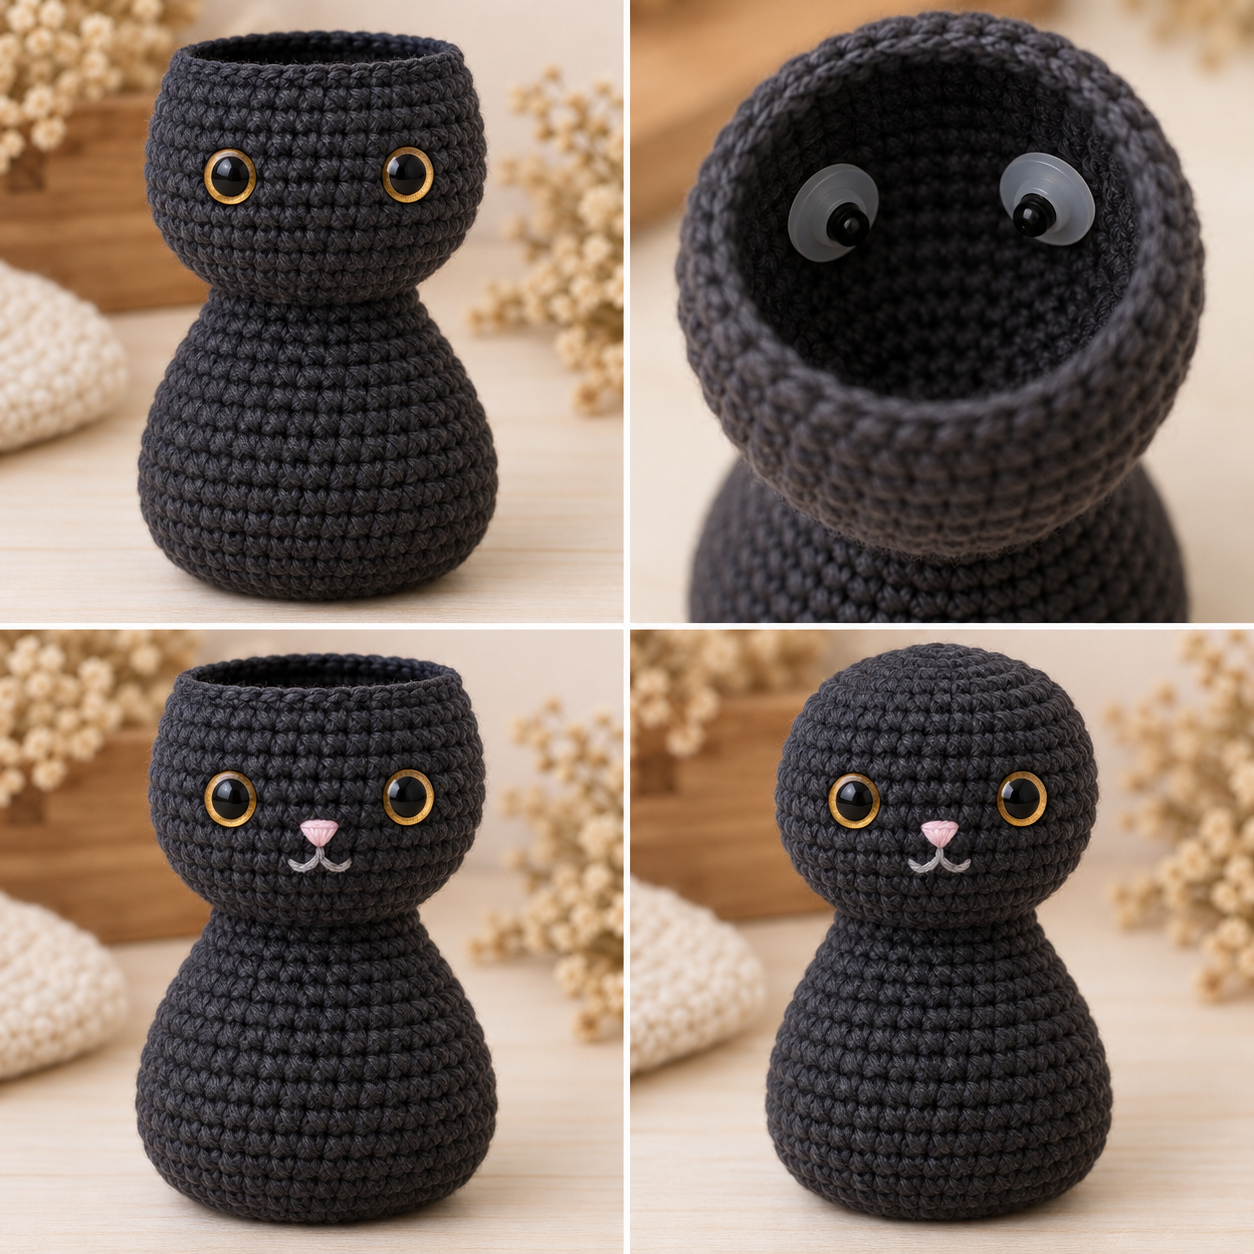
- Place the two amber/gold safety eyes between R21 and R22, beginning around 8 stitches apart center-to-center.
- Check that the eyes sit level, then attach both washers from inside the still-open head.
- Embroider a small dusty-pink inverted-triangle nose one round below the eyes.
- Add a short light-gray curved mouth under the nose.
Begin stuffing the body and head firmly, shaping the neck transition without overpacking.
Finish stuffing before the opening becomes too small. FO, close the remaining opening, and weave in securely.
Step 4 — Crochet the Flat Cat Ears
Make two matching triangular ears in charcoal-black yarn. These pieces stay flat and should not be stuffed.
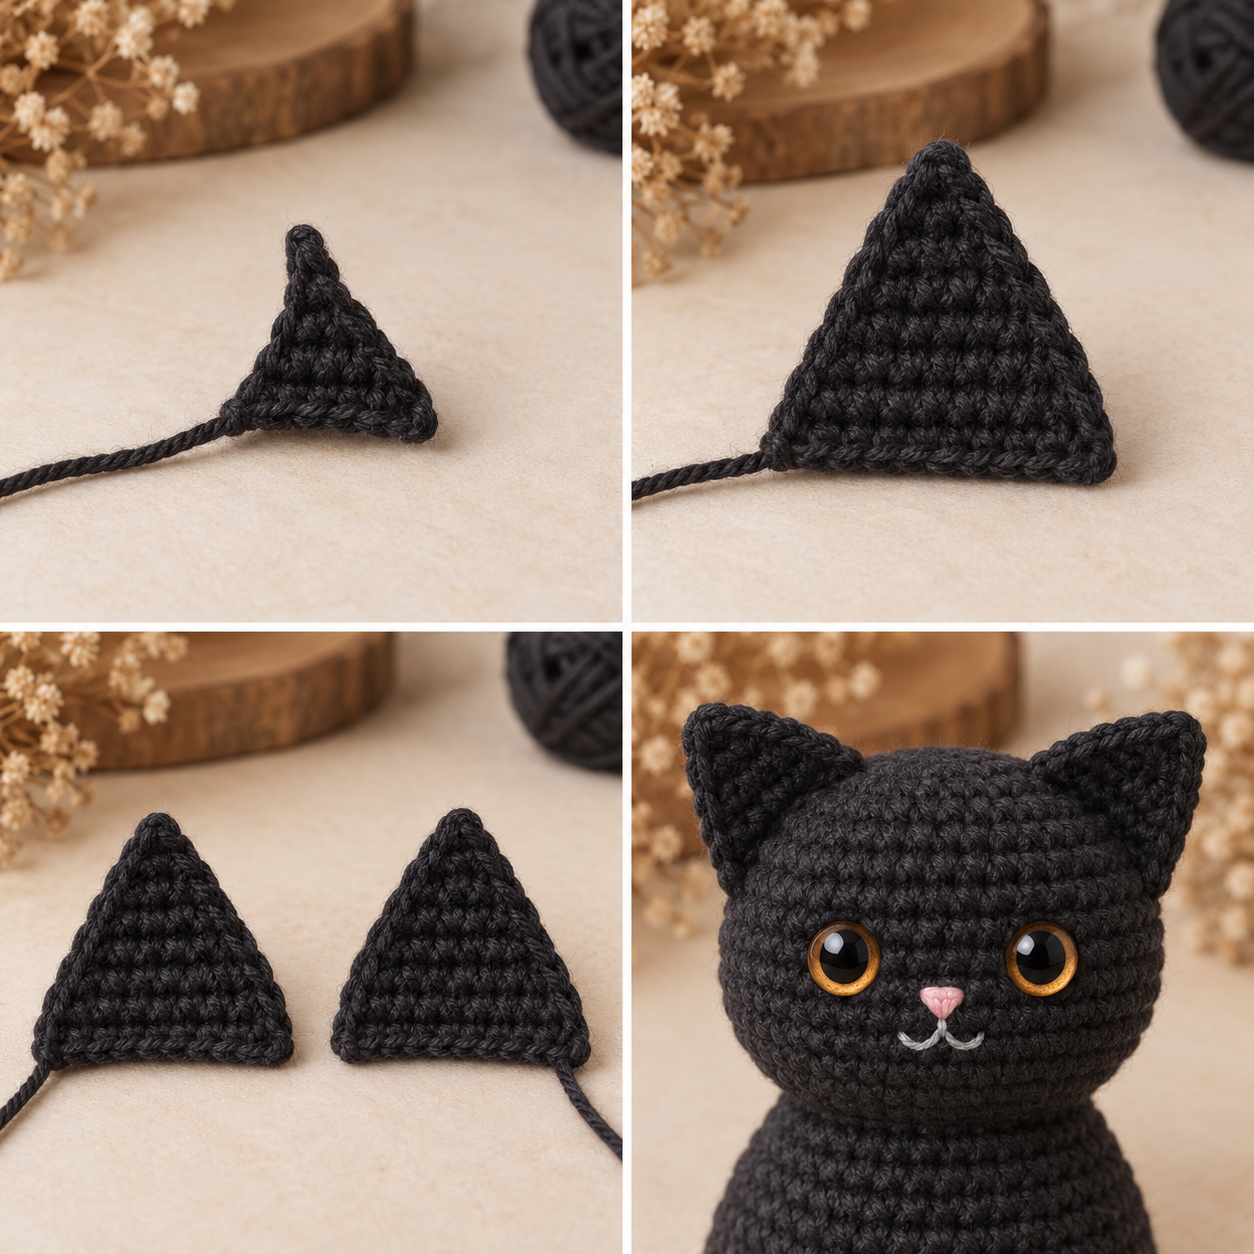
FO, leaving a long sewing tail. Make the second ear to match.
Step 5 — Front Paws / Arms — Make 2
The front paws begin rounded, narrow into short arms, and finish with a flat closed top. The closure matters because only that flat edge is sewn to the body.
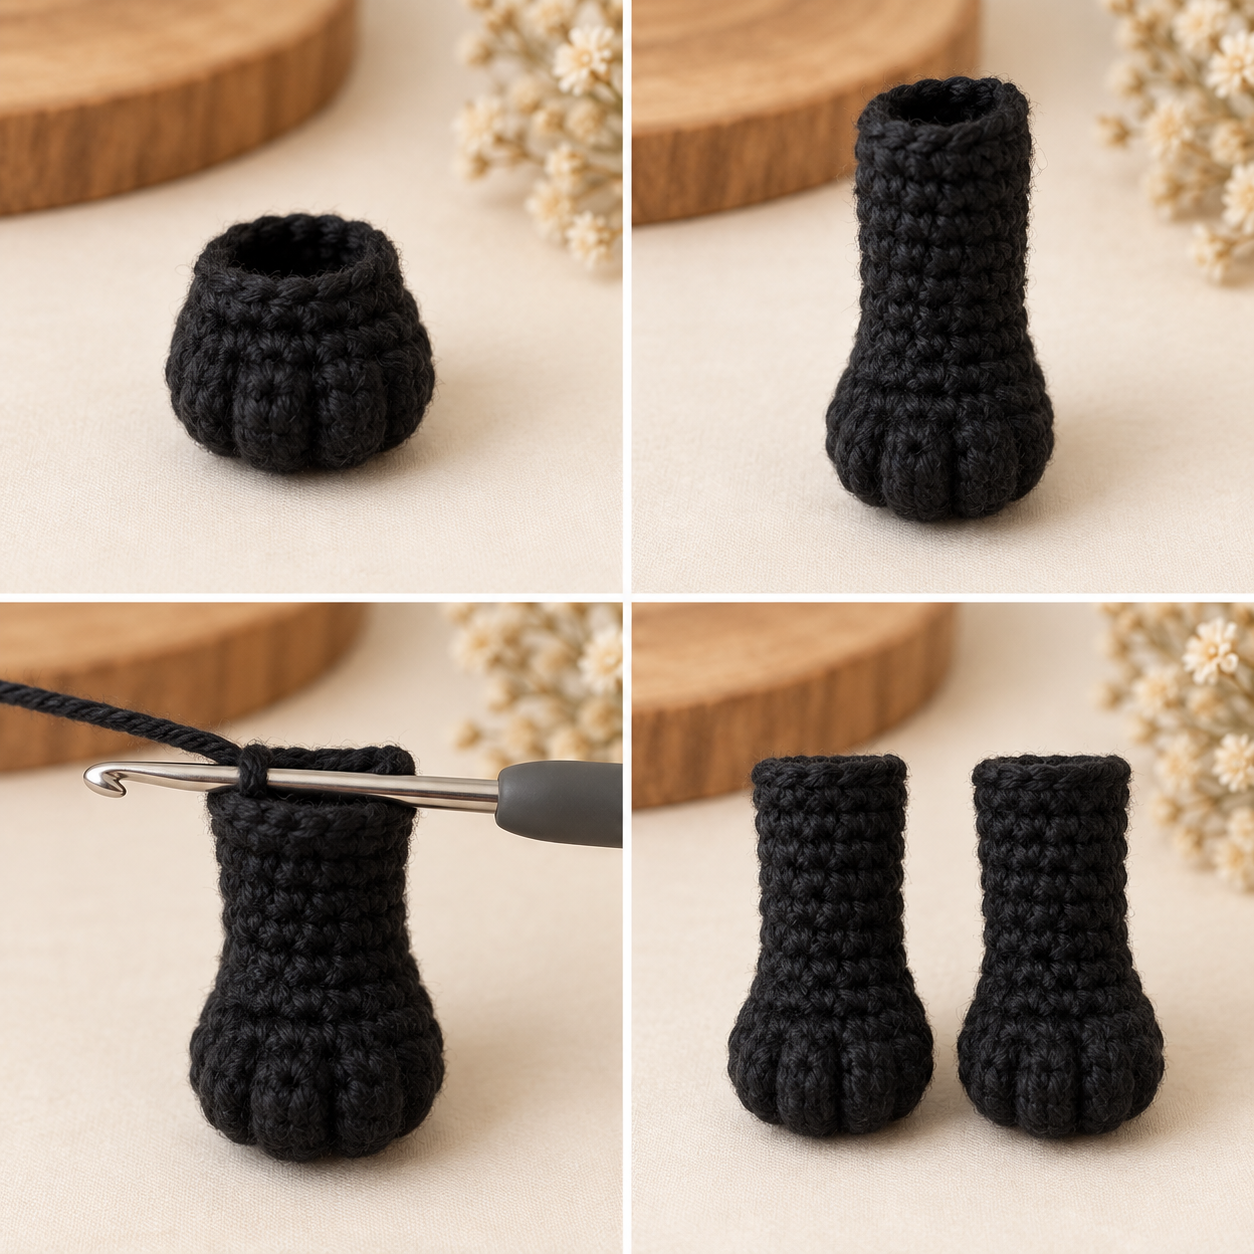
Add only a tiny amount of stuffing to the rounded paw end. Leave the upper section mostly unstuffed. Flatten the open top and crochet 4 sc through both aligned layers to close. FO, leaving a long sewing tail.
Step 6 — Hind Paws — Make 2
The hind paws are small rounded pieces that sit low on the front/sides of the finished cat to create the seated pose.
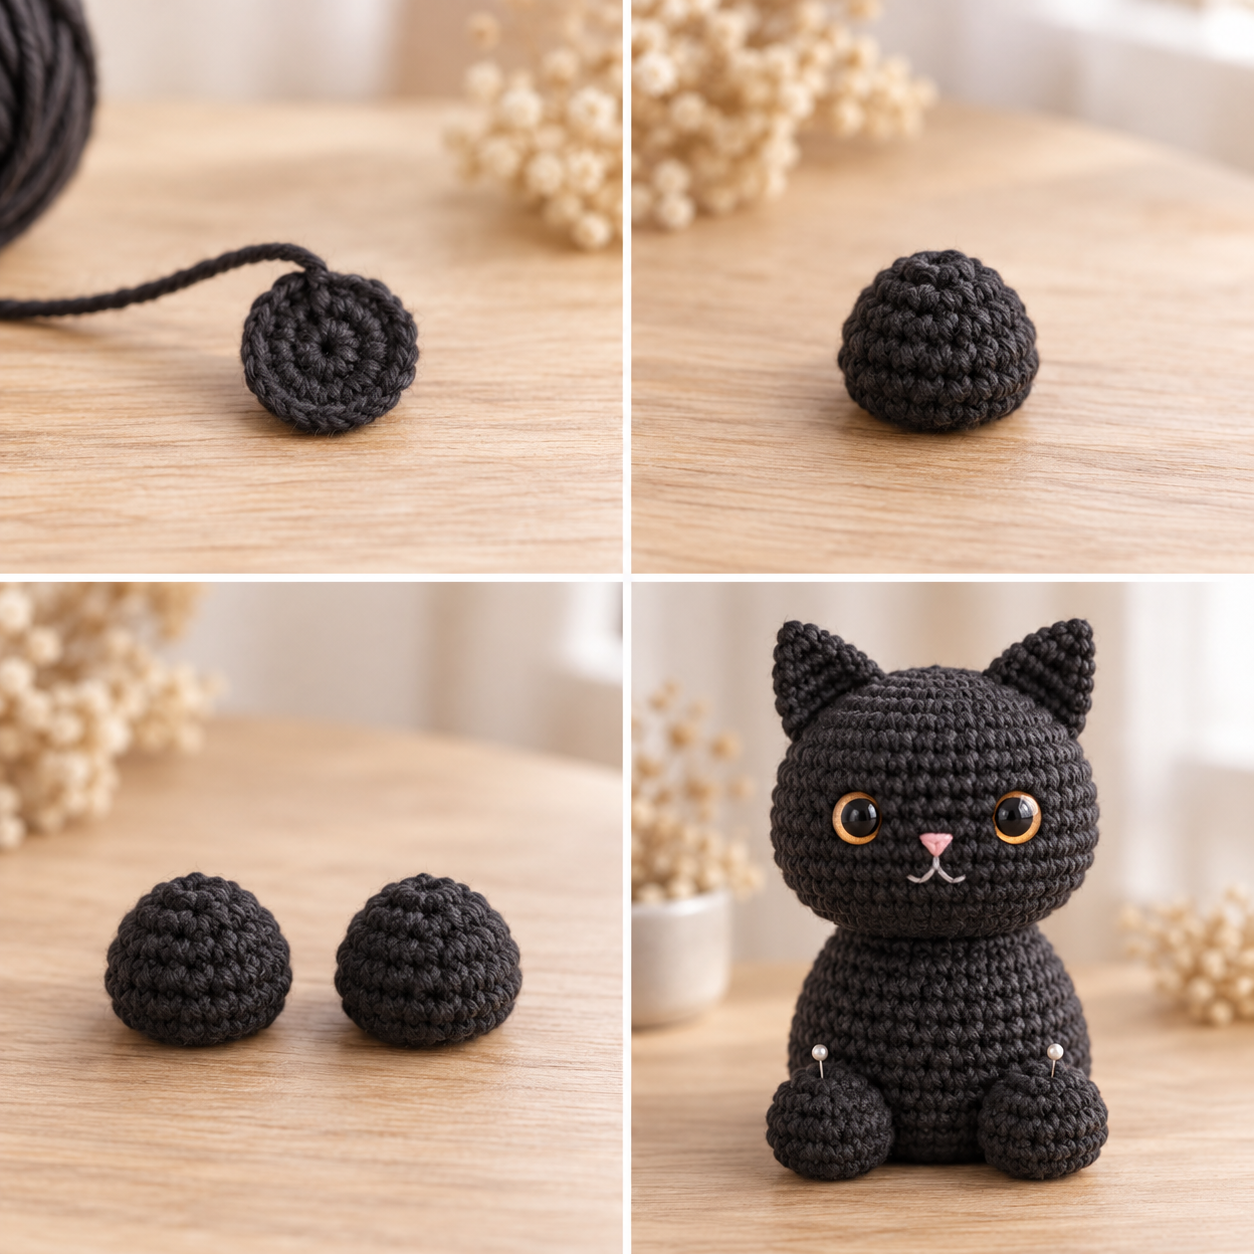
Add a small amount of stuffing.
FO, close the opening, and leave a long sewing tail. Make the second paw to match.
Step 7 — Crochet the Curved Tail Without Wire
This tail stays unstuffed. The curve is created by repeatedly decreasing on one side and increasing on the opposite side while keeping the stitch count at eight.
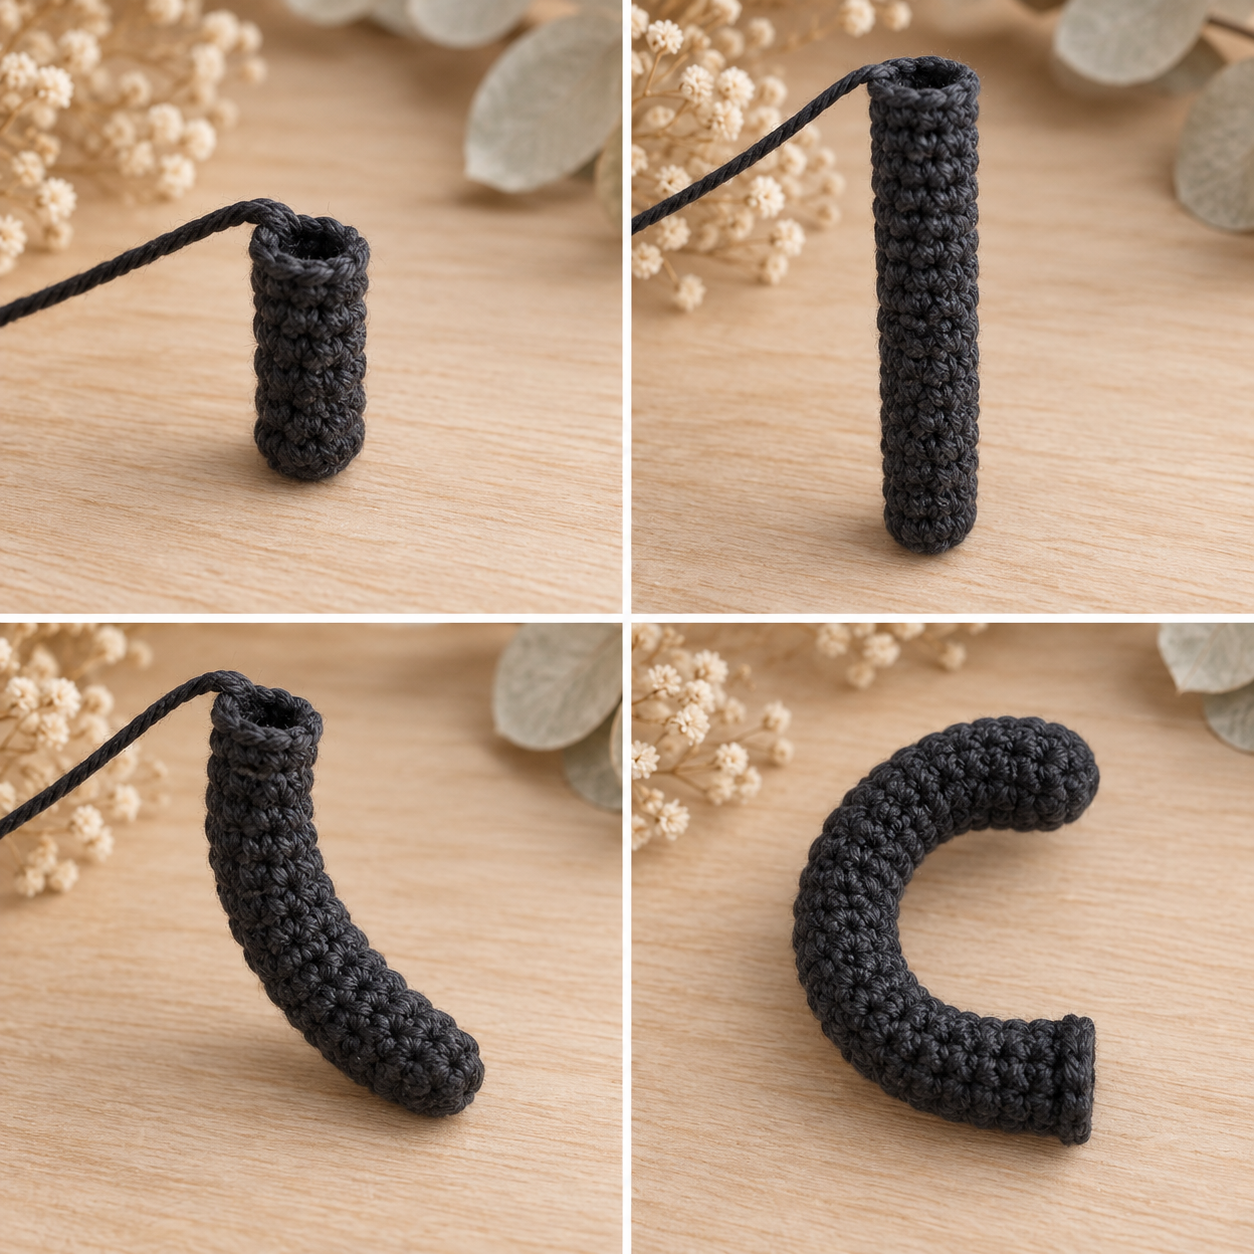
Curve orientation: Keep the start-of-round marker aligned so the decrease and increase continue working on the same relative sides. That repeated imbalance is what creates the bend.
Do not stuff. Flatten the final opening and crochet 4 sc through both layers to close. FO, leaving a long sewing tail.
Step 8 — Crochet the Removable Witch Hat
The hat is worked from the pointed cone down to the brim. A single burnt-orange round creates the band, then the plum brim flares outward. Two small yarn loops under the brim make the hat removable.
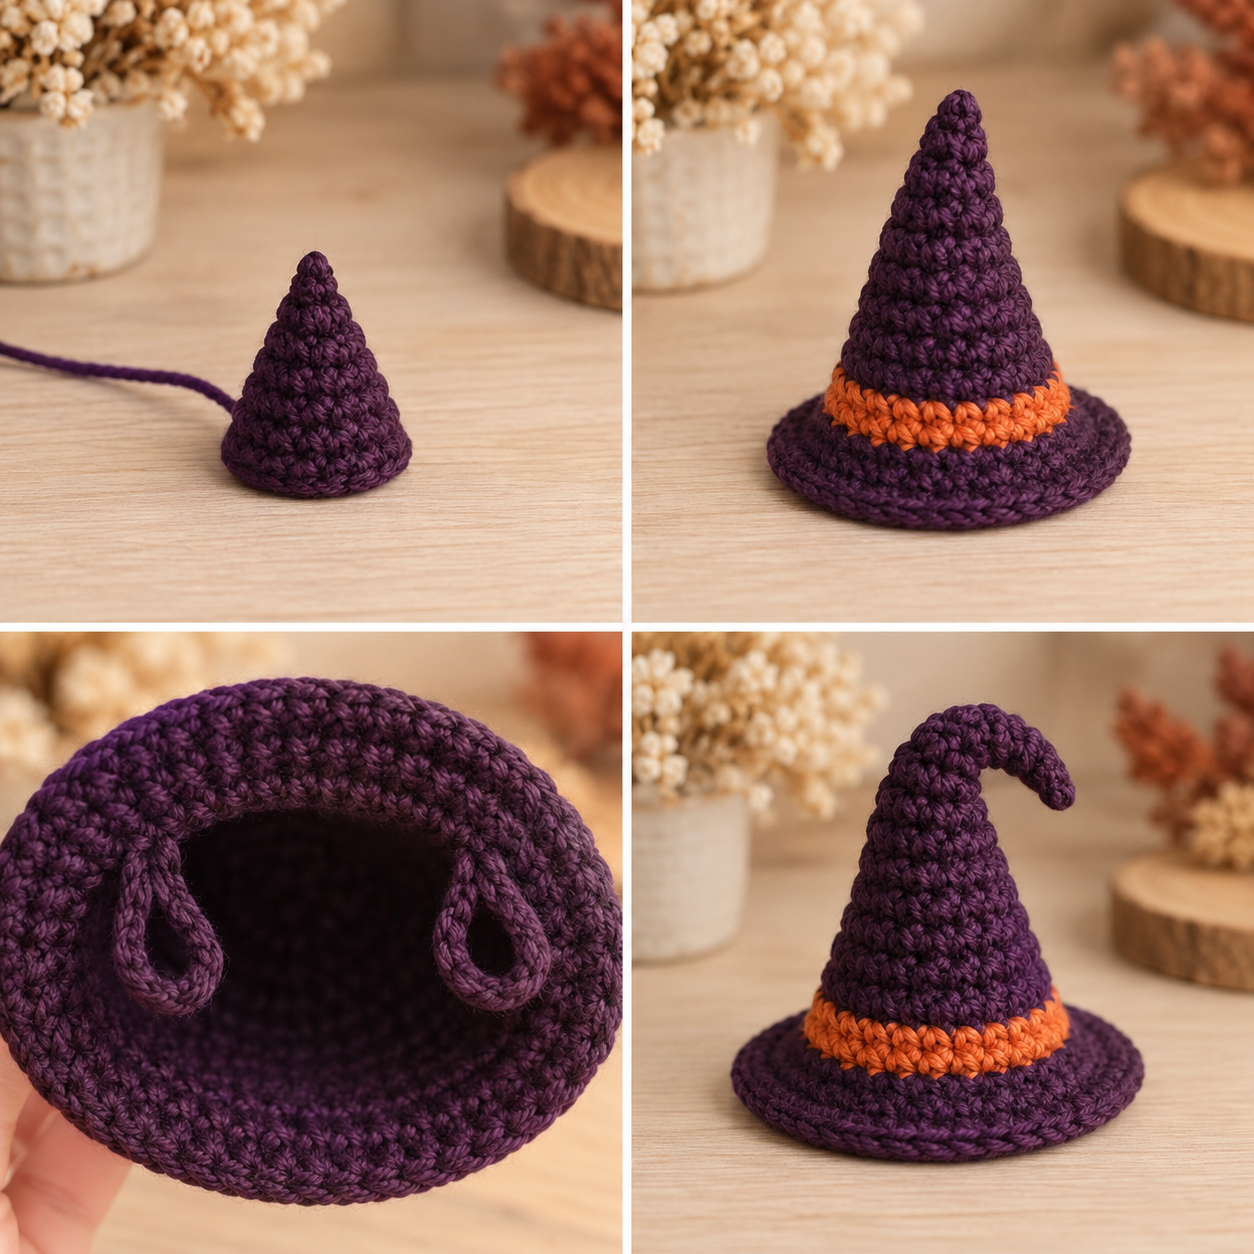
Witch Hat
Begin with deep-plum yarn.
FO and weave in.
Two Underside Ear Loops
- Turn the hat so the underside faces you.
- Using deep plum, join yarn near the inner brim edge.
- Ch 9, then sl st back into the underside roughly 4 brim stitches away to form one loop.
- FO securely.
- Repeat on the opposite side to make a second symmetrical loop.
Fit is provisional: During a real sample test, the loop length may need a one-chain adjustment for yarn tension. The construction itself stays the same: two yarn ear loops only—no ties, snaps, wire, elastic, or permanent sewing.
Step 9 — Assemble the Black Cat
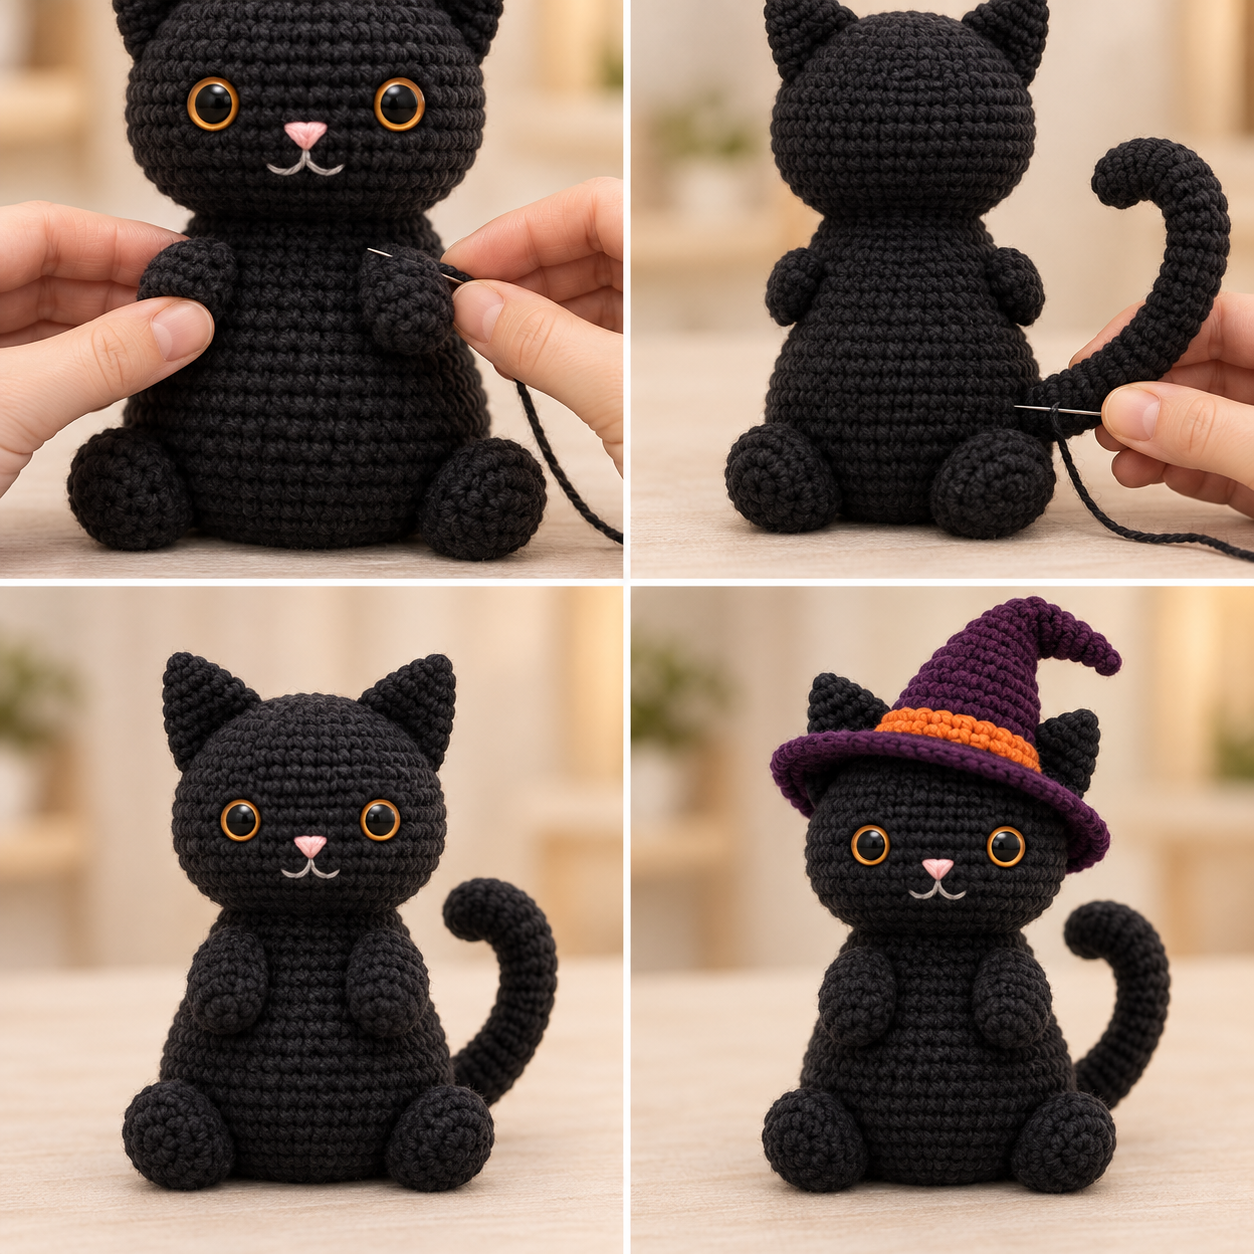
Attach the ears
Pin the two flat ears symmetrically on the upper sides of the head around the R25–R28 region, with their bases angled slightly outward. Sew across the flat bases.
Attach the front paws
Pin the front paws on the upper body around R12–R16, one on each side of the front centerline. Sew only the flattened closed tops.
Attach the hind paws
Sew the two hind paws low on the front/sides around R4–R8 so the cat reads as seated.
Attach the curved tail
Sew the flattened tail base to the lower back/side around R6–R9. Rotate the shaped tail so the curve sweeps visibly around one side instead of disappearing directly behind the body.
Add the removable hat
Slip the two underside yarn loops over the ear bases. Do not sew the hat to the cat.
Tips & Troubleshooting
The tail looks straight instead of curved
Check that the decrease and increase on R6, R8, R10, and R12 stay on the same relative sides. If the start-of-round marker drifts, the shaping can rotate around the tube instead of building one clean bend.
The front paws stick out too much
Keep the narrow upper section mostly unstuffed, flatten it firmly before closing, and sew only across the flat top edge.
The cat face looks uneven
Before locking the safety-eye washers, compare the face straight on. Treat the suggested eight-stitch spacing as a provisional starting point rather than a physically verified measurement.
The witch hat slips off
Check that both ear loops sit close to the inner brim and catch around the bases of the ears. Because the draft has not been physically tested, real yarn tension may require a one-chain loop adjustment.
The hat no longer feels removable
Do not stitch the brim to the head. The only attachment should be the two yarn ear loops under the brim.
Black Cat Crochet Pattern FAQ
Is this black cat crochet pattern no-sew?
No. The body and head are continuous, but the ears, front paws, hind paws, and tail are separate pieces that are sewn on.
Does the curved tail use wire?
No. The tail stays unstuffed and gets its bend from repeated decrease/increase shaping on opposite sides of the tube.
Is the witch hat really removable?
Yes by design. Two small yarn loops under the brim slip over the bases of the cat ears. The fit is still physically unverified because this is a working draft.
Can I use embroidered eyes instead?
Yes. Embroidered eyes are the safer option for babies or very young children.
How large is the finished cat?
The finished size has not yet been physically verified, so this pattern does not claim an exact measurement.
Should I count stitches in the tutorial visuals?
No. The written round counts are the technical source of truth. The images are visual construction guides.
Your Finished Witchy Black Cat Amigurumi
The finished cat should read as a compact seated black cat with a balanced face, two short front paws, rounded hind paws, and one visible side-curving tail. The plum-and-orange witch hat adds the seasonal look without permanently changing the cat underneath.