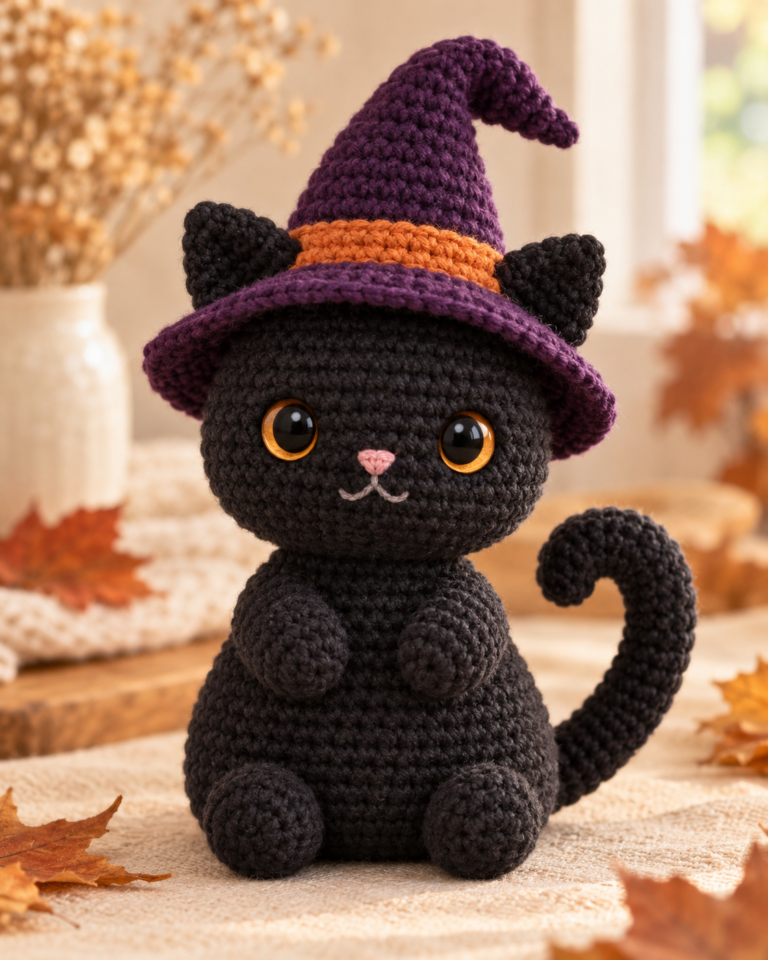

This free cat crochet pattern makes a sweet seated kitty with a soft round head, short front paws, rounded hind paws, and one flexible tail that rests naturally around the side.
The body and head are crocheted continuously as one piece, while the ears, paws, and tail are made separately and sewn on. The shapes are intentionally simple, making this a friendly project for an advanced beginner who is comfortable with basic amigurumi increases, decreases, stuffing, and simple assembly.
Pattern status: This original pattern is a working draft and has not been physically tested. AI-generated visuals illustrate the intended construction. Follow the written stitch counts and instructions rather than counting stitches visible in the images. Finished size, gauge, yarn quantity, and real-world balance are not yet verified.
Easy Seated Cat Crochet Pattern Overview
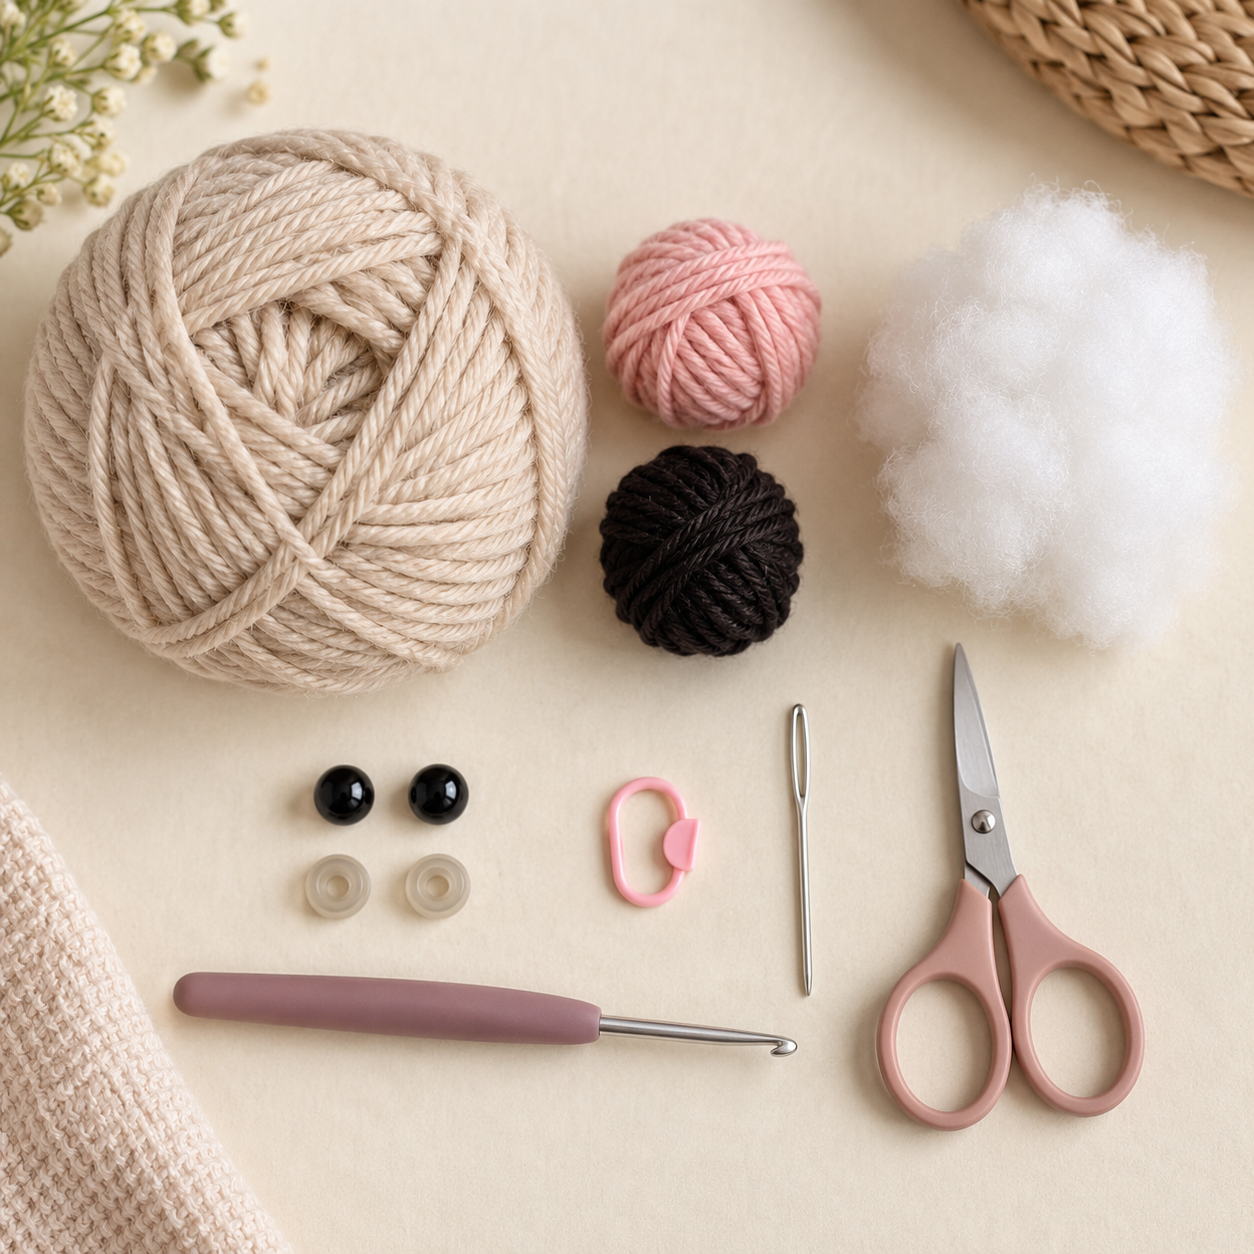
Materials
- #4 medium / worsted yarn in warm oatmeal or light beige for the cat
- Small amount of dusty-pink yarn for the nose
- Small amount of dark brown or black embroidery yarn for the mouth
- 3.25 mm crochet hook, or a hook that creates firm amigurumi fabric
- Two 10–12 mm dark safety eyes
- Polyester fiberfill
- Tapestry needle
- Stitch marker
- Scissors
Safety: Plastic safety eyes are small parts and can present a choking hazard. For babies or very young children, use securely embroidered eyes instead. See the U.S. CPSC small-parts guidance for general safety information.
Crochet Abbreviations
| Abbreviation | Meaning |
|---|---|
| MR | Magic ring |
| ch | Chain |
| sc | Single crochet |
| inc | Increase — 2 sc in the same stitch |
| dec | Invisible decrease |
| st / sts | Stitch / stitches |
| FO | Fasten off |
Important Pattern Notes
- Use standard US crochet terminology.
- Work the body/head, paws, and tail in continuous rounds unless a section says otherwise.
- Use a stitch marker to track the first stitch of each round.
- The body and head are one continuous piece.
- Install the safety-eye washers while the head is still open and accessible.
- The ears stay flat and unstuffed.
- Stuff only the rounded ends of the front paws very lightly; keep the narrow upper sections mostly unstuffed.
- The hind paws are lightly stuffed before their tops are flattened and closed.
- The tail stays unstuffed so it remains flexible.
- All placement guidance is provisional because the pattern has not yet been physically tested.
Step 1 — Crochet the Body Base
Start at the bottom with the main yarn. The first five rounds create the base, then the straight rounds build the rounded lower body.
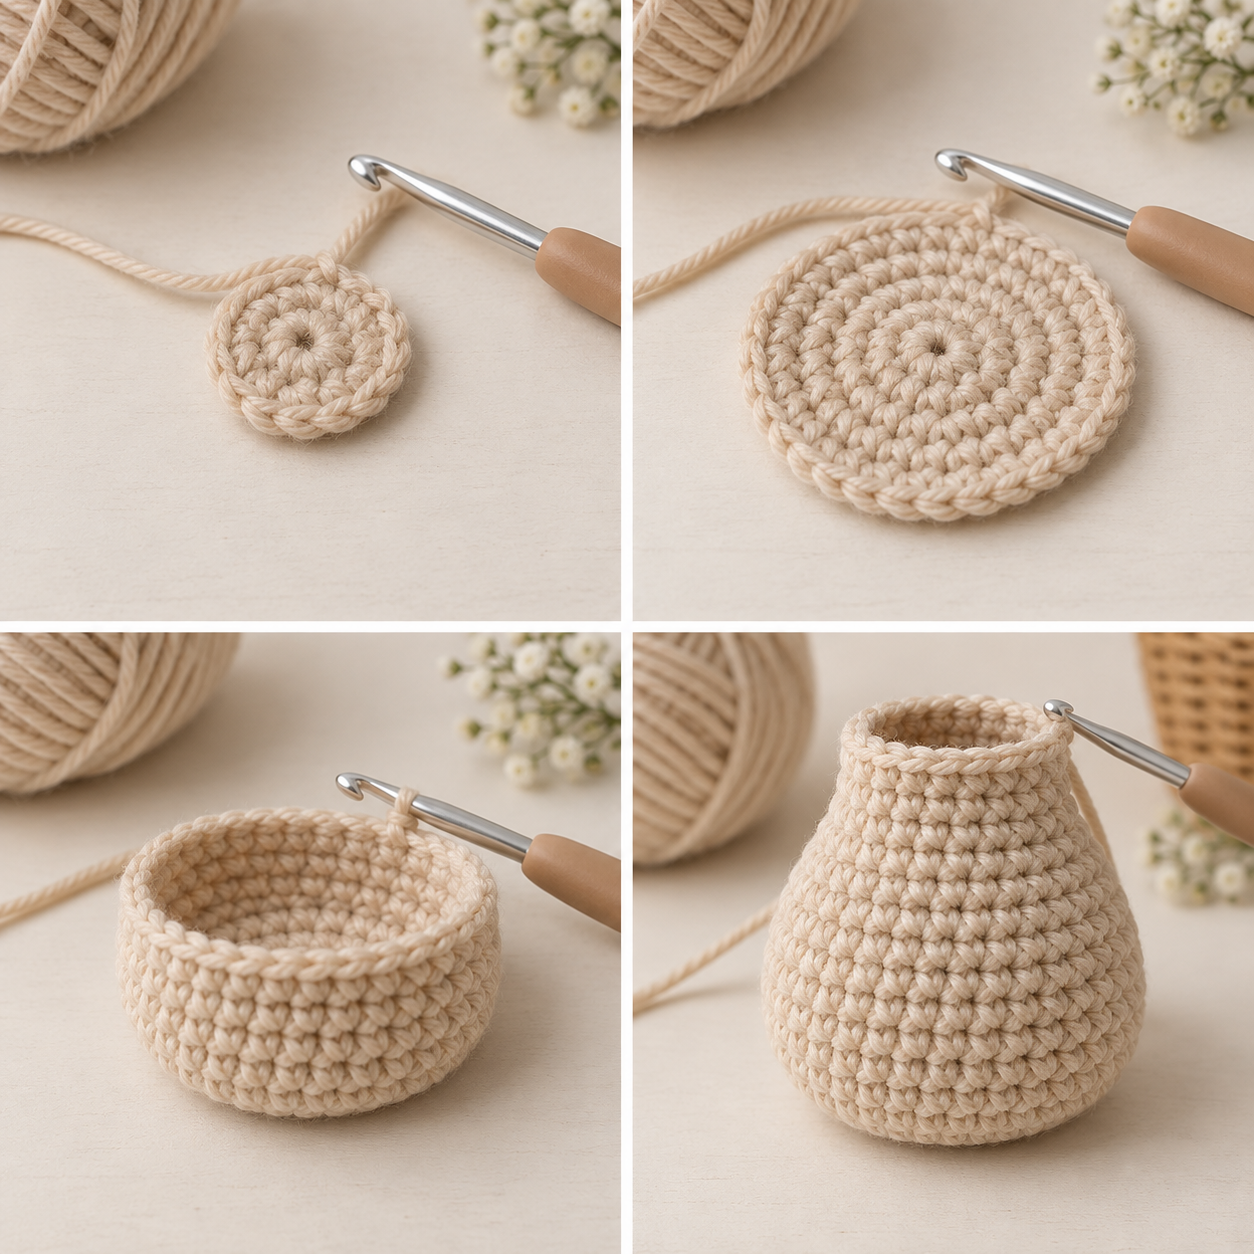
Do not fasten off. The same piece continues directly into the head.
Step 2 — Shape the Head
After the narrow neck, increase again to form the larger rounded head.
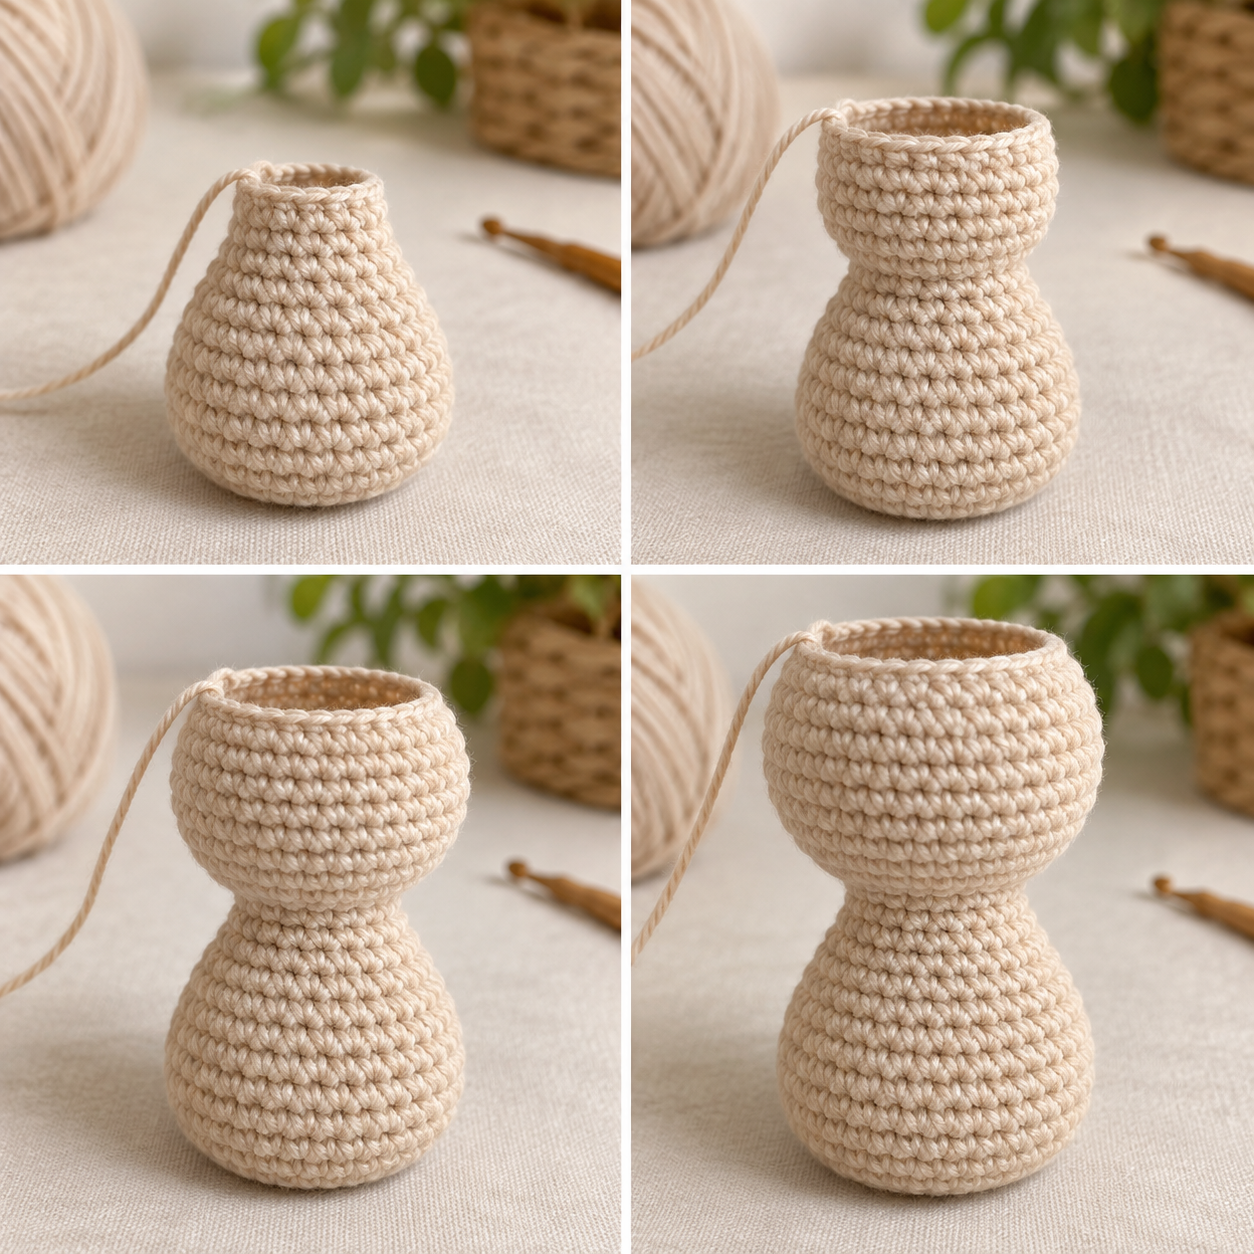
Keep the top open. You still need inside access for the safety-eye washers.
Step 3 — Add the Face, Stuff and Close
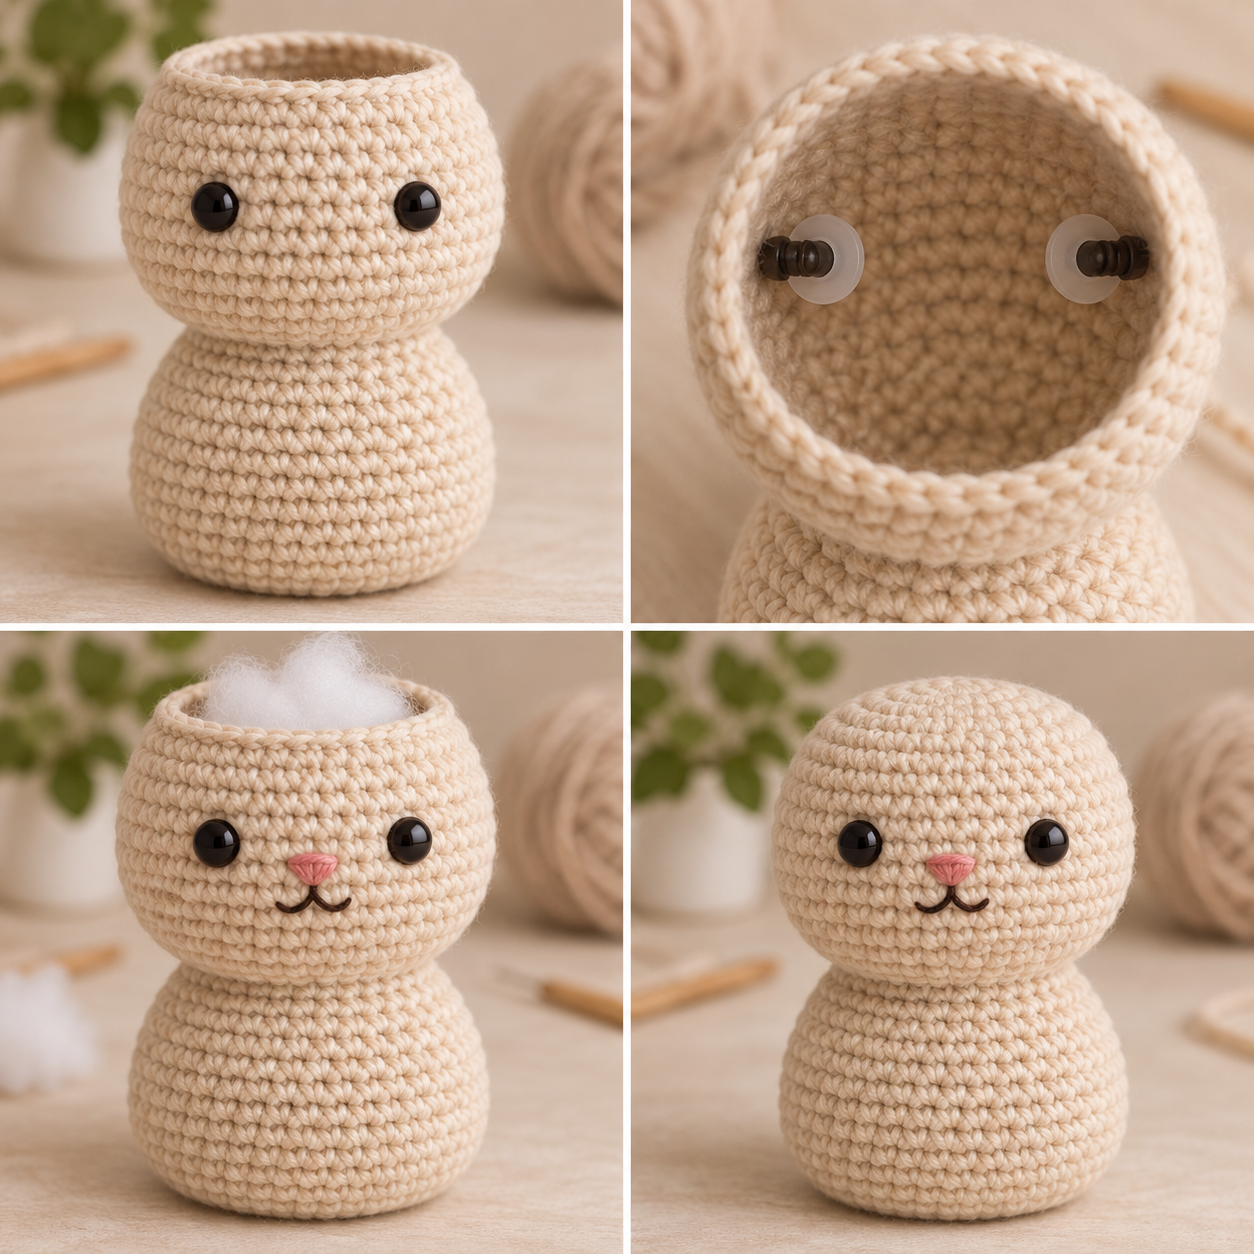
- Place the two safety eyes between R20 and R21, beginning around 7 stitches apart center-to-center.
- Check that they sit level, then lock both washers from inside the still-open head.
- Embroider a small dusty-pink triangular nose one round below the eyes.
- Add a small dark curved cat mouth below the nose.
Eye spacing is a provisional starting point. View the face straight on and adjust before locking the washers.
Begin stuffing the body and head firmly but evenly.
Finish stuffing before the opening becomes too small. FO, close the remaining opening, and weave in securely.
Step 4 — Crochet the Flat Ears
Make two matching triangular ears in the main yarn. Keep them flat and unstuffed.
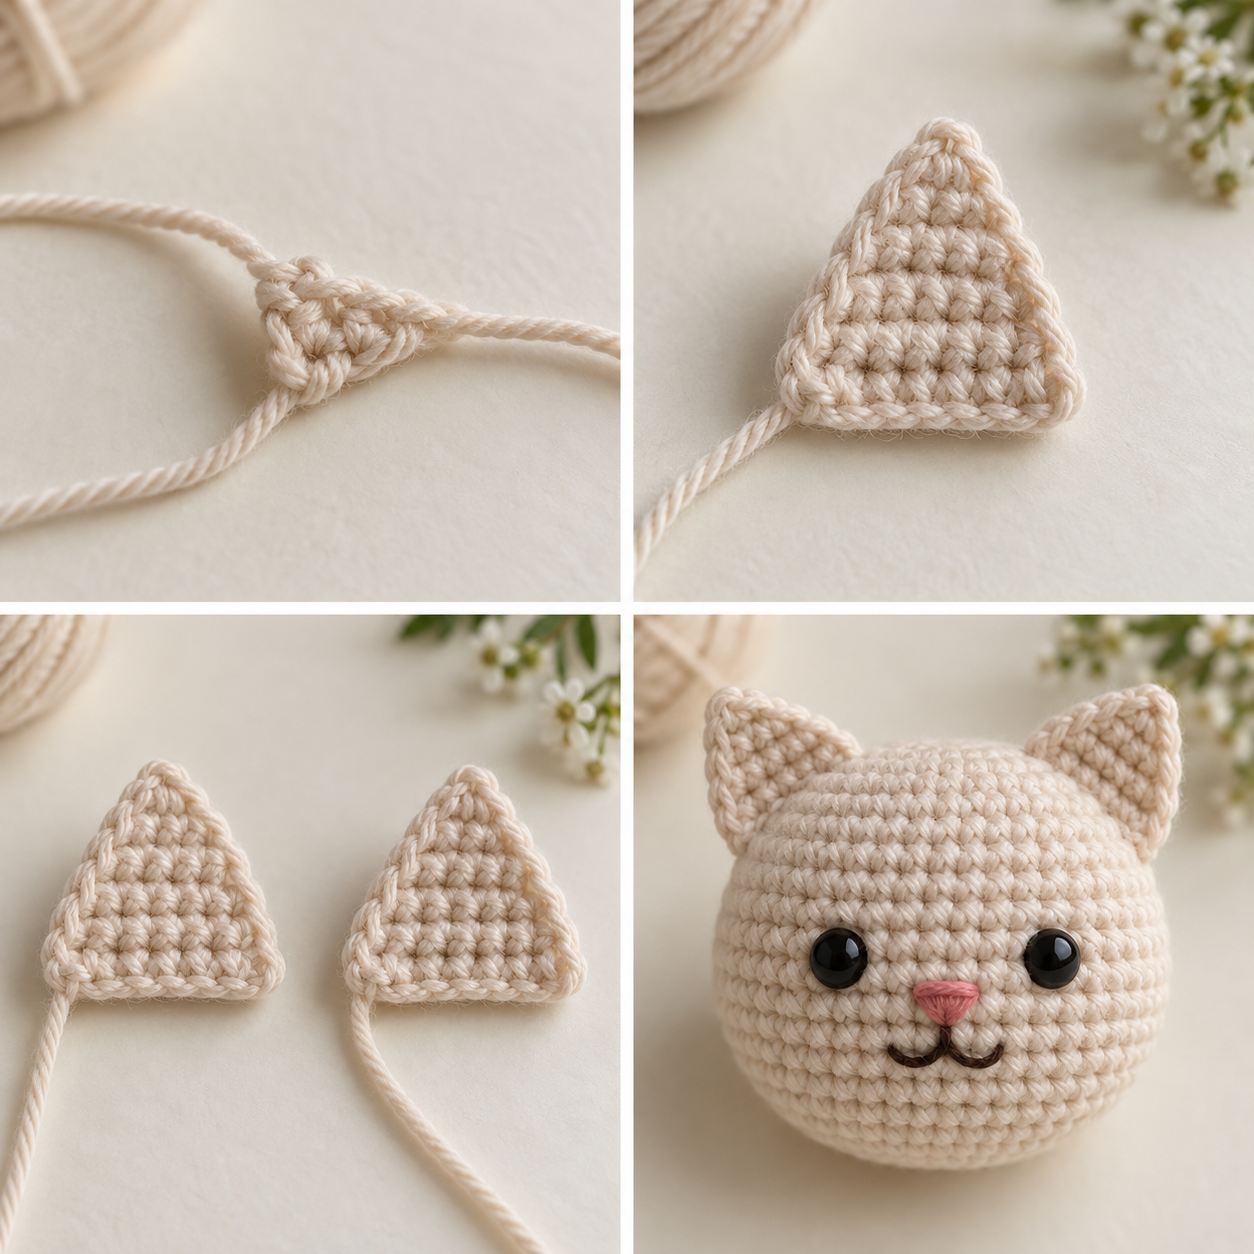
FO, leaving a long sewing tail. Make the second ear to match.
Step 5 — Front Paws / Arms — Make 2
The front paws start round, narrow into short arms, then finish with a flat closed top. Only that flat edge is sewn to the body.
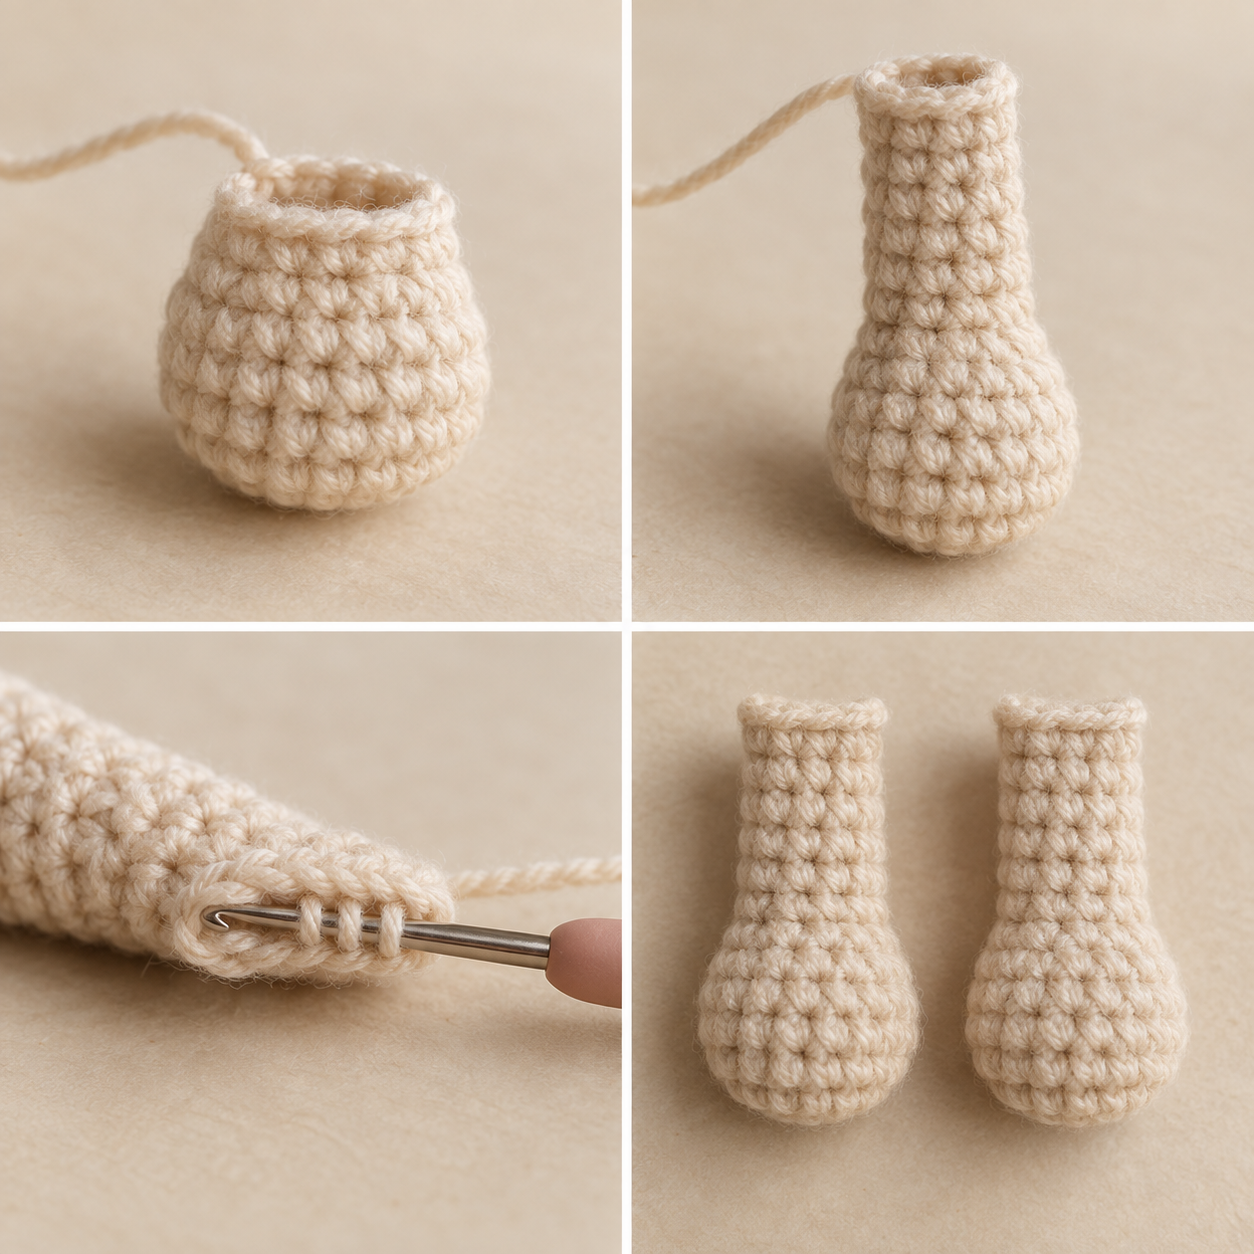
Add only a tiny amount of stuffing to the rounded paw end. Leave the upper section mostly unstuffed. Flatten the opening and crochet 4 sc through both aligned layers to close. FO, leaving a long sewing tail.
Step 6 — Hind Paws — Make 2
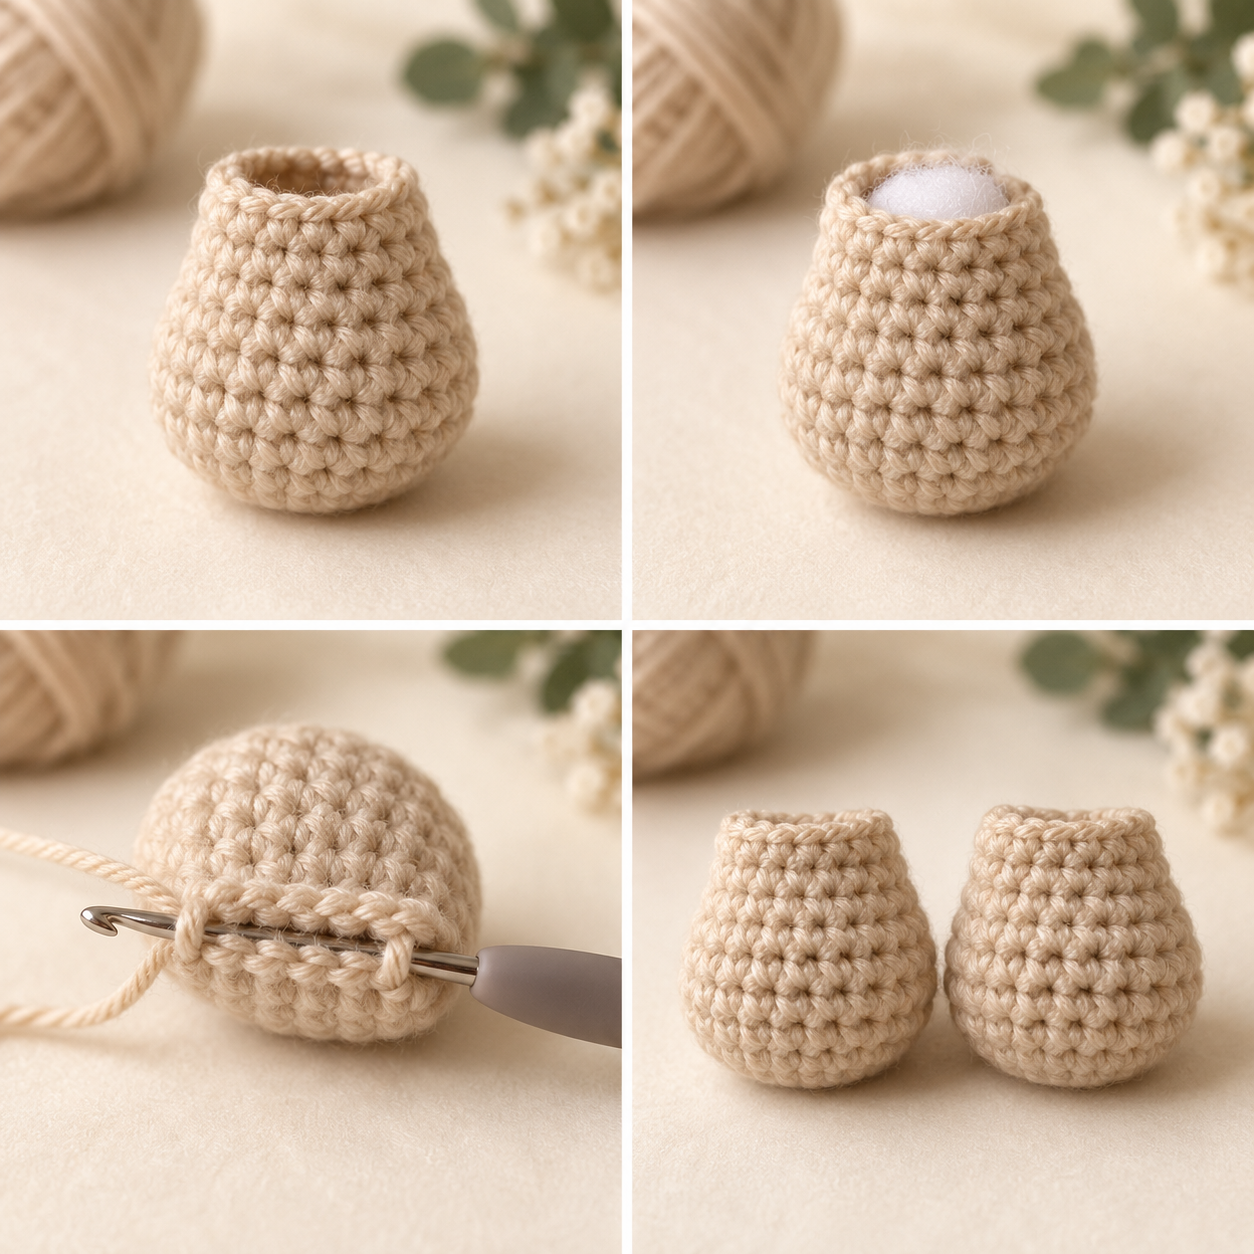
Add a small amount of stuffing. Flatten the opening and crochet 4 sc through both aligned layers to close. FO, leaving a long sewing tail. Make the second paw to match.
Step 7 — Crochet the Flexible Tail
The tail stays unstuffed so it can rest softly around the side of the seated cat. The pattern does not claim a fixed sculpted curve.
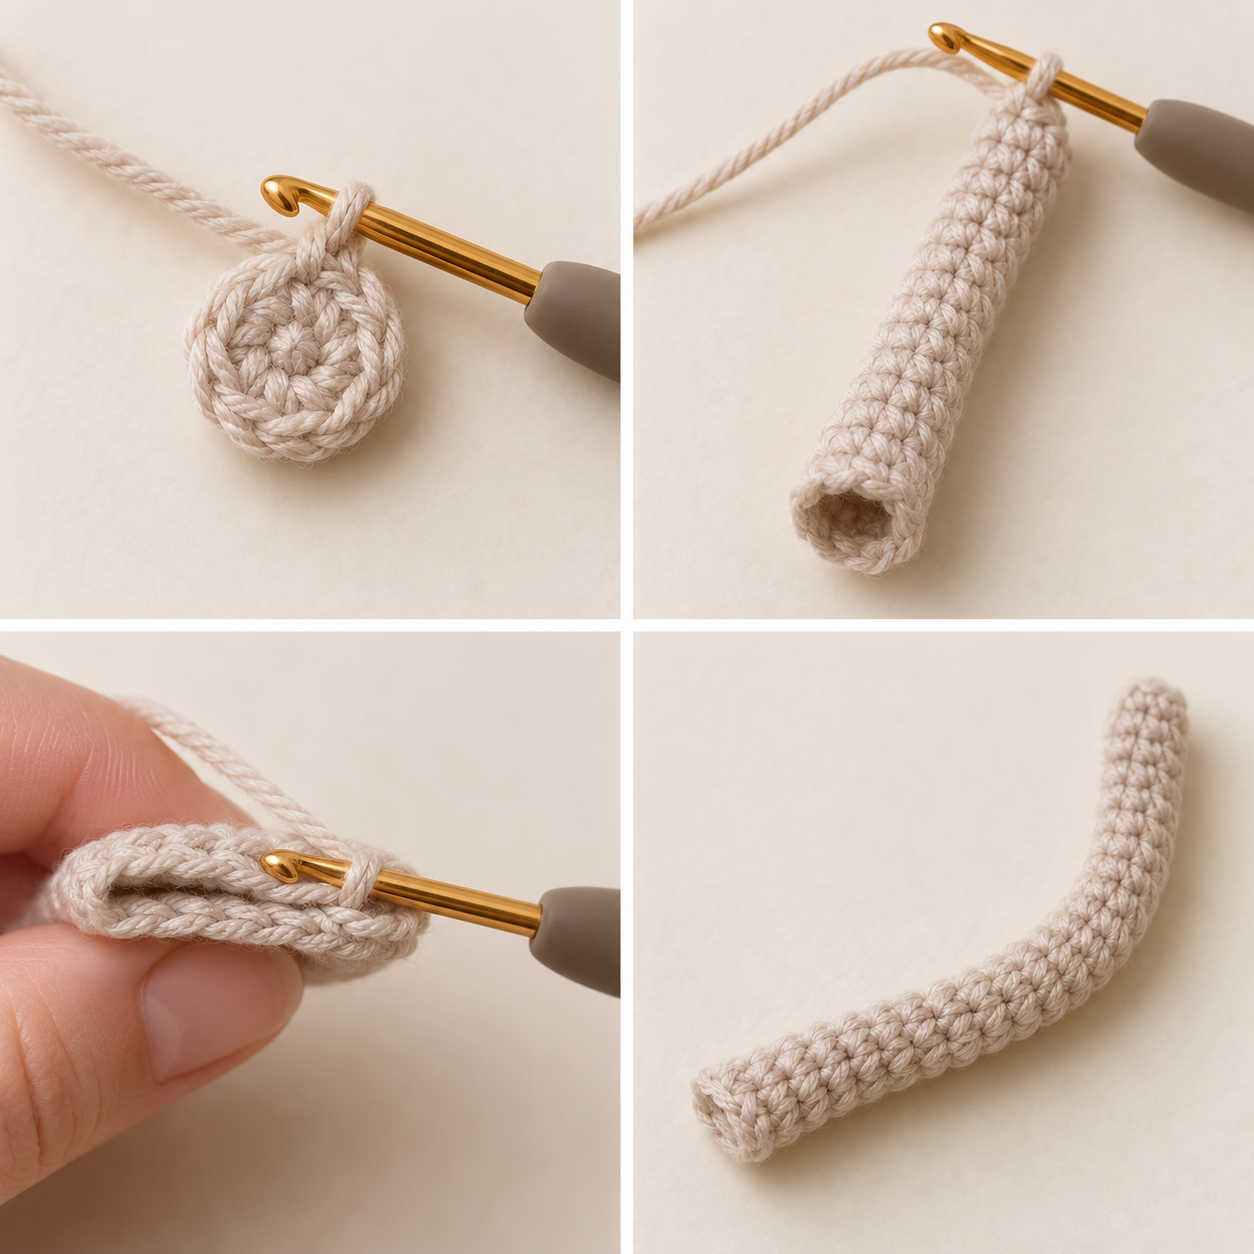
Do not stuff. Flatten the opening and crochet 4 sc through both aligned layers to close. FO, leaving a long sewing tail.
Step 8 — Assemble the Seated Kitty
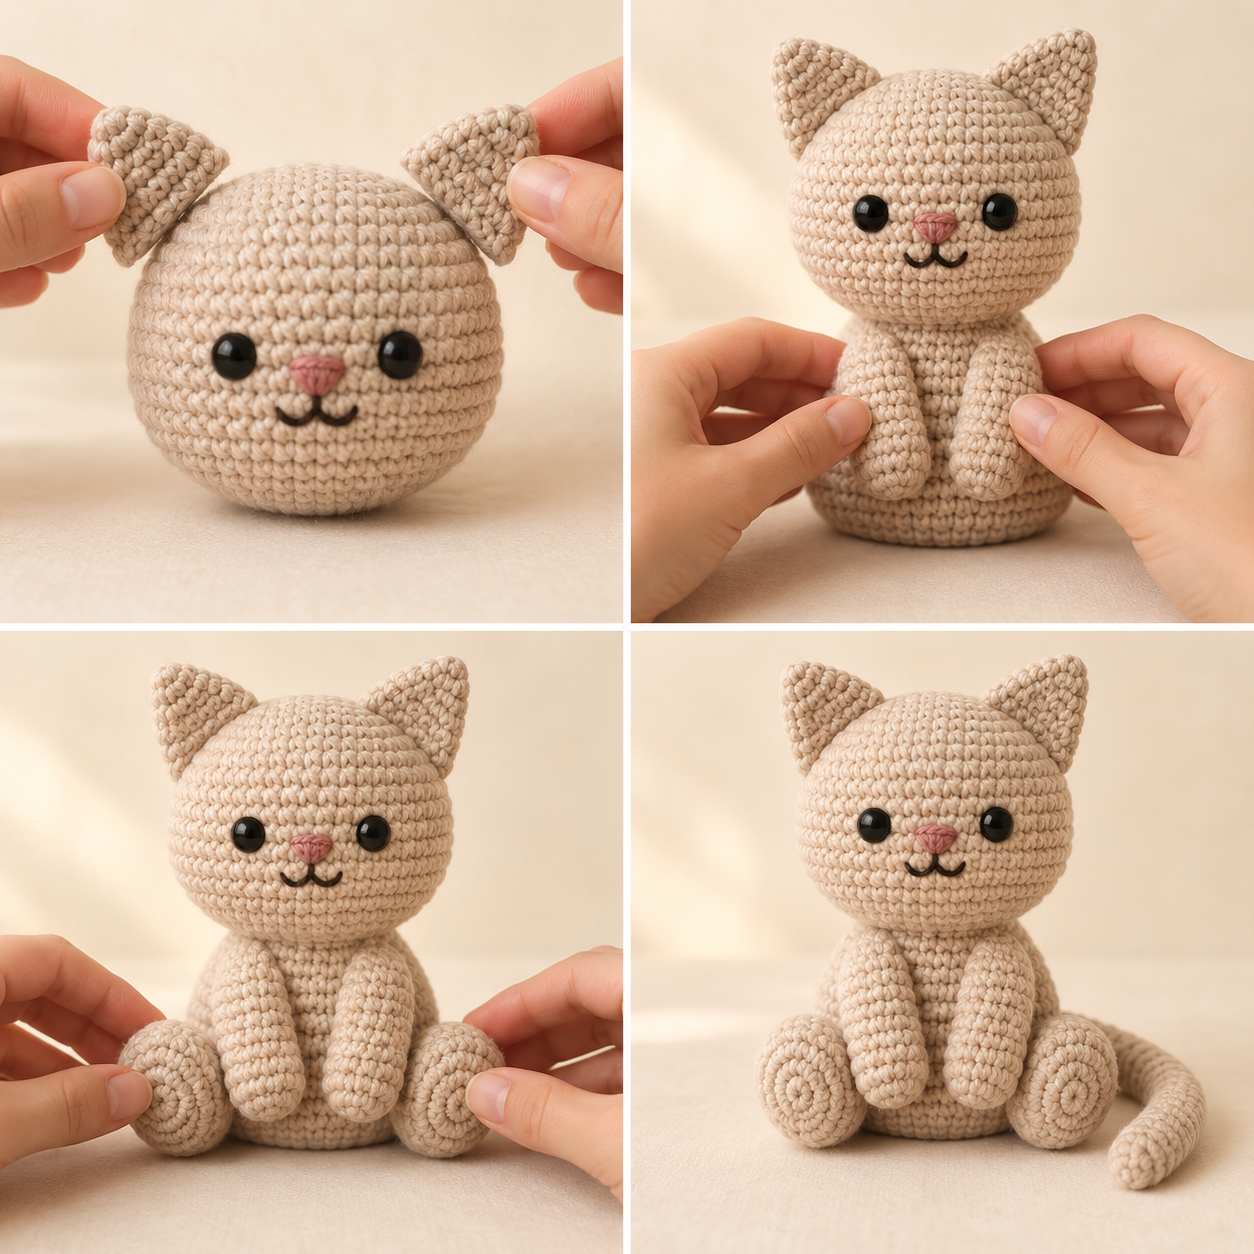
Attach the ears
Pin the ears symmetrically on the upper sides of the head, approximately across the R23–R26 area. Sew across the flat bases.
Attach the front paws
Pin the two front paws vertically on the front of the body, approximately across R9–R13. Sew only across the flattened closed tops.
Attach the hind paws
Sew the two hind paws low on the front/sides, approximately across R3–R6, so the cat reads clearly as seated.
Attach the tail
Sew the flattened tail base to the lower back/side around R5–R7. Let the unstuffed tail rest naturally around one side of the body.
Before weaving in the final sewing ends, place the cat on a flat surface and check the ears, front paws, hind paws, and tail from both the front and side. All placement guidance remains provisional until a physical sample is tested.
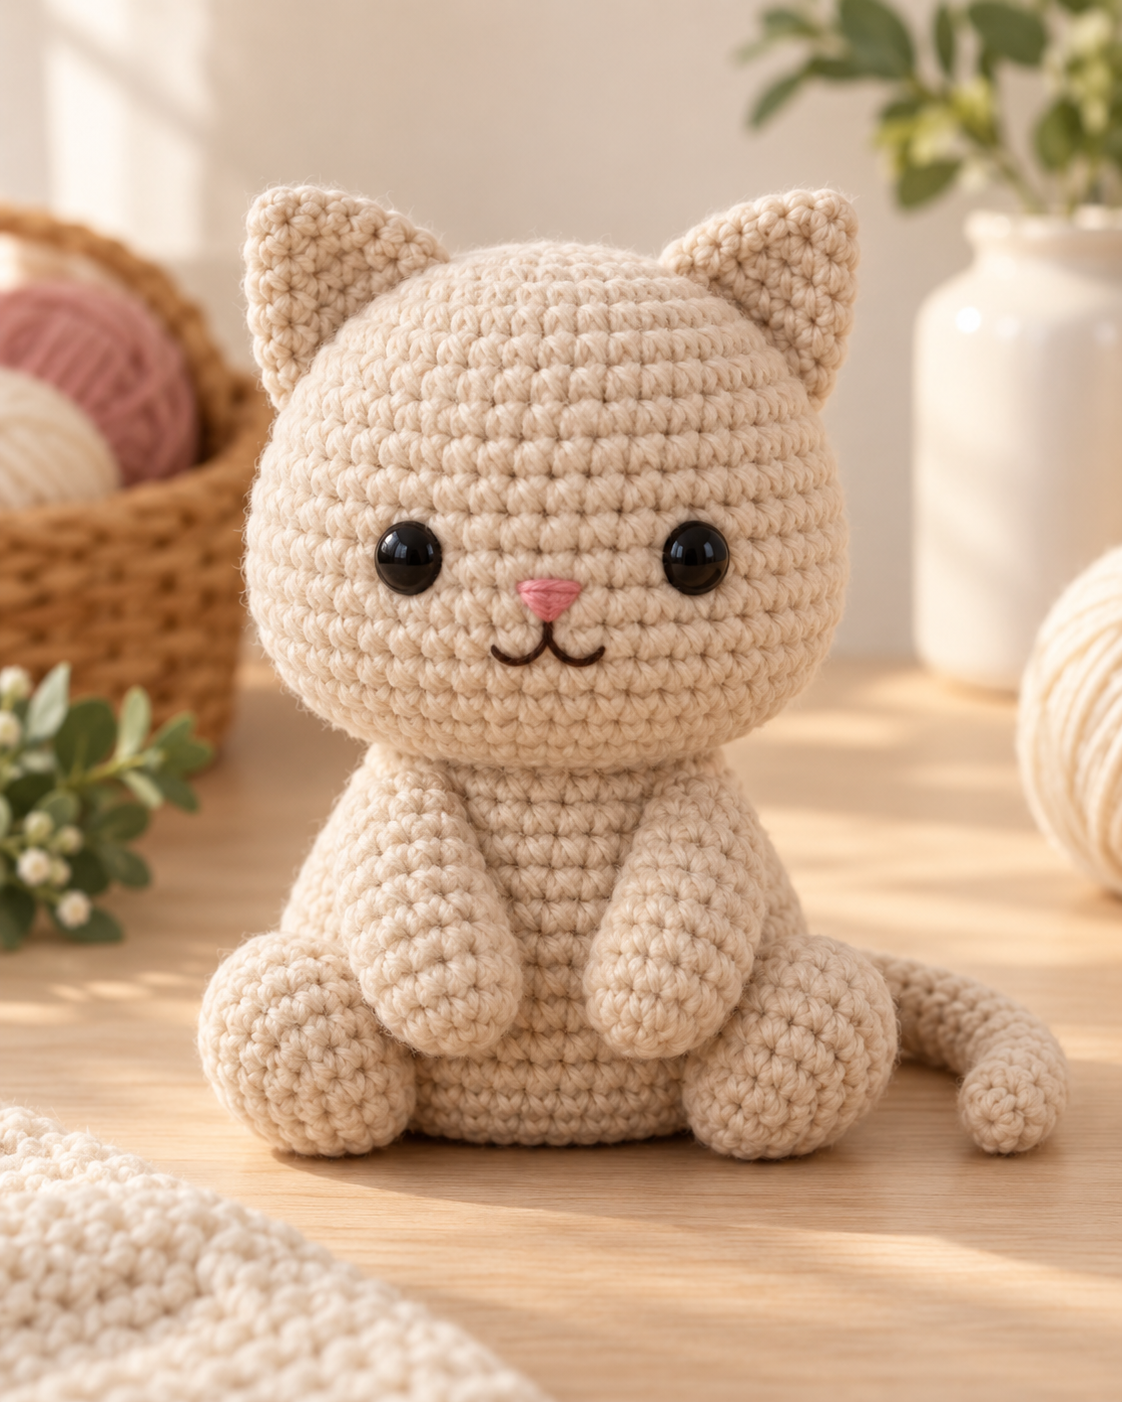
Your Finished Seated Amigurumi Kitty
The finished project should read as a simple evergreen cat: round head, compact seated body, two short front paws, rounded hind paws, and one soft side tail. There are no seasonal accessories or colorwork details, making this a useful core Cat pattern for the Free Amigurumi Crochet Patterns animal collection.
Tips & Troubleshooting
The cat leans instead of sitting upright
Check that the hind paws are attached at the same height and that the lower body is stuffed evenly. Before finishing the seams, test the cat on a flat surface and adjust the paw angle if needed.
The front paws stick out too far
Keep the narrow upper sections mostly unstuffed, flatten the tops firmly, and sew only along the flat closed edge.
The face looks uneven
Use the suggested eye spacing only as a starting point. View the face straight on before locking the washers and adjust until both eyes sit level.
The tail looks too stiff
Do not stuff it. The unstuffed tube is meant to stay flexible and settle naturally around the side of the body.
Free Cat Crochet Pattern FAQ
Is this cat crochet pattern no-sew?
No. The body and head are continuous, but the ears, front paws, hind paws, and tail are separate pieces that are sewn on.
Is this pattern suitable for a complete beginner?
It is aimed at an advanced beginner. You should already be comfortable with a magic ring, single crochet, increases, invisible decreases, stuffing, and basic sewing.
Can I use embroidered eyes instead of safety eyes?
Yes. Embroidered eyes are the safer choice for babies or very young children.
How large is the finished cat?
The finished size has not yet been physically verified, so this working draft does not claim an exact measurement.
Should I count stitches in the tutorial visuals?
No. The written round counts are the technical source of truth. The images are visual construction guides.