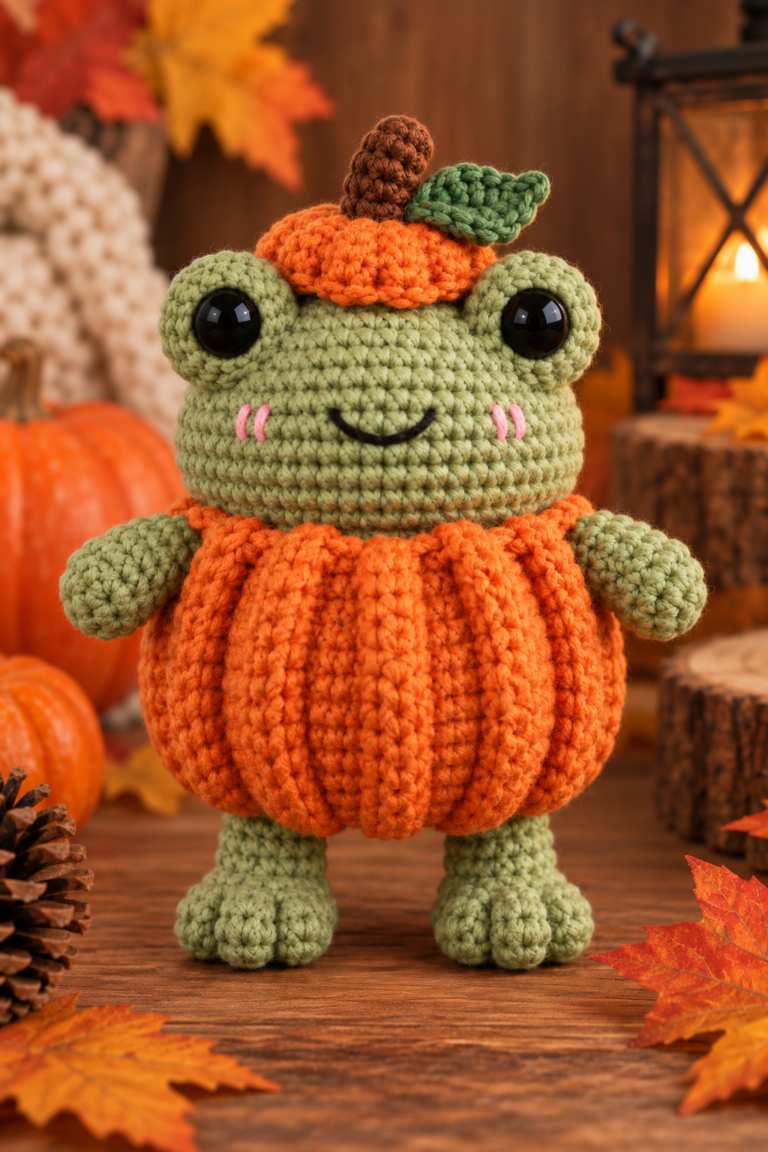

This free frog crochet pattern walks you through every major part of a cute seated frog, from the first body rounds to the raised eyes, cream belly, arms, long hind legs, and final assembly.
The body and head are crocheted continuously as one piece, while the eye bumps, belly patch, arms, and legs are made separately. Each photo collage follows the construction in order, so you can see how the shapes develop instead of jumping straight to finished pieces.
This frog amigurumi pattern is designed for advanced beginners who are comfortable with a magic ring, single crochet, increases, decreases, stuffing, and basic sewing.
Pattern status: This original pattern is a working draft and has not been physically tested. The tutorial photos are AI-generated visual construction guides. Exact finished size, yarn usage, gauge, stuffing behavior, and real-world balance have not yet been verified. Follow the written stitch counts rather than counting stitches visible in the images.
Free Frog Crochet Pattern Overview
Before starting your frog, here is a quick overview of the yarn, hook, construction, and techniques used in this amigurumi pattern.
Construction note: This is not a no-sew frog. The body and head are continuous, but the eyes, cream belly, arms, and hind legs are made separately and sewn to the body.
Table of Contents
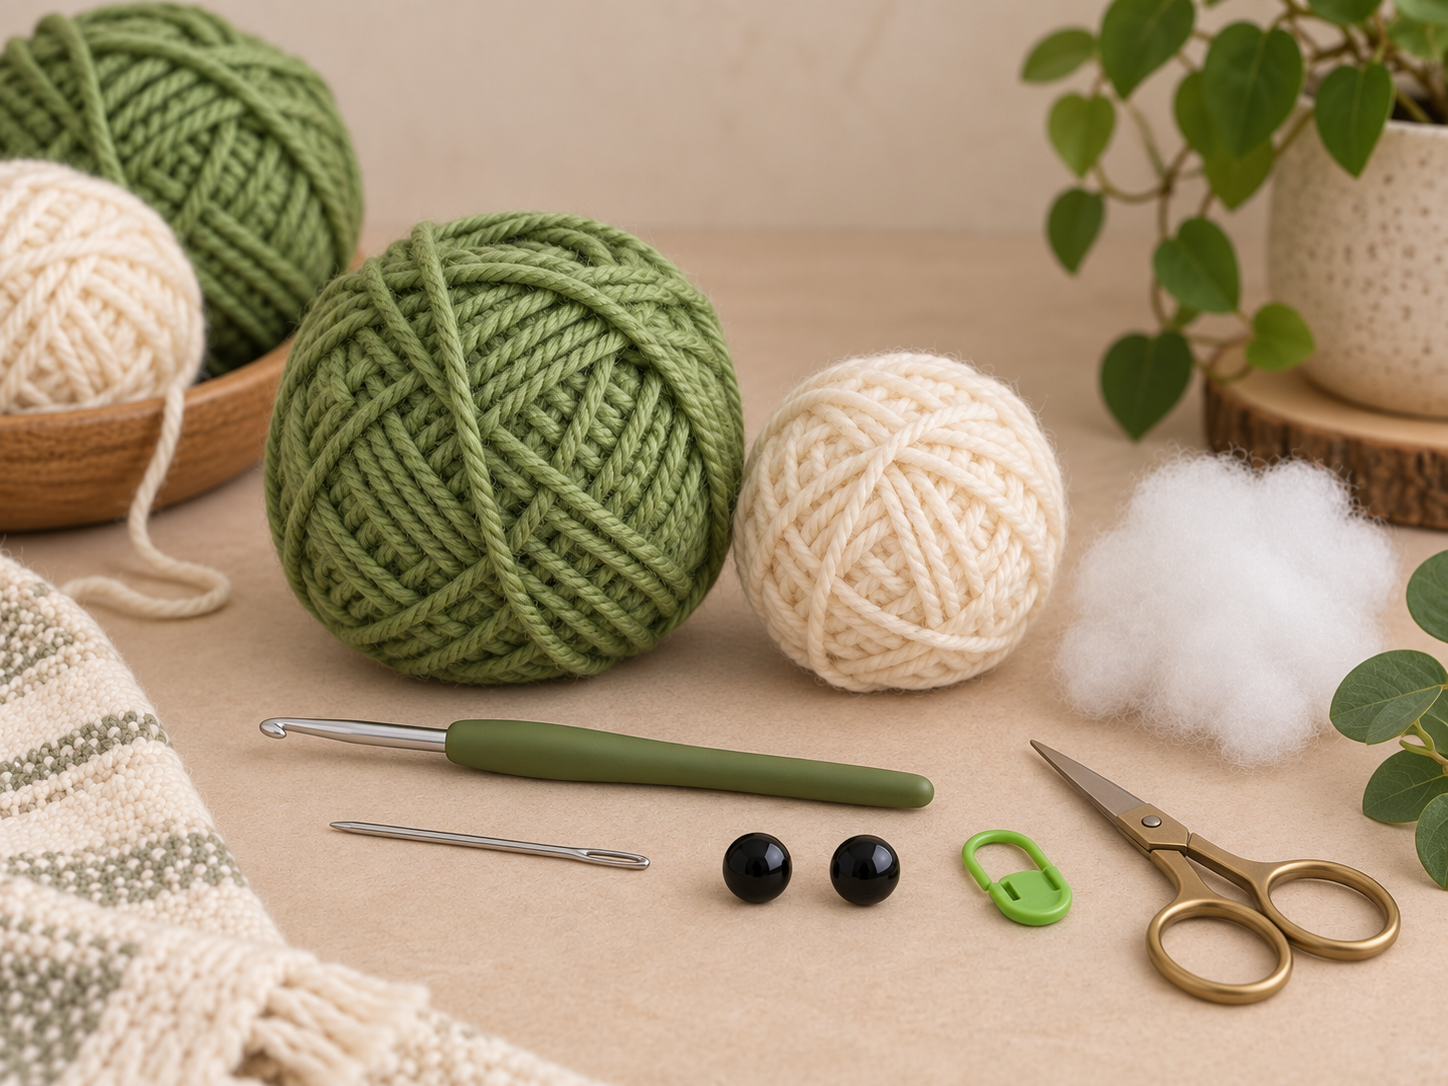
Frog Crochet Pattern Materials
- #4 worsted-weight smooth yarn in moss or leaf green
- #4 worsted-weight yarn in warm cream
- Small amount of black yarn or embroidery thread
- 3.25 mm crochet hook
- Two black safety eyes
- Polyester fiberfill
- Yarn or tapestry needle
- Stitch marker
- Scissors
- Sewing pins for provisional placement
Safety note: Plastic safety eyes can be a choking hazard. If the finished frog is intended for a baby or very young child, use securely embroidered eyes instead.
Crochet Abbreviations
This free frog crochet pattern uses standard US crochet terminology.
| Abbreviation | Meaning |
|---|---|
| MR | Magic Ring |
| sc | Single Crochet |
| inc | Increase — 2 sc in the same stitch |
| dec | Invisible Decrease |
| st / sts | Stitch / Stitches |
| FO | Fasten Off |
For additional terminology help, see the Craft Yarn Council crochet abbreviation guide .
Frog Amigurumi Pattern Notes
- Work in continuous spiral rounds unless stated otherwise.
- Mark the first stitch of each round.
- Use firm tension so stuffing does not show through the fabric.
- The body and head are crocheted continuously as one piece.
- Make both eye bumps before permanently attaching either one.
- The cream belly is a flat circle and should not be stuffed.
- Stuff only the rounded end of each arm lightly.
- Concentrate stuffing around the rounded foot section of each hind leg.
- Leave the long leg section mostly flexible.
- Leave long yarn tails on pieces that will be sewn to the body.
- Piece placement is provisional because this pattern has not been physically tested.
- The written stitch counts override anything that appears different in an AI-generated photo.
Step 1 — Start the Frog Body
Begin with green yarn at the bottom of the frog. The first rounds expand into a flat circle before the straight rounds turn the piece into the rounded lower body.
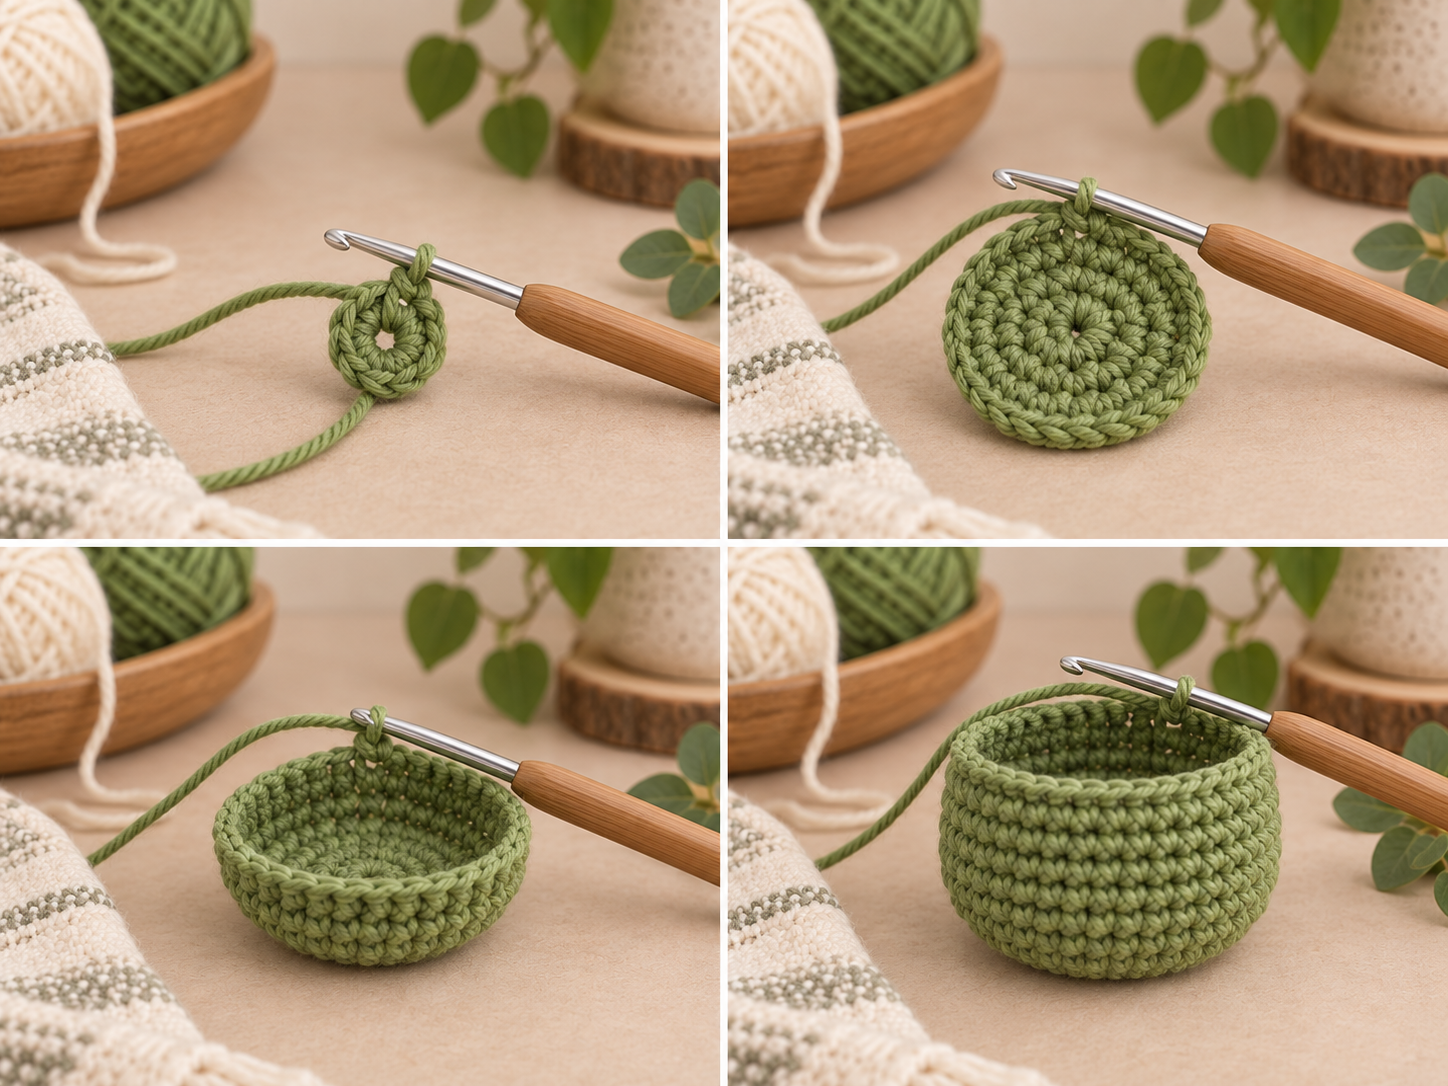
By the end of R10, the crochet should resemble an open rounded cup. Do not fasten off. The same piece continues directly into the neck and head.
Step 2 — Shape the Body and Head
The next two decrease rounds narrow the upper body. You will then increase again to create the larger rounded frog head.
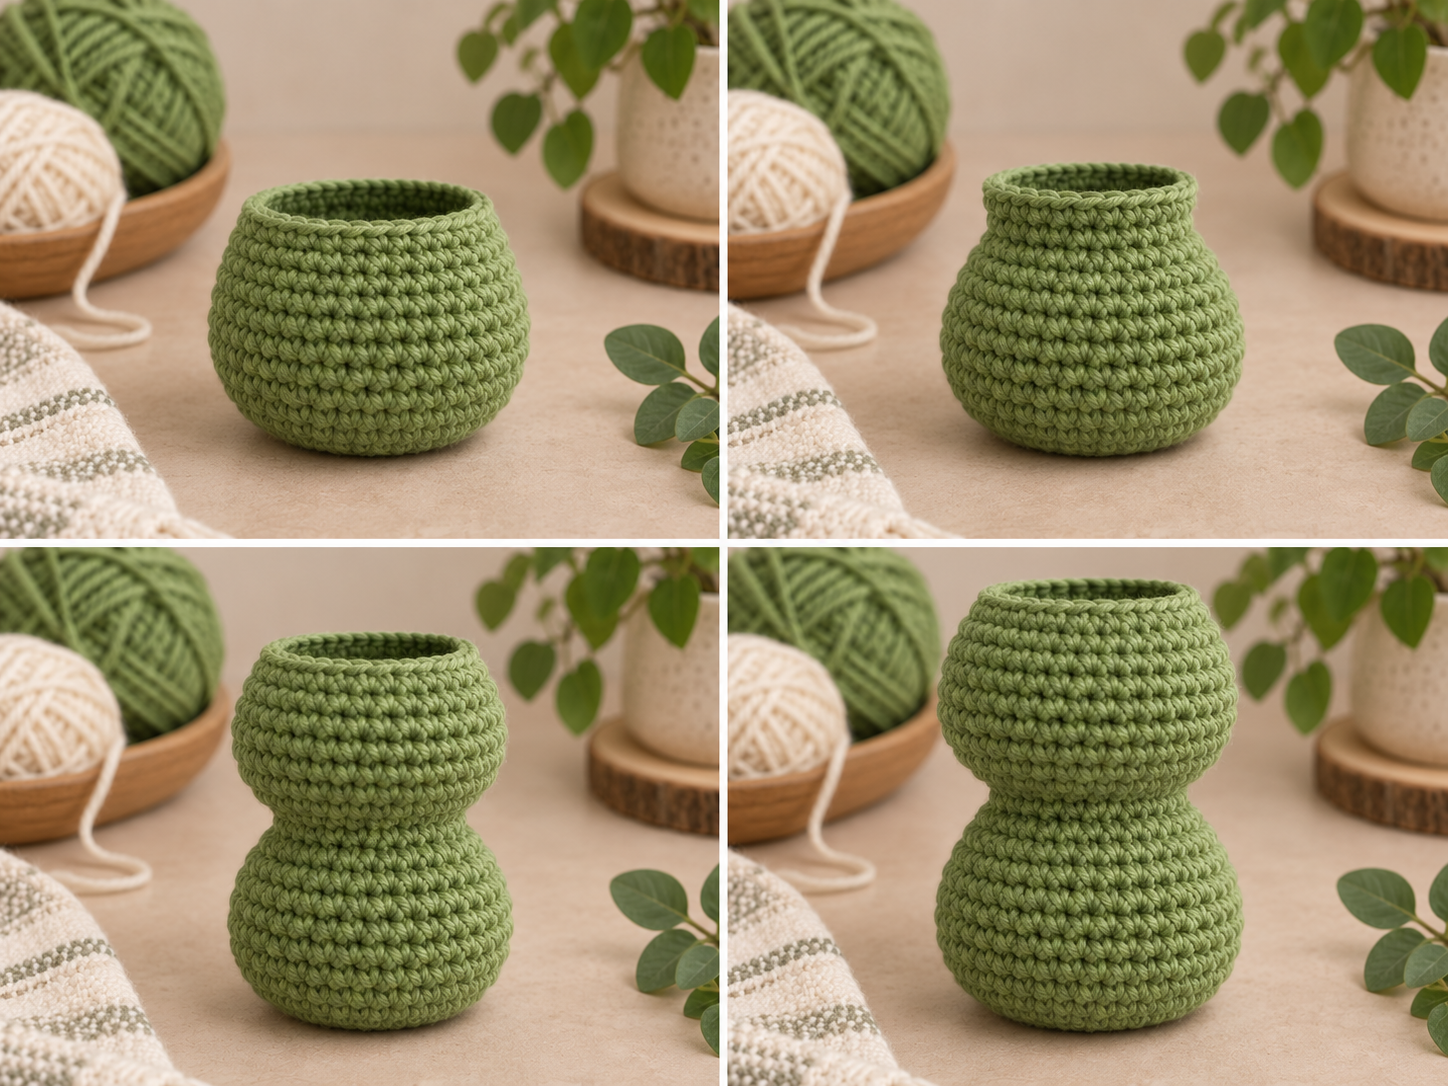
The head should now be visibly fuller than the narrow transition underneath it. Keep the top open for stuffing.
Step 3 — Stuff and Close the Frog Head
Decrease gradually to round the top of the head. Add stuffing before the opening becomes too small to reach comfortably.
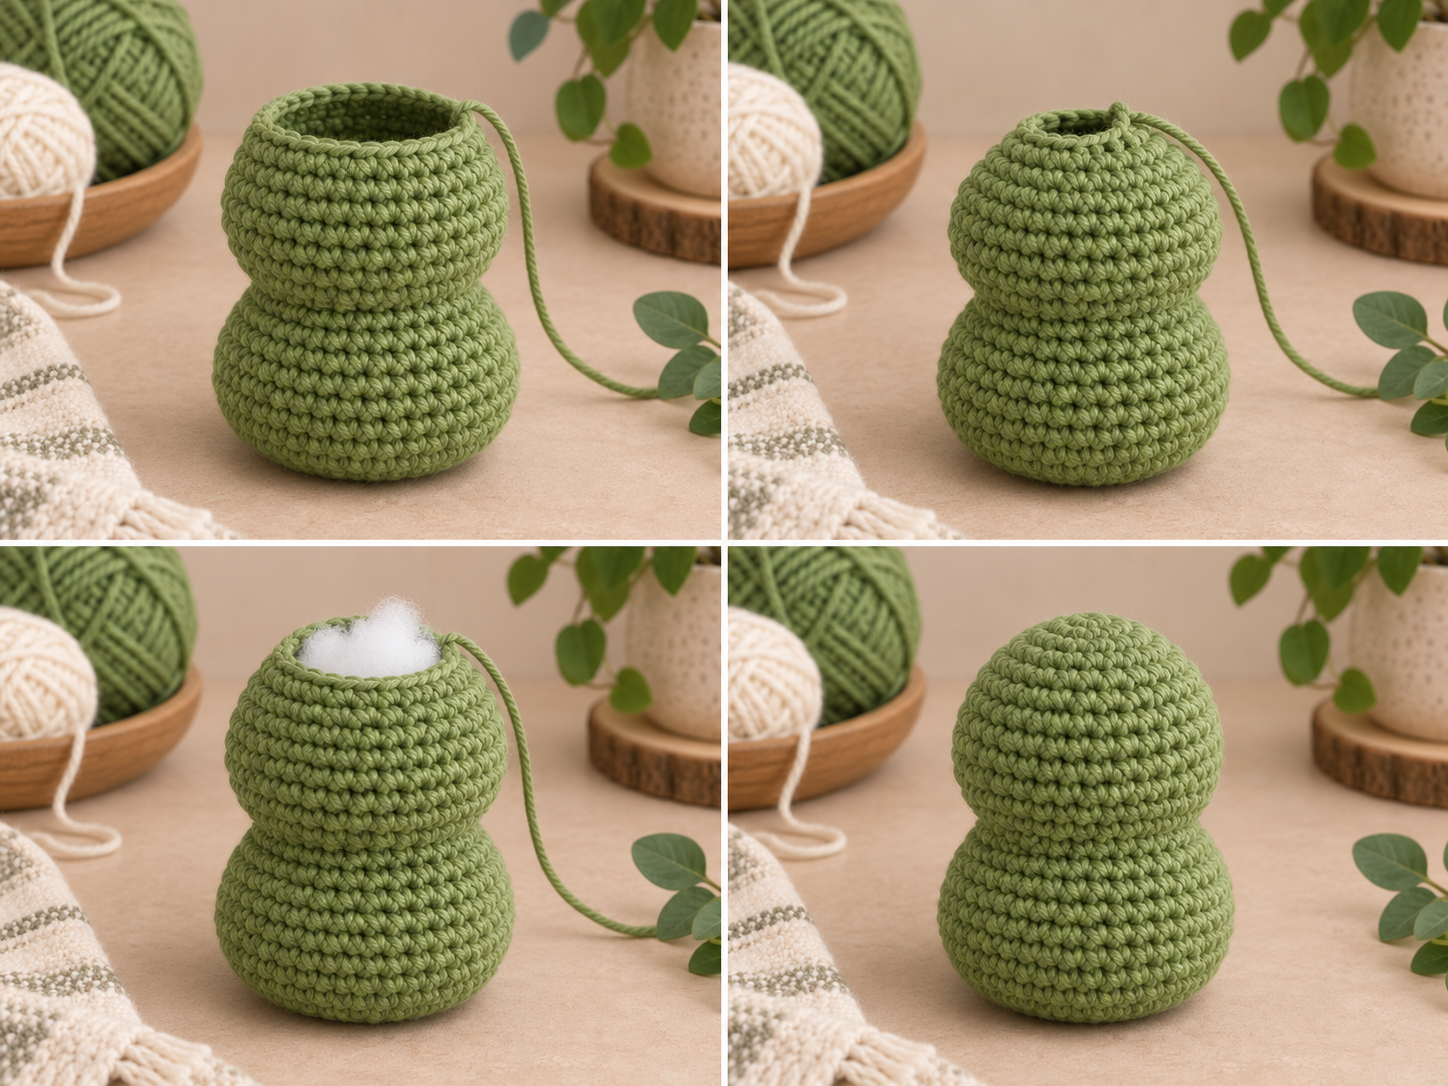
Begin stuffing through the remaining opening. Push small pieces of fiberfill down into the lower body first, then fill the neck and head.
Add enough stuffing to hold the rounded shape without stretching the stitches.
Add any final small amount of stuffing before R26 if needed. Fasten off, thread the tail through the remaining front loops, pull gently to close, and secure the yarn end.
Stuff gradually: several small pieces of fiberfill are easier to distribute evenly than one large handful.
Step 4 — Make the Eye Bumps and Face
The raised eye bumps create the recognizable frog silhouette and give the face much more character than attaching the safety eyes directly to the head.
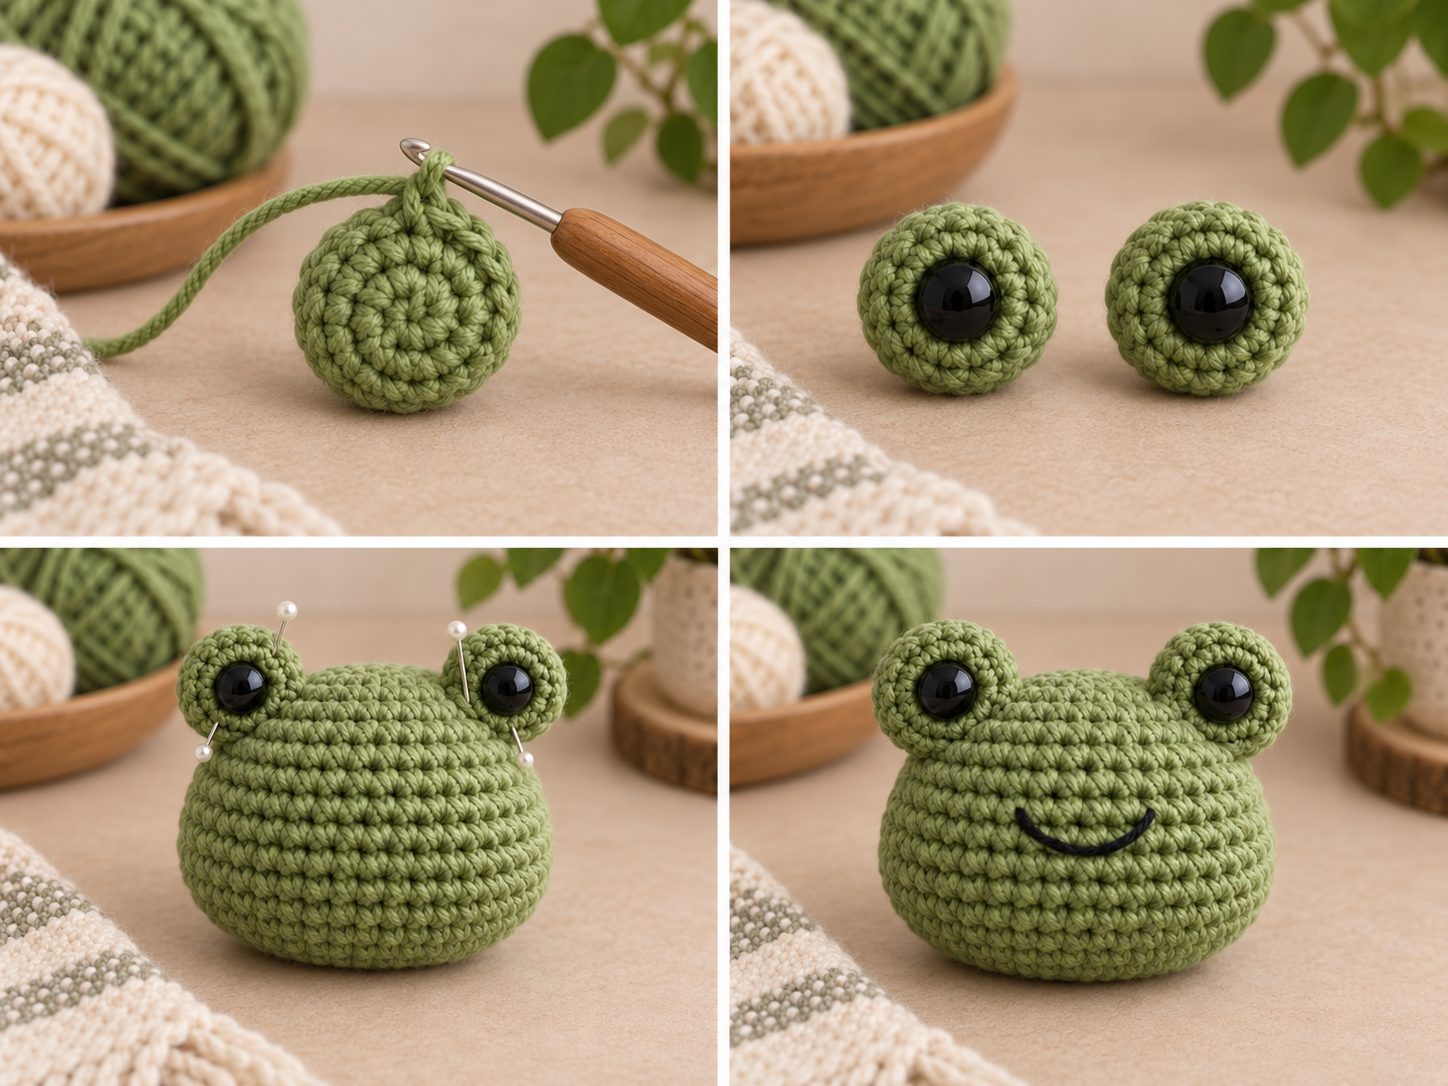
Eye Bumps — Make 2
Use green yarn.
After R4, insert one safety-eye stem through the front center of the eye bump. Secure the washer from inside while the opening is still easy to access.
Add a small amount of stuffing.
FO and leave a long tail for sewing. Repeat for the second eye bump.
Position the Eyes
Pin both eye bumps across the upper part of the head before sewing either one permanently. A useful visual starting area is around the upper R17–R21 region, but this is provisional rather than a verified measurement.
Check the frog from the front and above. Adjust the spacing until both eyes appear balanced, then sew securely around the base of each bump.
Embroider the Smile
Use black yarn or embroidery thread to make a small curved smile between and below the eyes.
Step 5 — Crochet the Cream Belly Patch
The cream belly is worked separately as a flat crochet circle. This piece should remain flat and should never be stuffed.
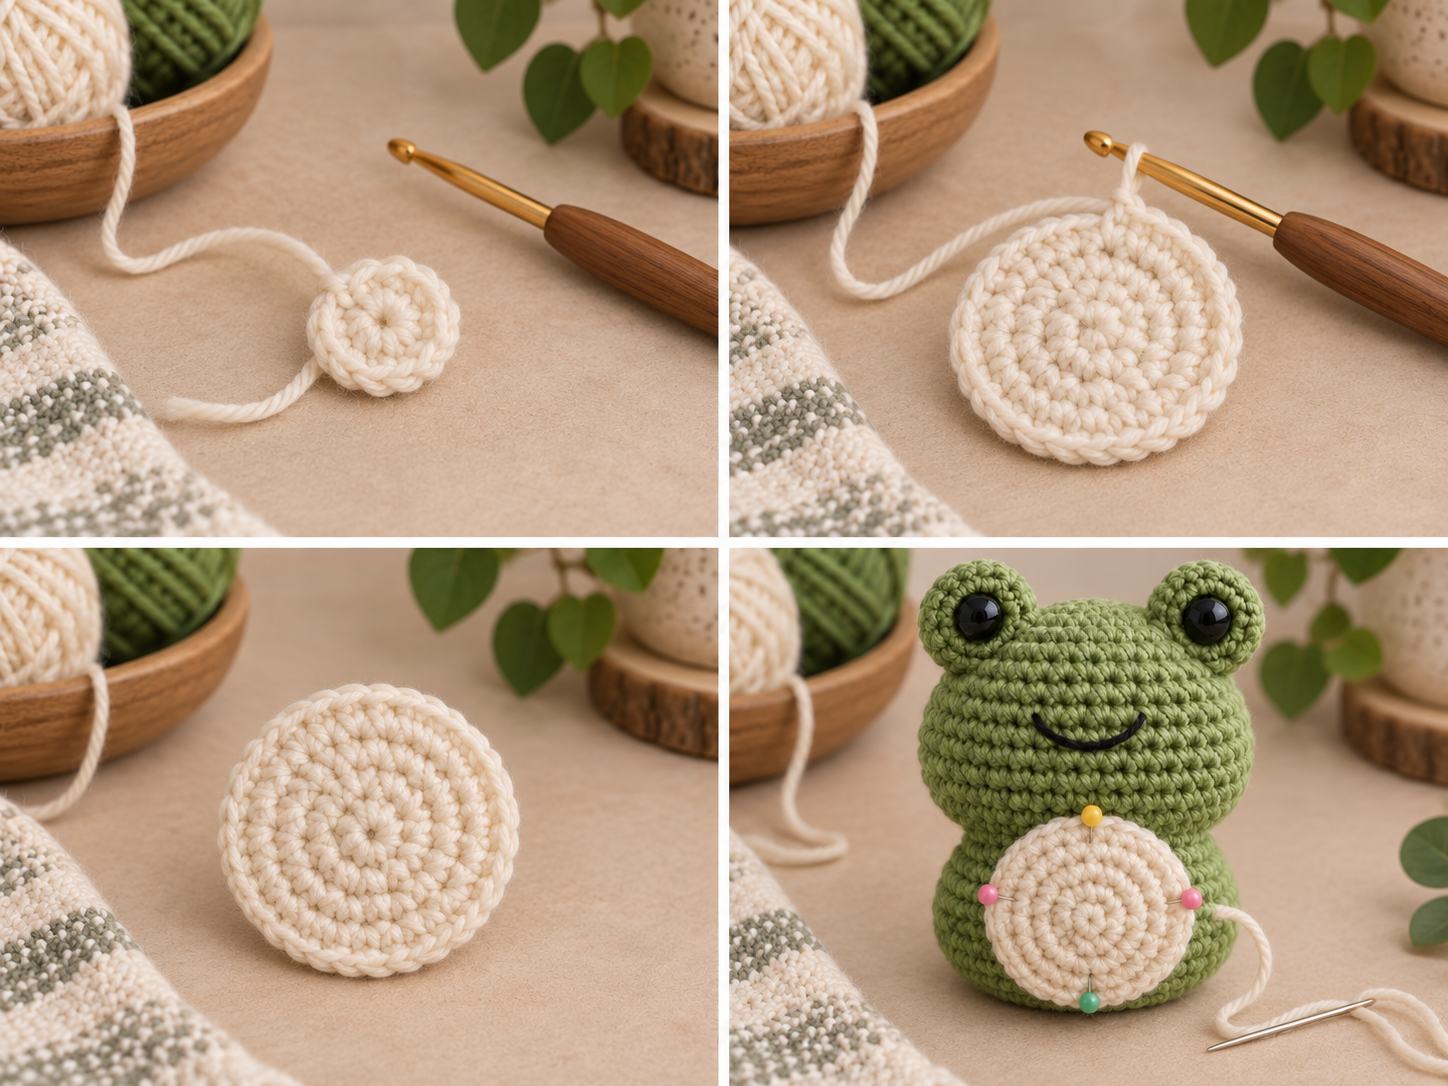
Use warm cream yarn.
FO and leave a long sewing tail.
Center the flat circle on the front of the lower body. Pin it in several places and check the alignment before sewing around the outer edge with small, even stitches.
If the belly starts to cup: gently flatten the circle before sewing it to the body. A strongly curved patch can also be a sign of unusually tight tension.
Step 6 — Make the Frog Arms
The arms are short with softly rounded ends. Keeping the upper part relatively flat makes them easier to position against the body.
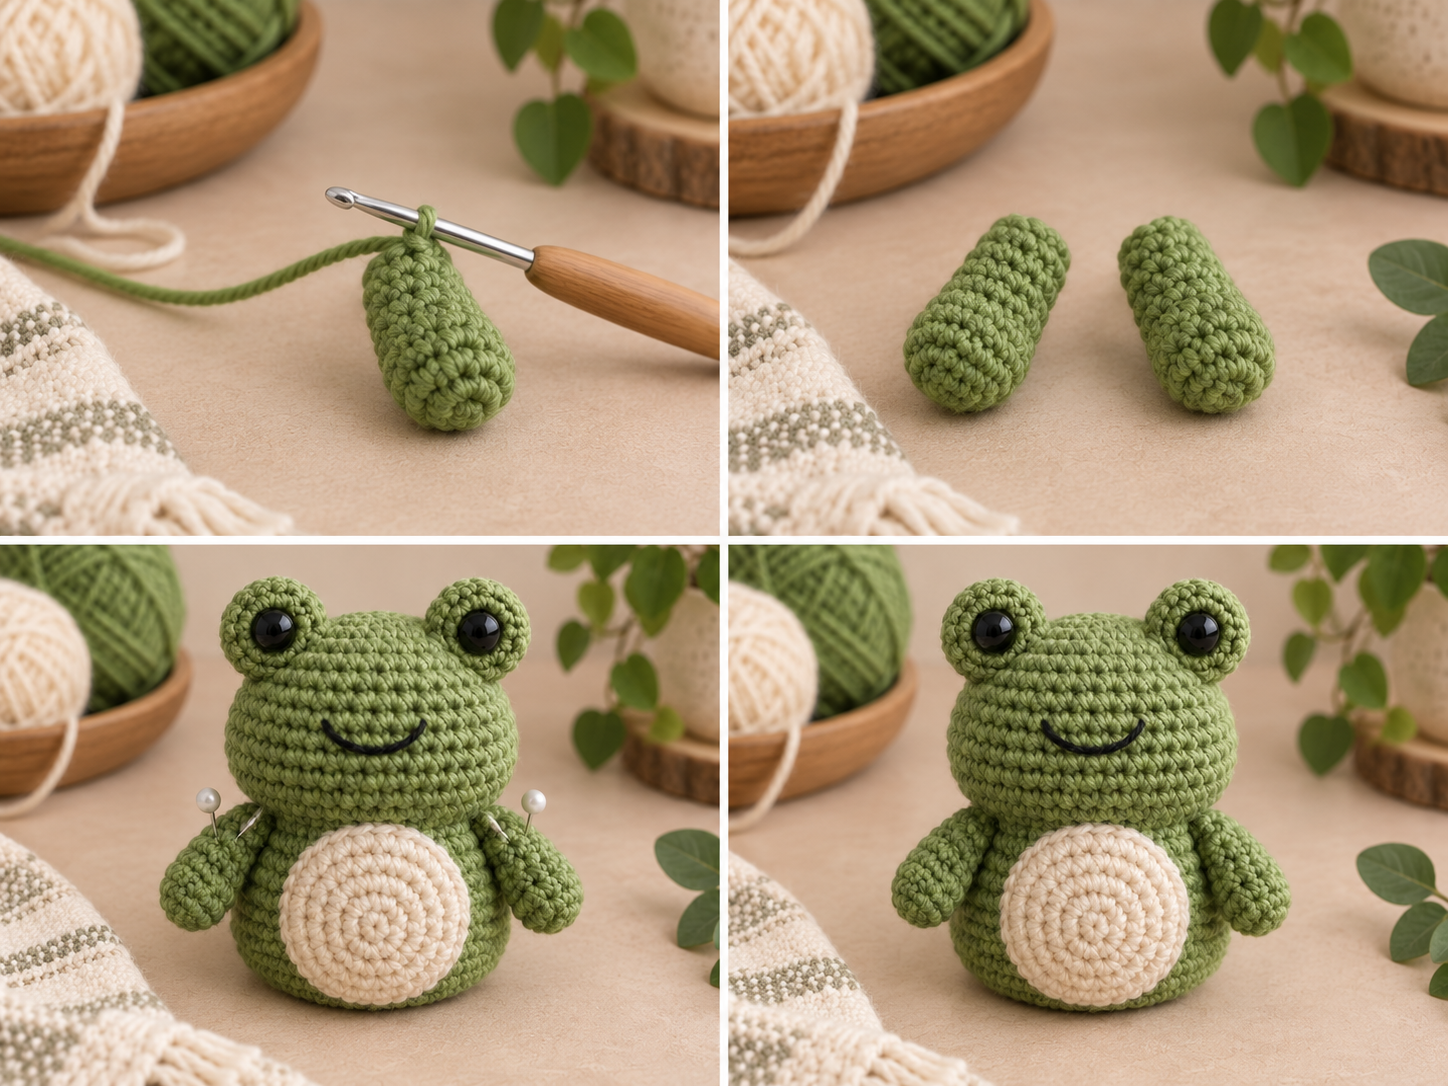
Arms — Make 2
Use green yarn.
Lightly stuff only the rounded lower end. Leave the upper section mostly unstuffed.
Flatten the opening and work 4 sc through both layers to close it. FO and leave a long tail for sewing.
Pin one arm on each side near the upper body and neck transition. Angle the arms slightly forward rather than straight outward.
Step 7 — Make the Long Hind Legs
The longer hind legs are one of the main visual features of this free frog crochet pattern. Each leg is worked as a single continuous piece with one simple rounded foot and no separate crocheted toes.
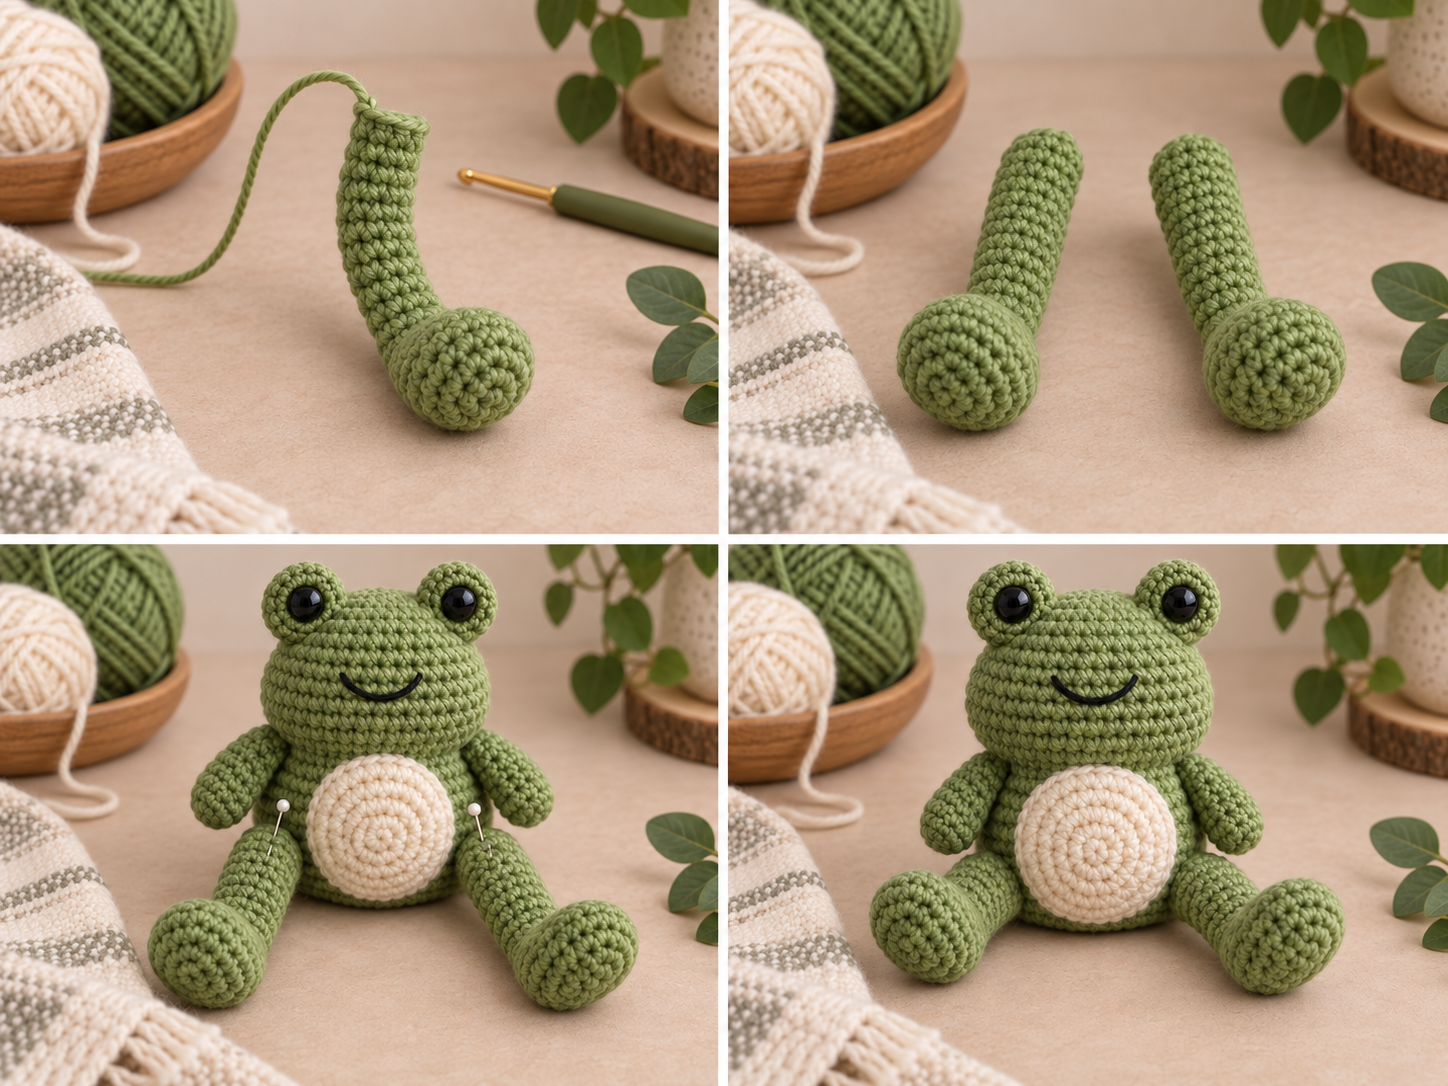
Hind Legs — Make 2
Use green yarn.
Stuff approximately the rounded foot area around R1–R6. Leave the long upper section mostly unstuffed so it stays flexible.
Flatten the top opening and work 4 sc through both layers. FO and leave a long tail for sewing.
Do not overstuff the legs: firm stuffing throughout the entire tube can make the legs too stiff to form the relaxed seated pose.
Step 8 — Assemble the Crochet Frog
Arrange all of the finished pieces before sewing. Pinning the parts first gives you a chance to correct the position of the arms and legs before making anything permanent.
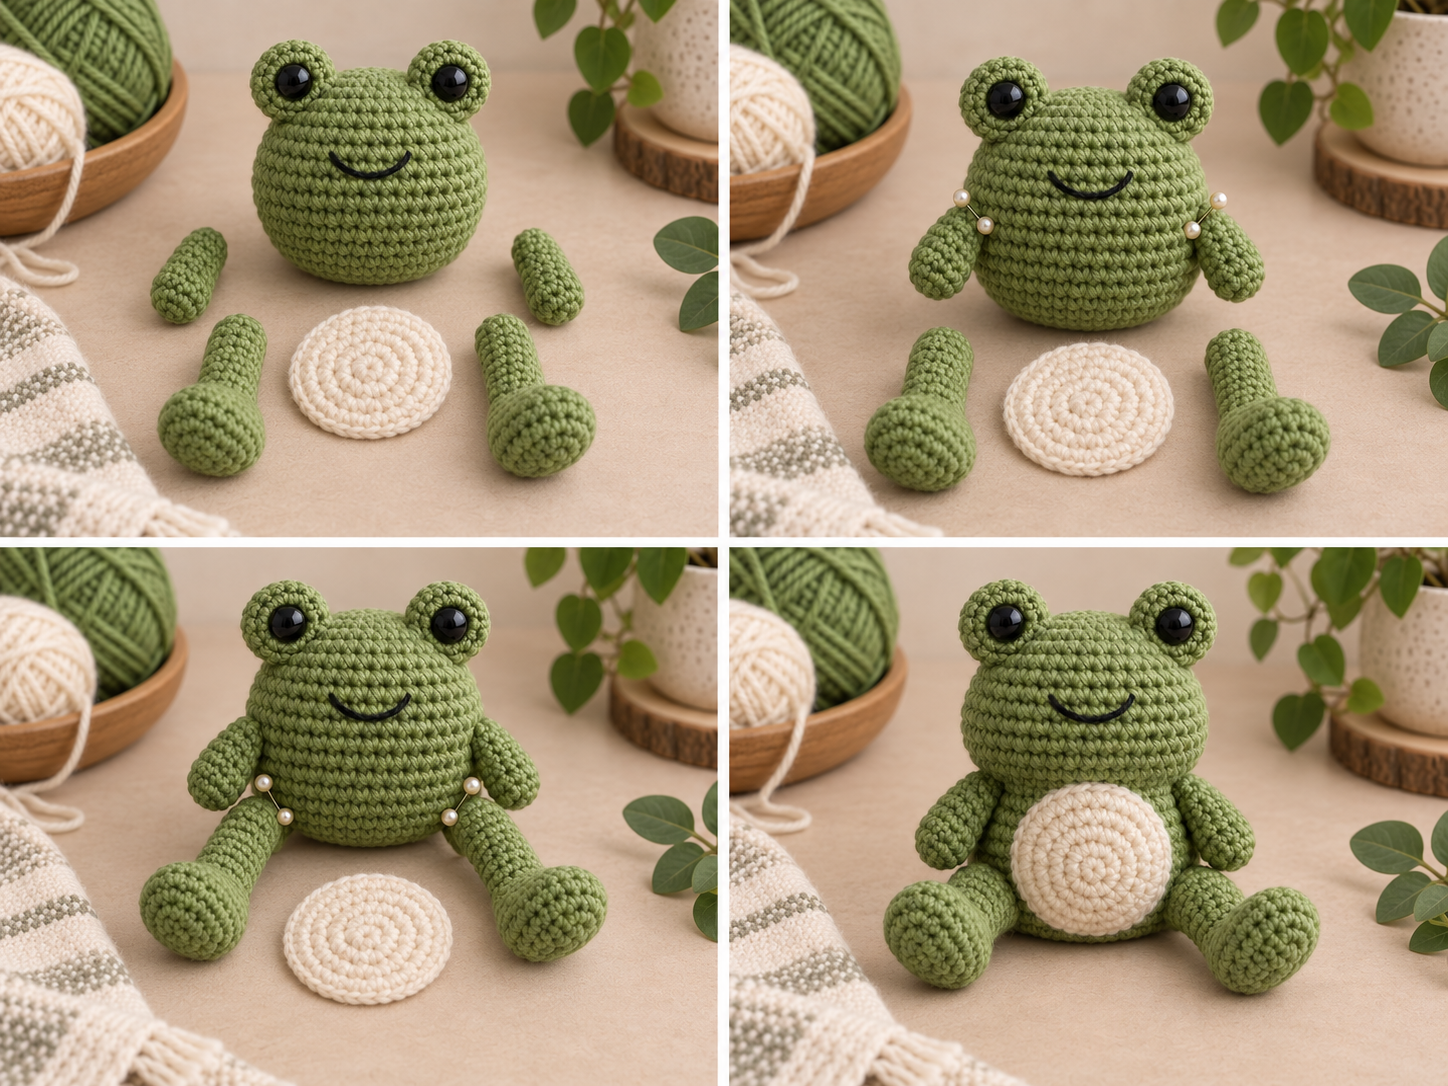
Check that both eye bumps are securely attached and appear balanced from the front.
Center the flat cream belly patch on the lower front of the body and sew around the outer edge.
Pin both arms near the upper body. Check their angle before sewing them securely in place.
Pin both hind legs low on the body and allow the long sections to curve outward and slightly forward.
Place the frog on a flat surface and check the sitting pose from the front and side before sewing the legs permanently.
Sew both hind legs securely and weave in all remaining yarn tails.
Placement note: Exact attachment rounds are intentionally not presented as verified measurements. Adjust the placement slightly if needed for your yarn, tension, stuffing, and individual crochet shape.
Finished Frog Amigurumi
Your frog should now have its complete seated shape, with raised eyes, a flat cream belly, short arms, and long relaxed hind legs.
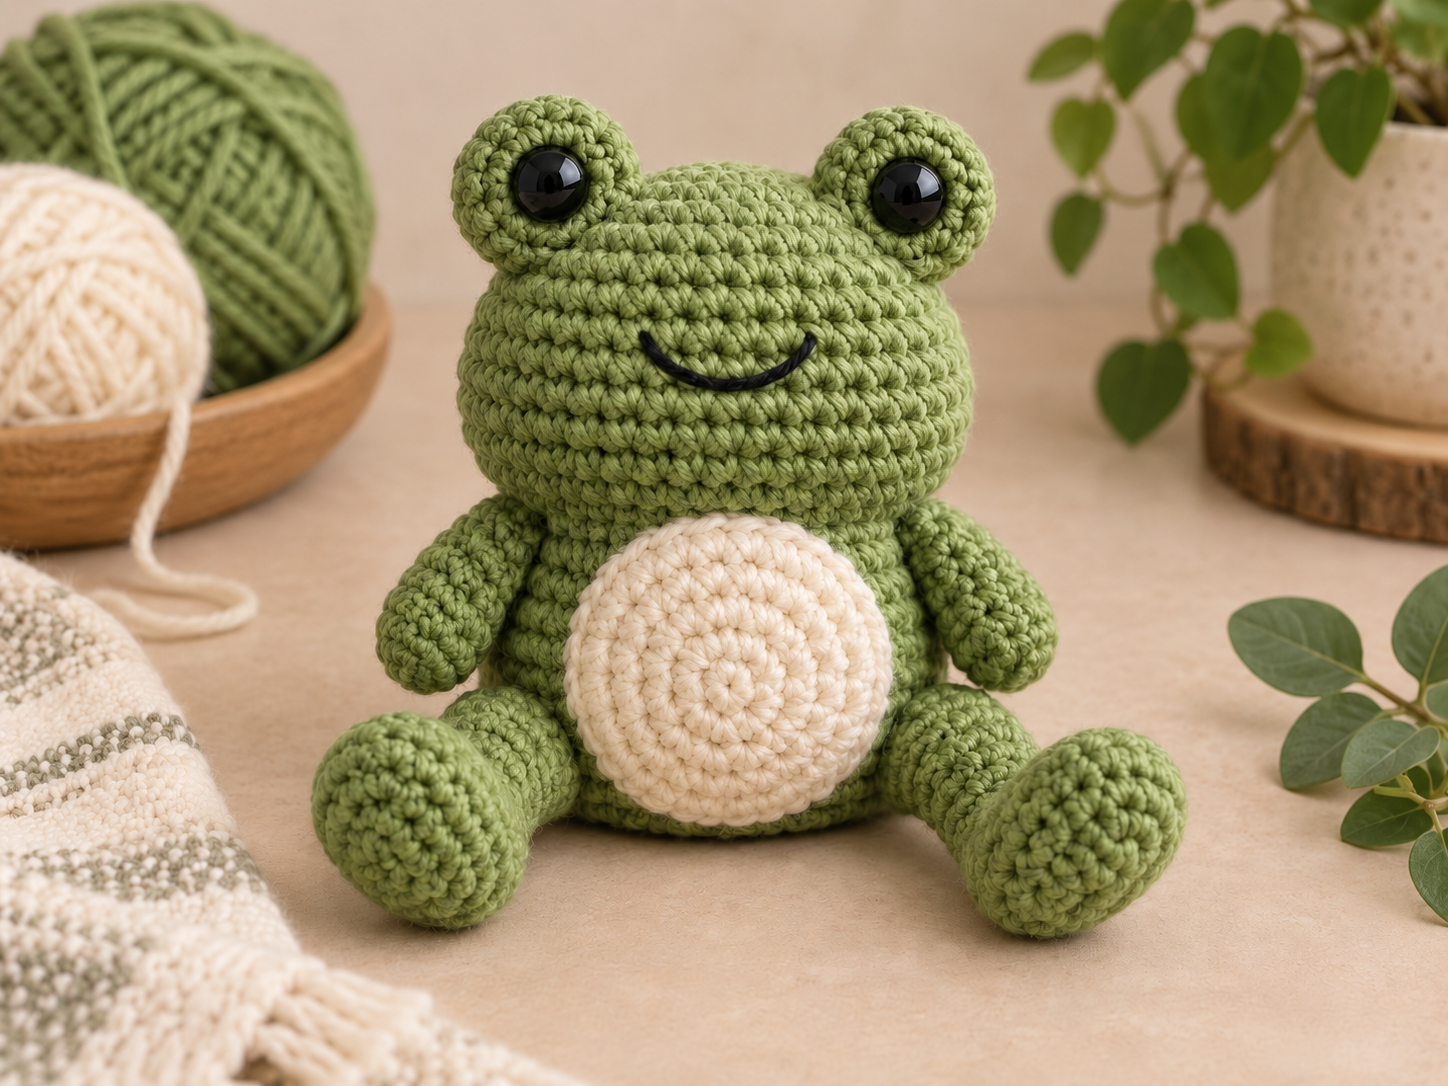
Gently shape the frog with your hands. Smooth the head, flatten the cream belly if necessary, and curve the hind legs into a relaxed seated position.
Look at the frog from the front, both sides, and above. The eye bumps should appear balanced, the belly should sit near the center of the lower body, and both legs should rest naturally.
Tips for a Better Crochet Frog
- Count every round. The neck and head shaping depend on the decreases and increases happening in the correct places.
- Use a stitch marker. Continuous spiral rounds can be difficult to track visually.
- Pin before sewing. Compare both eyes, both arms, and both legs before making the placement permanent.
- Add stuffing gradually. Small pieces are easier to distribute smoothly.
- Keep the leg tubes flexible. Concentrate the stuffing around the rounded feet.
- Check the sitting position. If the frog leans backward, test the hind legs slightly farther forward before sewing.
- Adjust your hook if needed. If stuffing shows through the fabric, try a slightly smaller hook.
Cute Ways to Customize Your Frog
- Try sage, olive, lime, or pastel green yarn.
- Replace the cream belly with pale yellow or soft pink.
- Add a few small embroidered cheek stitches.
- Use embroidered eyes instead of plastic safety eyes.
- Make two frogs in contrasting colors as a handmade gift pair.
Larger construction changes deserve their own pattern. A true no-sew frog, pocket frog, keychain frog, or extra-long leggy frog would use a different construction rather than simply changing the title of this pattern.
Free Frog Crochet Pattern FAQ
Is this frog crochet pattern suitable for beginners?
It is best for an advanced beginner who already knows how to make a magic ring, single crochet, increases, invisible decreases, continuous rounds, stuffing, and basic amigurumi sewing.
Is this a no-sew frog crochet pattern?
No. The body and head are made continuously as one piece, but the eye bumps, cream belly, arms, and hind legs are crocheted separately and sewn onto the frog.
How big is the finished crochet frog?
The exact finished size has not yet been physically verified. Your final size will depend on yarn thickness, hook size, tension, stuffing, and shaping.
Can I use chenille or plush yarn?
You can experiment with a different yarn type, but thick chenille will create a larger frog and may change the proportions of the eye bumps, belly, arms, and legs. The working pattern was designed around smooth worsted-weight yarn with visible stitch definition.
Can I make the frog without safety eyes?
Yes. Embroidered eyes are a good alternative and are the preferred option when making amigurumi for babies or very young children.
Why are my frog’s legs too stiff?
The long section of each hind leg should remain mostly unstuffed. Concentrate the fiberfill around the rounded foot so the upper part can bend naturally.
Why does my frog lean backward?
Before sewing the hind legs permanently, place the frog on a flat surface and experiment with their position. Moving them slightly lower or allowing them to rest a little farther forward may improve the sitting balance.