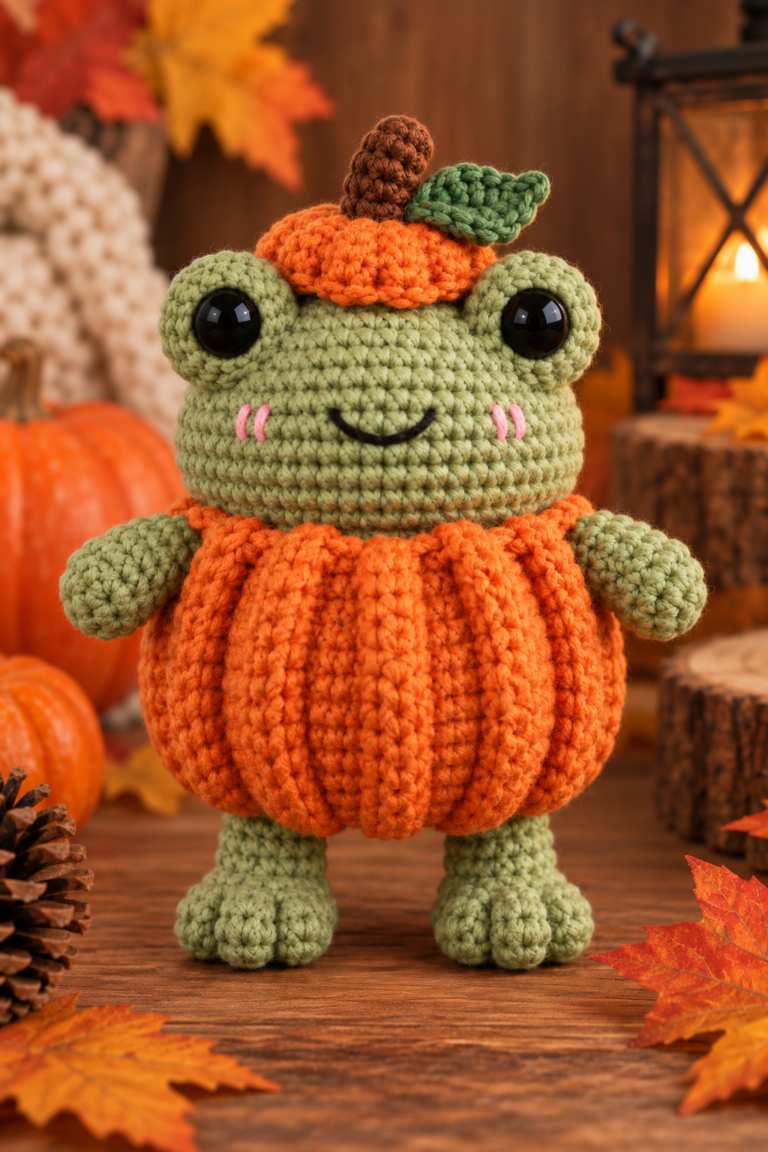

Looking for a no sew leggy frog crochet pattern free to follow? This long-limbed frog has floppy legs, shorter dangling arms, raised frog eyes, and a simple happy face.
The arms and legs are crocheted as narrow tubes and joined directly into the body with your crochet hook. That means there are no amigurumi pieces to sew onto the finished frog.
This photo-guided tutorial uses standard US crochet terminology and takes you through the project in eight clear construction steps.
Pattern status: This original pattern is a working draft and has not been physically tested.
The tutorial photos are AI-generated illustrations of the intended construction. Always follow the written stitch counts and instructions rather than trying to count stitches visible in the images. Finished size, gauge, yarn quantity, and completion time have not yet been physically verified.
Materials
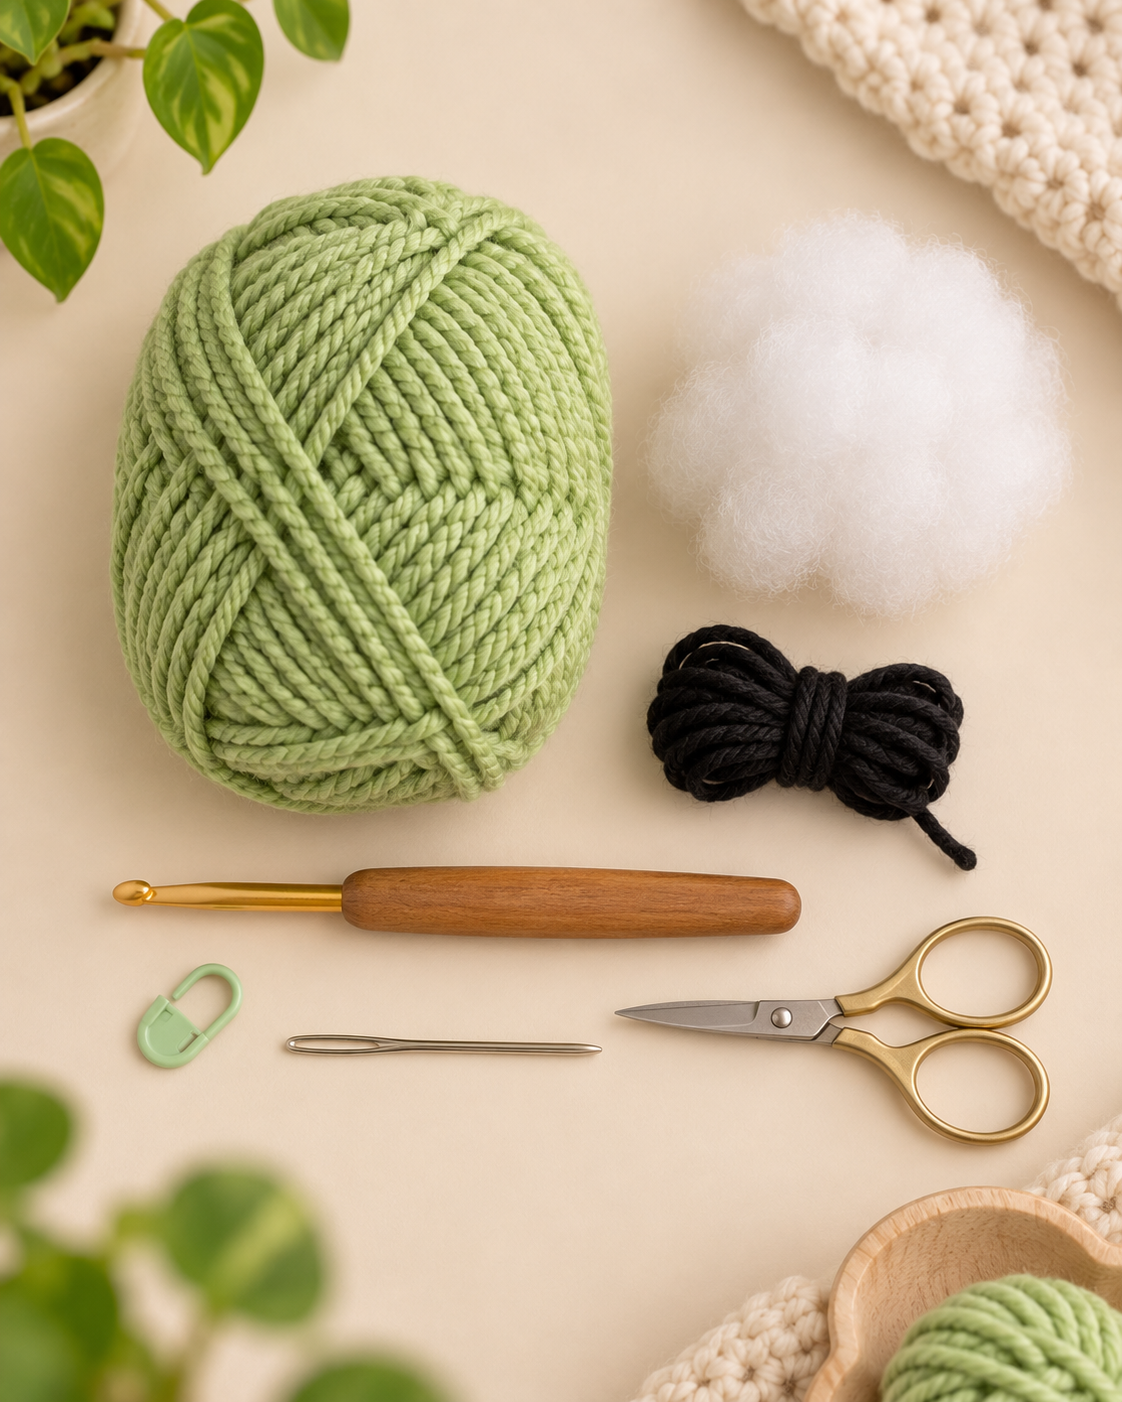
- Medium / worsted-weight yarn in soft sage or pistachio green
- Small amount of black yarn for the mouth
- 3.5 mm crochet hook — provisional
- Fiberfill stuffing
- Stitch marker
- Yarn needle
- Scissors
- Small black safety eyes that fit comfortably inside the eye bumps, optional
You can replace plastic safety eyes with embroidered black eyes. Exact yarn quantity and safety-eye size have not yet been physically verified.
Safety note: Plastic safety eyes can be a choking hazard and are not suitable for babies or very young children. Use firmly embroidered eyes instead when making the frog for a young child.
Abbreviations & Essential Notes
| Abbreviation | Meaning |
|---|---|
| MR | Magic ring |
| ch | Chain |
| sc | Single crochet |
| inc | 2 single crochet in the same stitch |
| dec | Invisible decrease |
| sl st | Slip stitch |
| BO | Bobble stitch |
| st / sts | Stitch / stitches |
| FO | Fasten off |
This pattern uses standard US crochet terminology. You can also reference the Craft Yarn Council crochet abbreviations guide for commonly used US crochet terms.
Bobble Stitch
Work all parts of the bobble into the same stitch:
(yo, insert hook, yo and pull up a loop, yo and pull through 2 loops) × 5
Yarn over and pull through all remaining loops. Push the finished bobble toward the outside of the work. The bobble counts as one stitch.
Working method: Work the body in continuous spirals unless instructed otherwise. Keep a stitch marker in the first stitch of each round.
The long arms and legs stay unstuffed. This keeps them flexible and gives the finished frog its floppy leggy shape.
Step 1: Crochet the Body Base
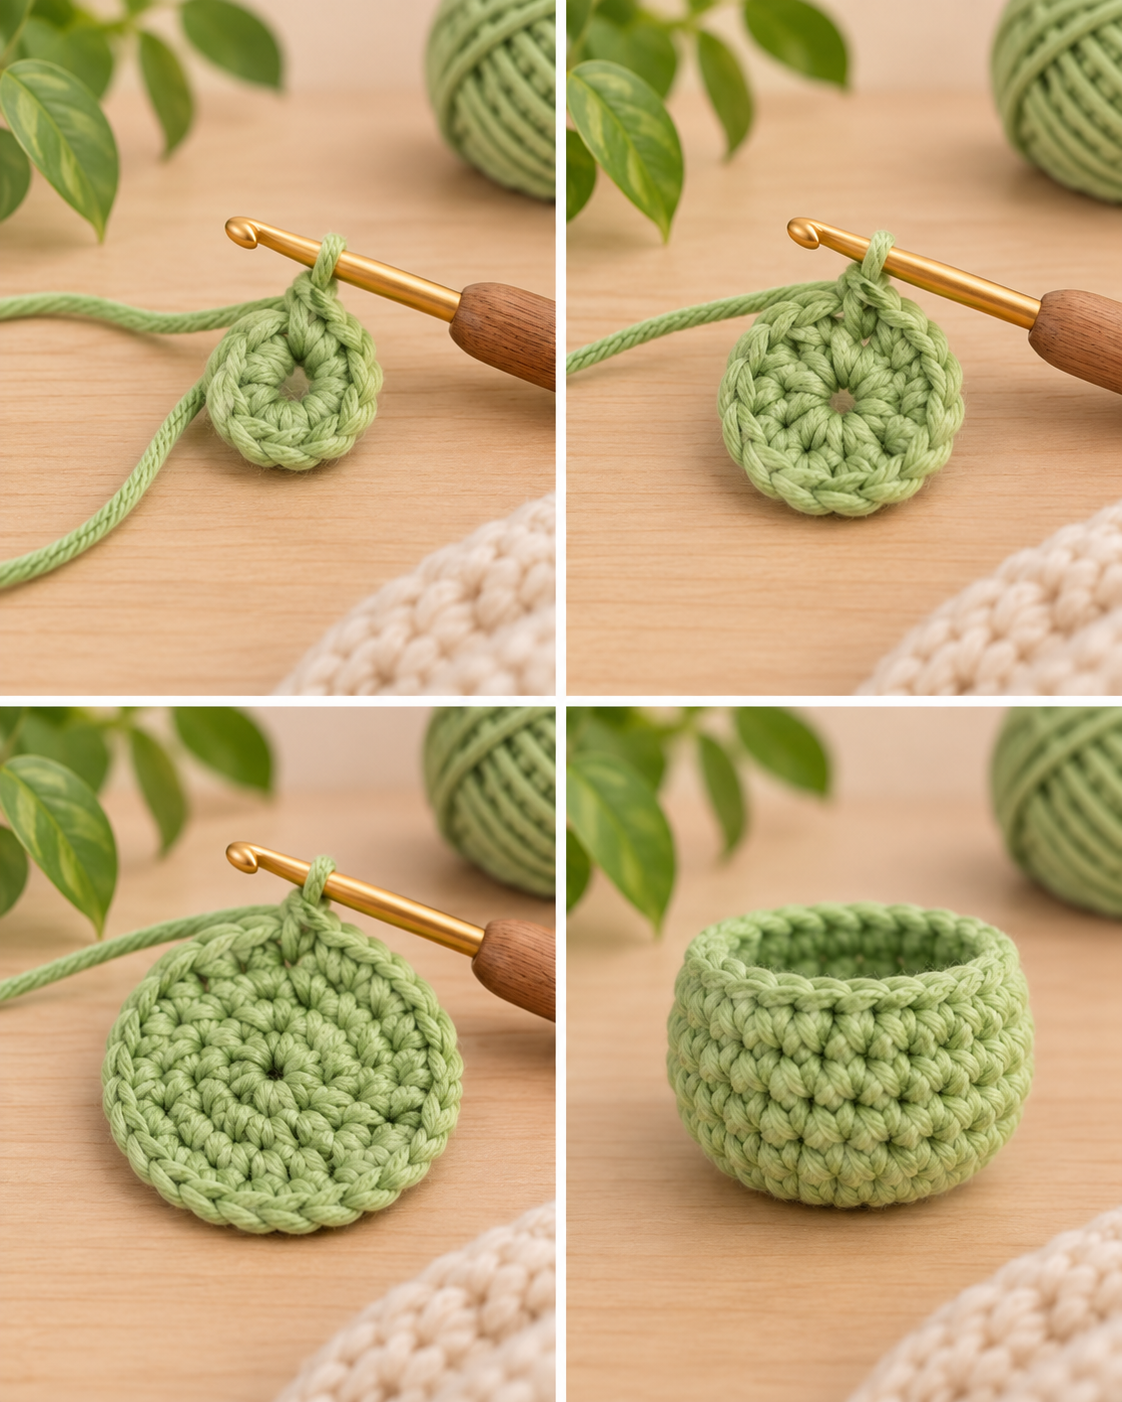
Start at the bottom of the frog with the main green yarn. The first four rounds create a compact circular base that begins to curve into a shallow cup.
Do not stuff the body yet. At this stage the piece should remain open and easy to handle.
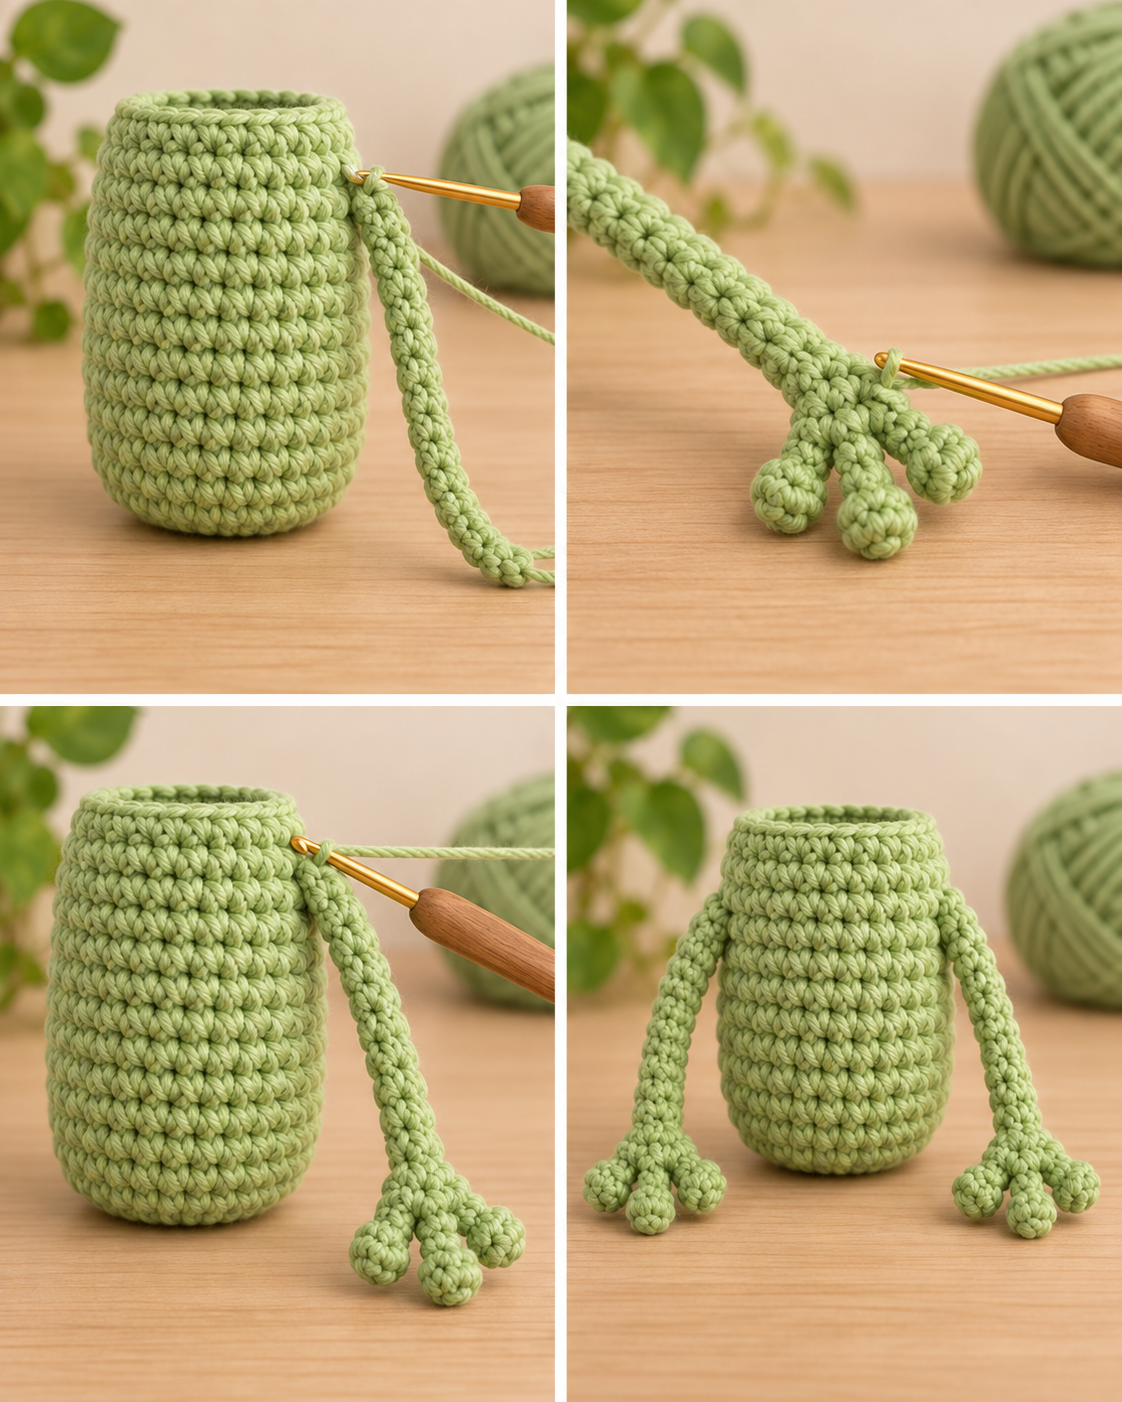
Step 2: Make and Join the Long Legs
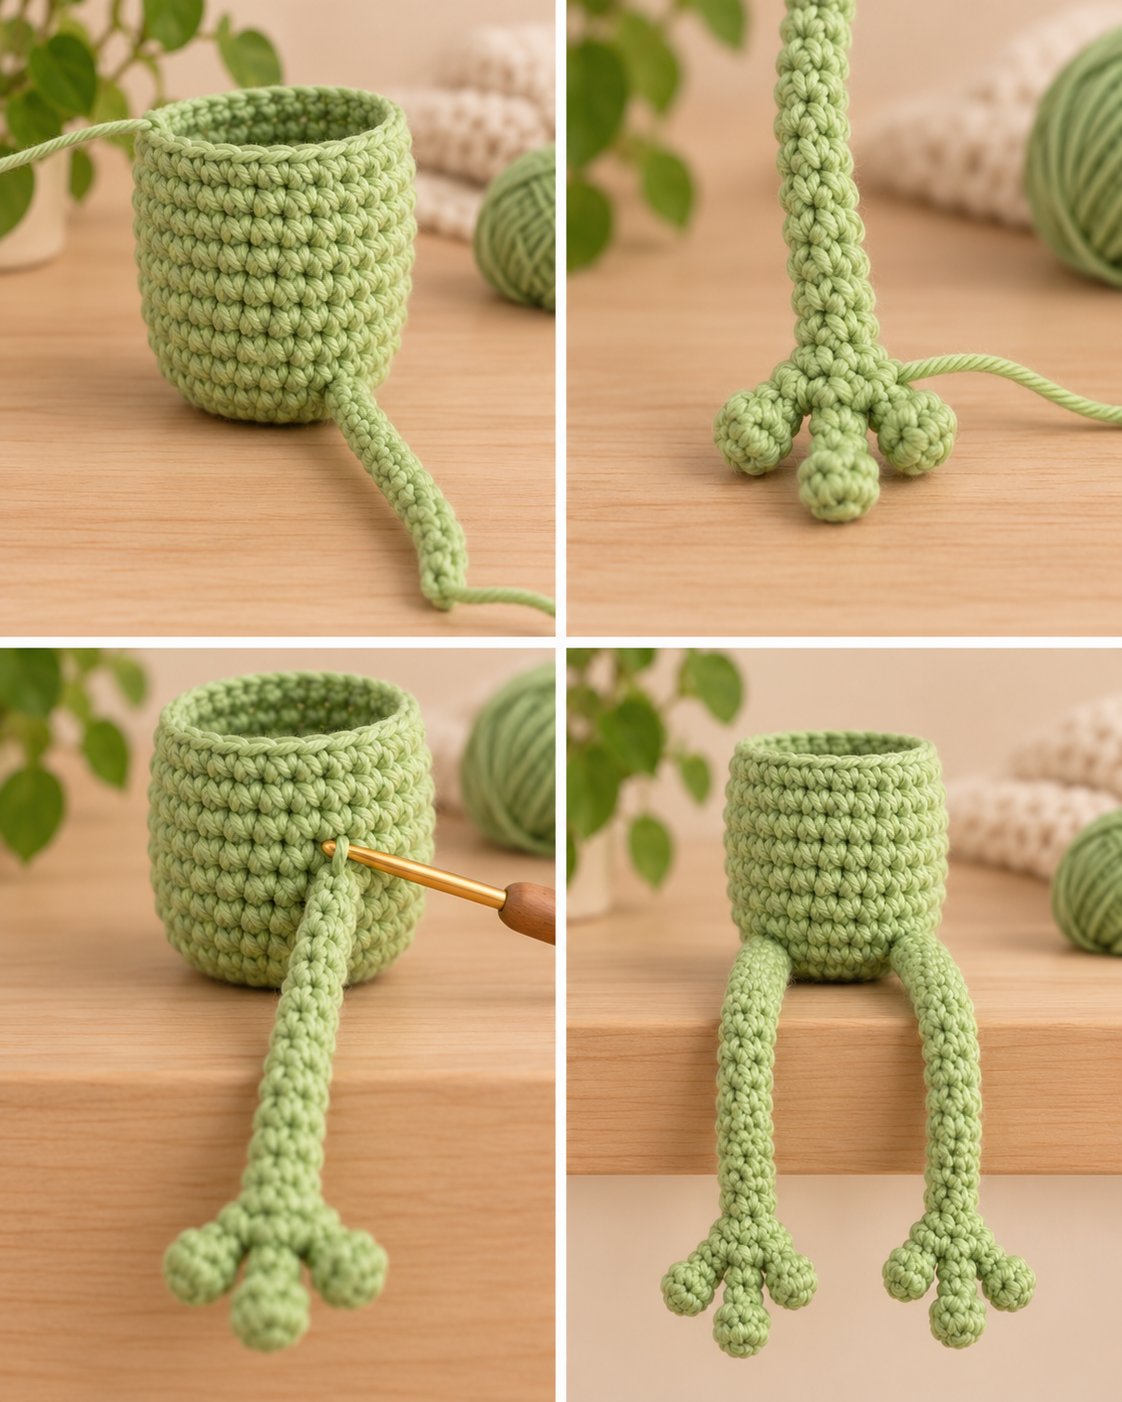
The extra-long legs are the feature that gives this frog its distinctive leggy silhouette. Crochet both legs before continuing the next body round.
Long Legs — Make 2
FO after R14. Do not close or stuff the top of the leg. Tuck the yarn tail inside.
Repeat for the second leg and make both legs as similar in length as possible.
Join the Legs — Body R5
Flatten the open top of each leg so its 6 stitches form three pairs. Each leg will be joined over three body stitches.
To join a leg, insert the hook through both layers of the flattened leg opening and through the next body stitch. Work one sc through all layers. Repeat across the three paired leg stitches.
Each joined sc replaces one normal body stitch, so the body stitch count remains 24.
No sewing: The legs are attached with the crochet hook while the body is being worked. No yarn needle is used to attach them.
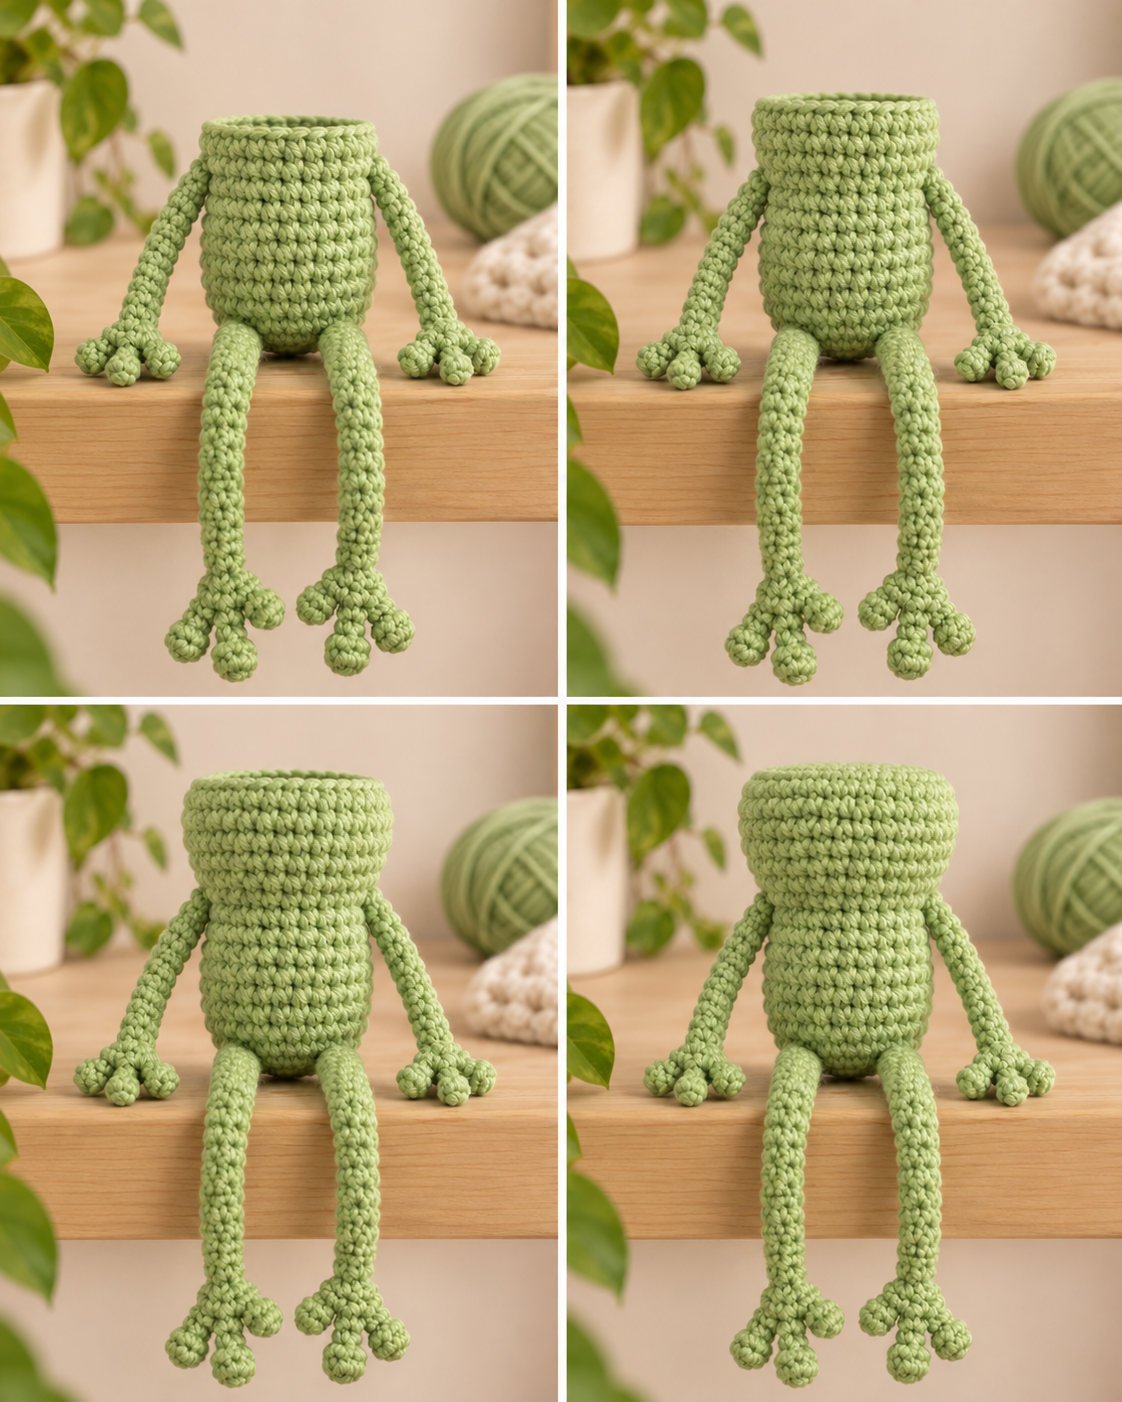
Step 3: Build the Lower Body
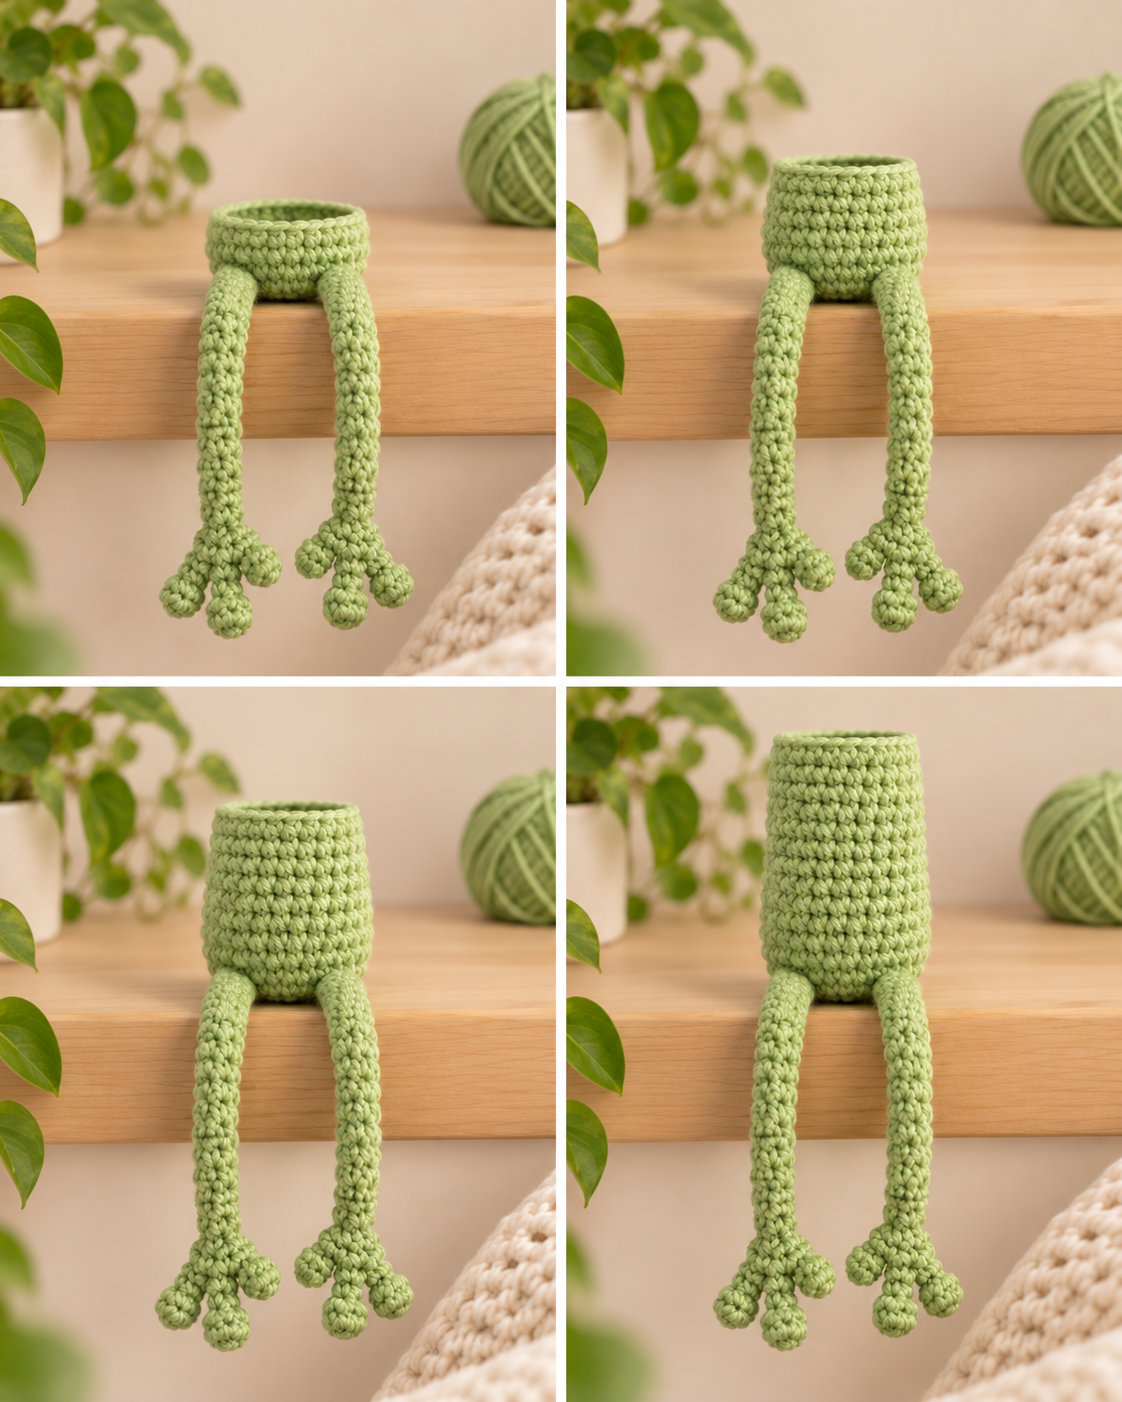
Continue upward without changing the stitch count. These straight rounds create the narrow central torso while the long legs hang freely below.
Keep the legs outside the body as you work. Do not trap them inside the rounds and do not add stuffing yet.
Step 4: Make and Join the Long Arms
The arms use the same narrow tubular construction as the legs, but they are intentionally shorter.
Long Arms — Make 2
FO after R10. Leave the tops open and keep the arms unstuffed.
Join the Arms — Body R10
Flatten each arm opening exactly as you did for the legs.
Check the frog from the front before continuing. The two arms should sit on opposite sides of the torso, while the legs remain clearly longer.
Step 5: Shape the Upper Body and Head
Two straight rounds finish the torso before a simple increase round widens the upper section into the frog’s head.
The change from 24 to 30 stitches gives the head a slightly broader frog-like shape without creating a separate head piece.
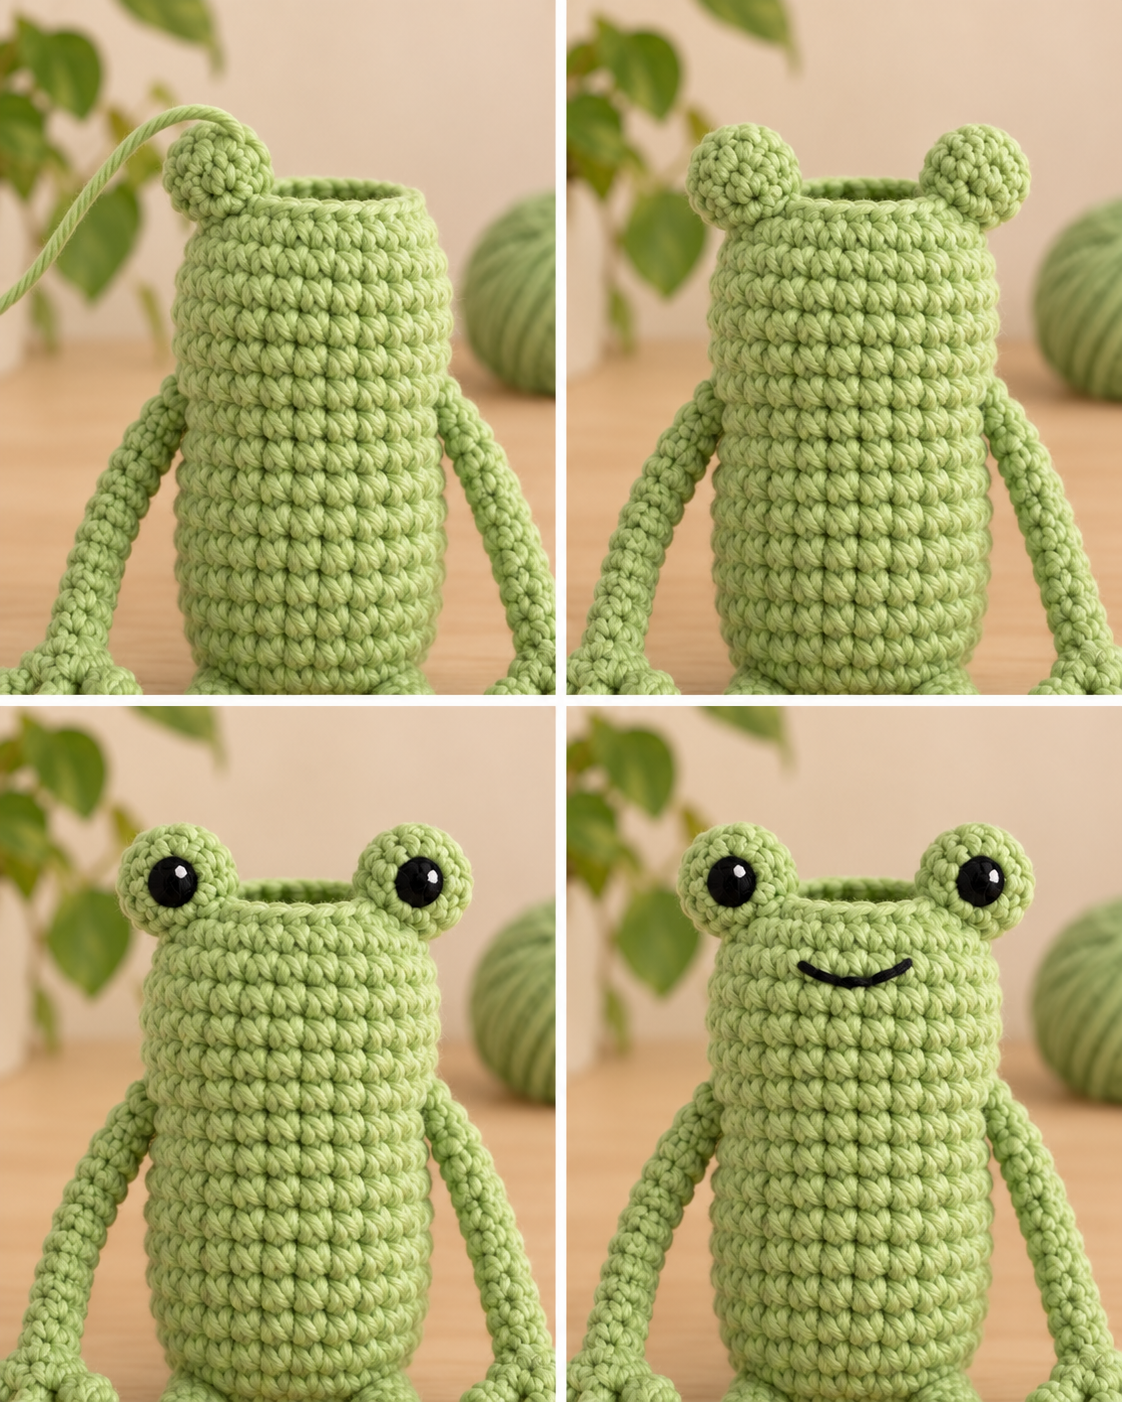
Step 6: Add the Eye Bumps and Face
The raised eye bumps are worked directly into the head, so there are no separate crochet eye pieces to attach.
Push both eye bobbles outward and check that they sit evenly across the front of the head.
Eyes
If using safety eyes, place one eye through the center area of each raised eye bump while the head is still completely open. Fit the washers securely on the inside.
If you prefer an all-yarn face, embroider a small black eye onto each bump instead.
Mouth
With black yarn, embroider a short, simple smile below the eyes. Keep the expression small so the raised eyes and long limbs remain the main features of the frog.
Secure and hide embroidery tails inside the open body before beginning the decrease rounds.
Step 7: Decrease and Stuff the Frog
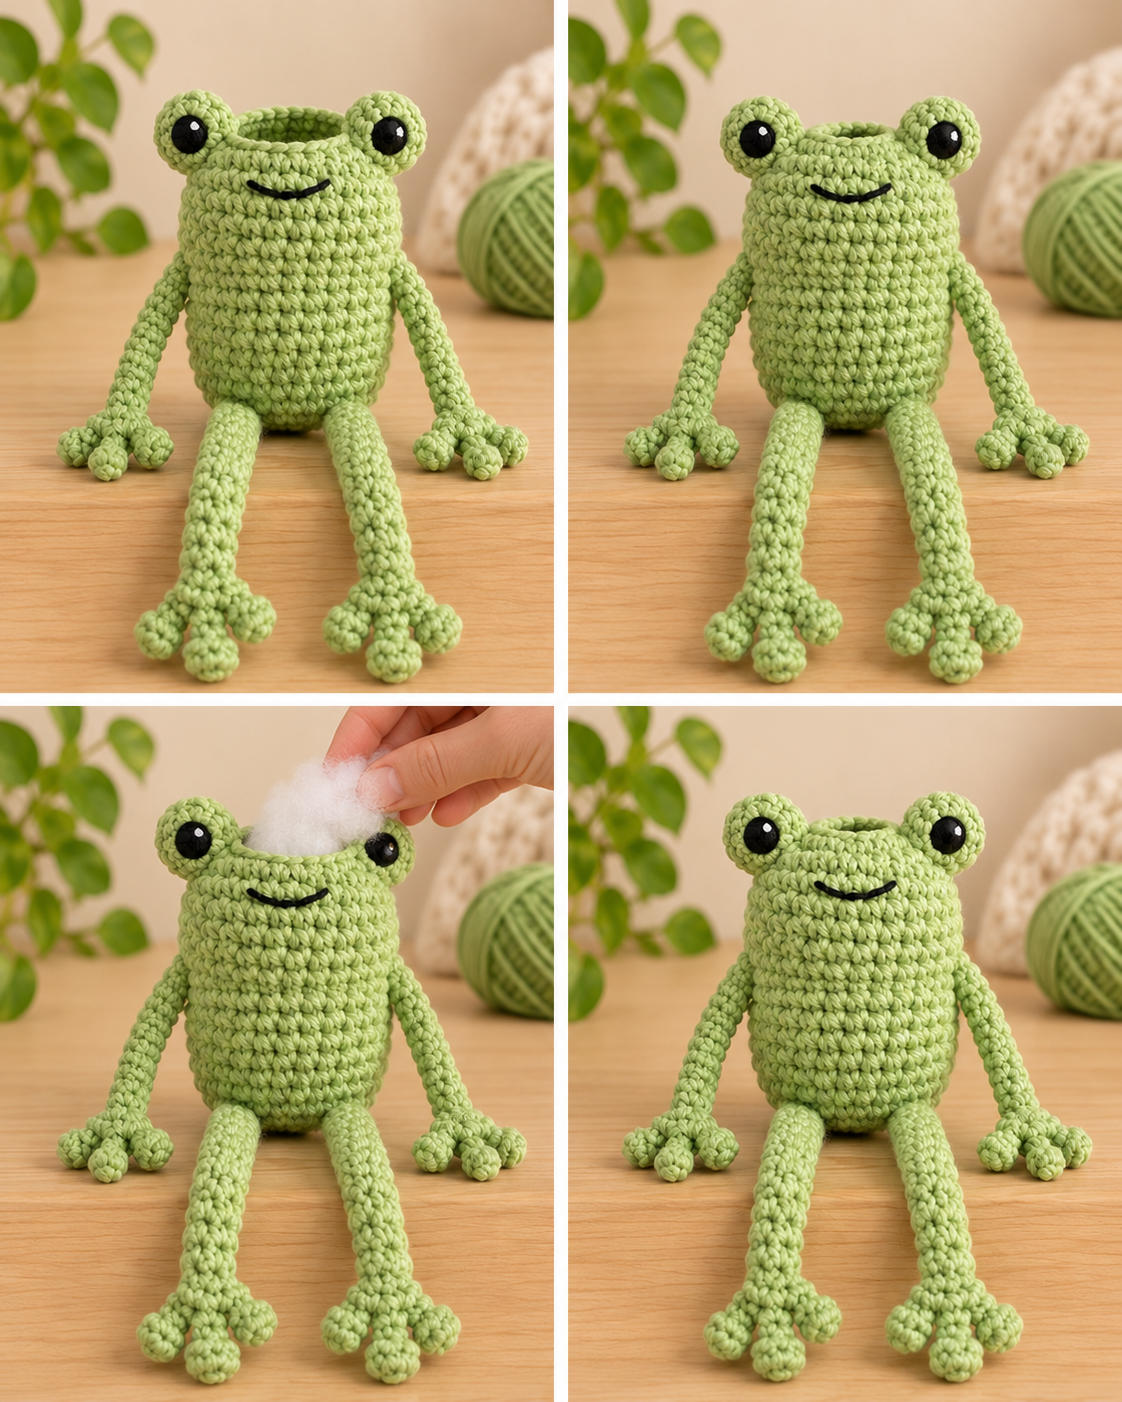
Now begin closing the top of the head. Do the main stuffing while the opening is still large enough to reach the torso comfortably.
Stuff the torso first, pushing small amounts of fiberfill toward the bottom and around the sides. Then fill the upper body and head.
Keep all four limbs unstuffed so they stay flexible and floppy.
Avoid packing stuffing too tightly behind the eye bumps. A gentler fill helps preserve their raised shape.
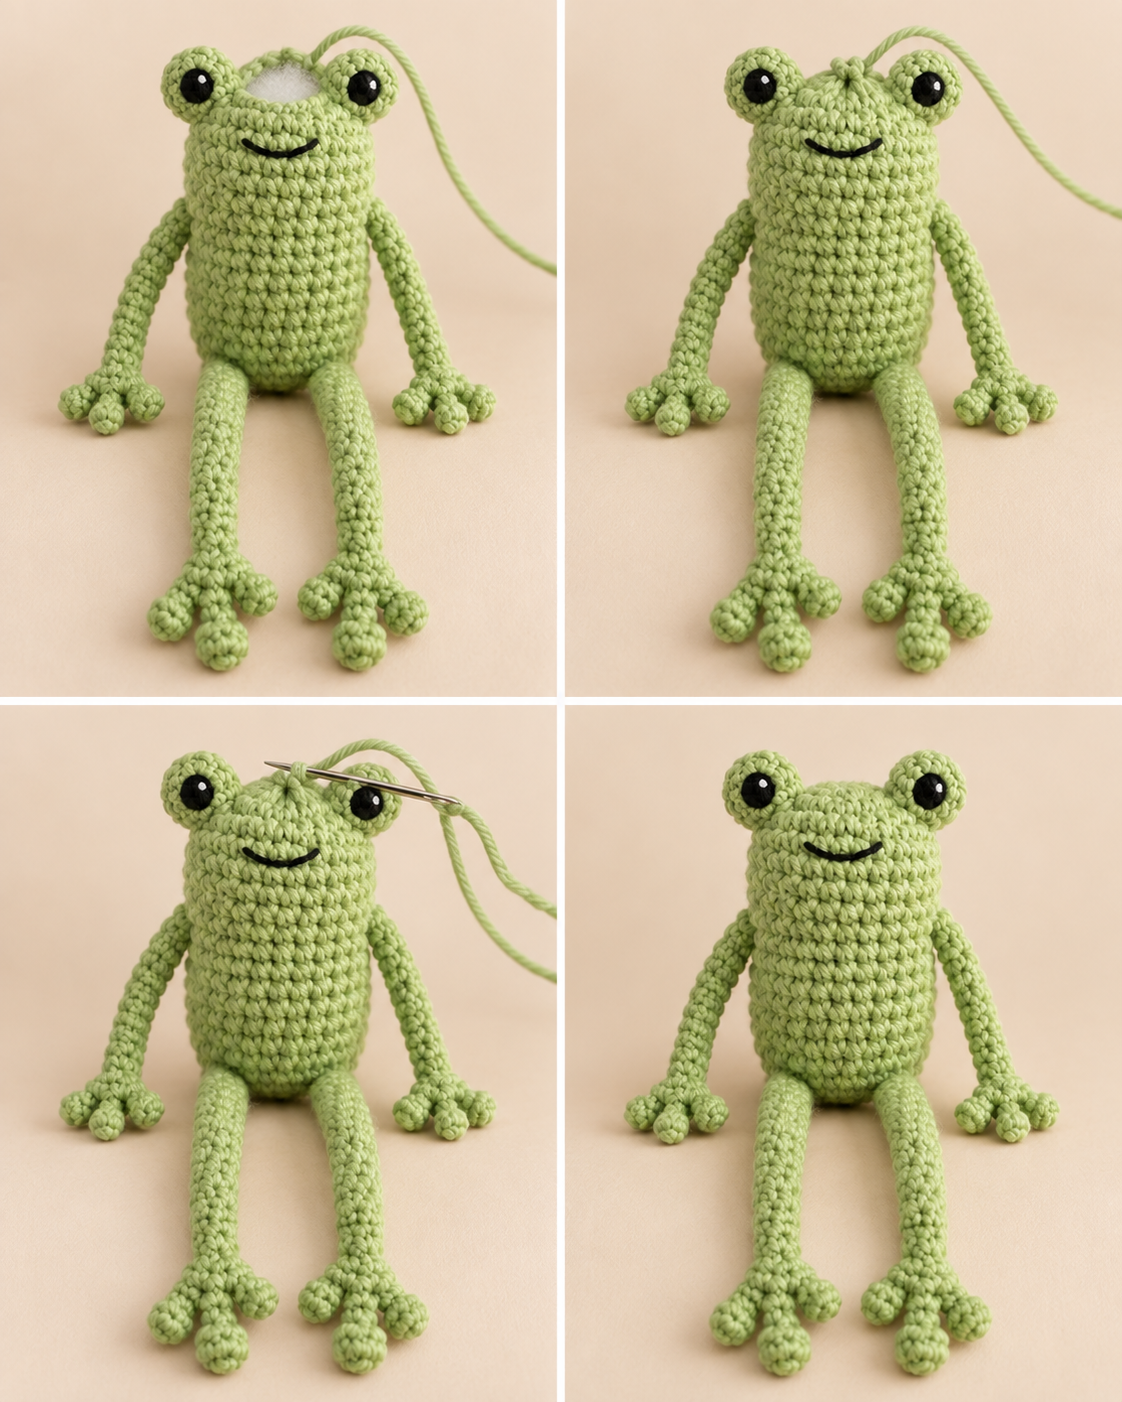
Step 8: Finish the Final Closure
Complete the final decrease rounds after the frog has been stuffed to your liking.
Add a small final amount of stuffing before R21 if needed.
FO, leaving enough yarn to close the opening. Thread the tail through the front loops of the final 6 stitches, pull gently until the hole closes, then secure and weave the end into the body.
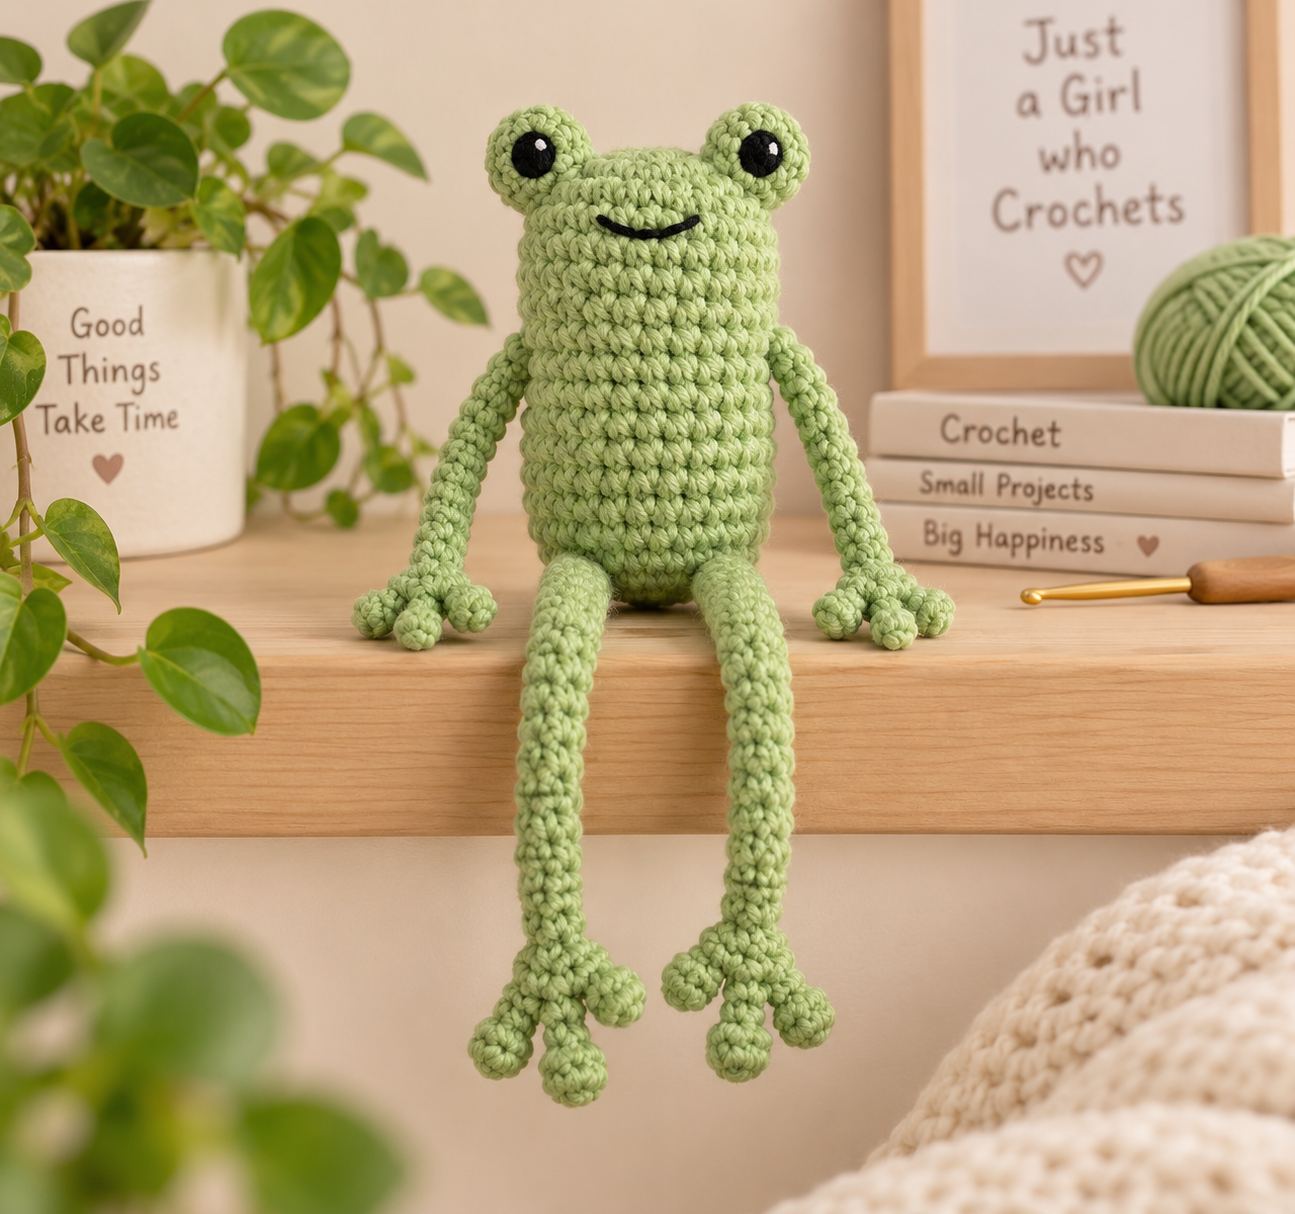
No Sew Leggy Frog Crochet Pattern Free: Finished Result
Your frog should now have a softly rounded green body, a slightly wider head, two raised eyes, long dangling legs, shorter floppy arms, and small three-bump frog hands and feet.
Because the limbs were crocheted directly into the project with the hook, you never have to sew four separate amigurumi limbs onto the body.
What Does “No-Sew” Mean Here?
This pattern does not require sewing separate crochet body parts together. The legs and arms are joined with single crochet stitches as you work the body, the head is continuous with the torso, and the eye bumps are crocheted directly into the head.
You may still use a yarn needle for the embroidered mouth, embroidered eyes if chosen, the final closure, and weaving in yarn ends.
Tips for a Neater Leggy Frog
Keep the limbs loose and floppy. Do not stuff the arms or legs.
Match the pairs. Count the rounds carefully when making the second leg and second arm so each pair finishes at the same length.
Check the limb direction before moving on. After joining each pair, view the frog from the front and make sure the limbs are sitting where you want them before completing several more rounds.
Do not use the photos as stitch-count evidence. The images illustrate the intended construction and shape; the written pattern is the technical source of truth.
No-Sew Leggy Frog Crochet Pattern FAQ
Is this leggy frog really no-sew?
Yes in the amigurumi construction sense. The arms and legs are attached with your crochet hook while working the body instead of being sewn on later. A yarn needle may still be used for facial embroidery, the final closure, and weaving in ends.
Are the long arms and legs stuffed?
No. Leave all four limbs unstuffed. Their narrow hollow construction is what allows them to hang and move freely.
Can I embroider the eyes instead of using safety eyes?
Yes. Embroidered eyes are a good alternative and are recommended instead of plastic safety eyes when the finished project is intended for babies or very young children.
What yarn works best for this frog?
The working draft uses medium or worsted-weight yarn with a provisional 3.5 mm hook. A smooth yarn is especially useful for this photo tutorial because the stitches and narrow limb construction remain easy to see.
Can I make the legs shorter?
You can experiment with fewer straight rounds in each leg, but that modification has not been physically tested. Make the same change to both legs so they remain matched.
Why is there no finished size listed?
This is an original working draft that has not yet been physically tested, so an exact finished measurement would not be responsible to claim. Final size will also vary with yarn, hook size, tension, and stuffing.