
Free Mini Bat Crochet Pattern — Easy Halloween Amigurumi
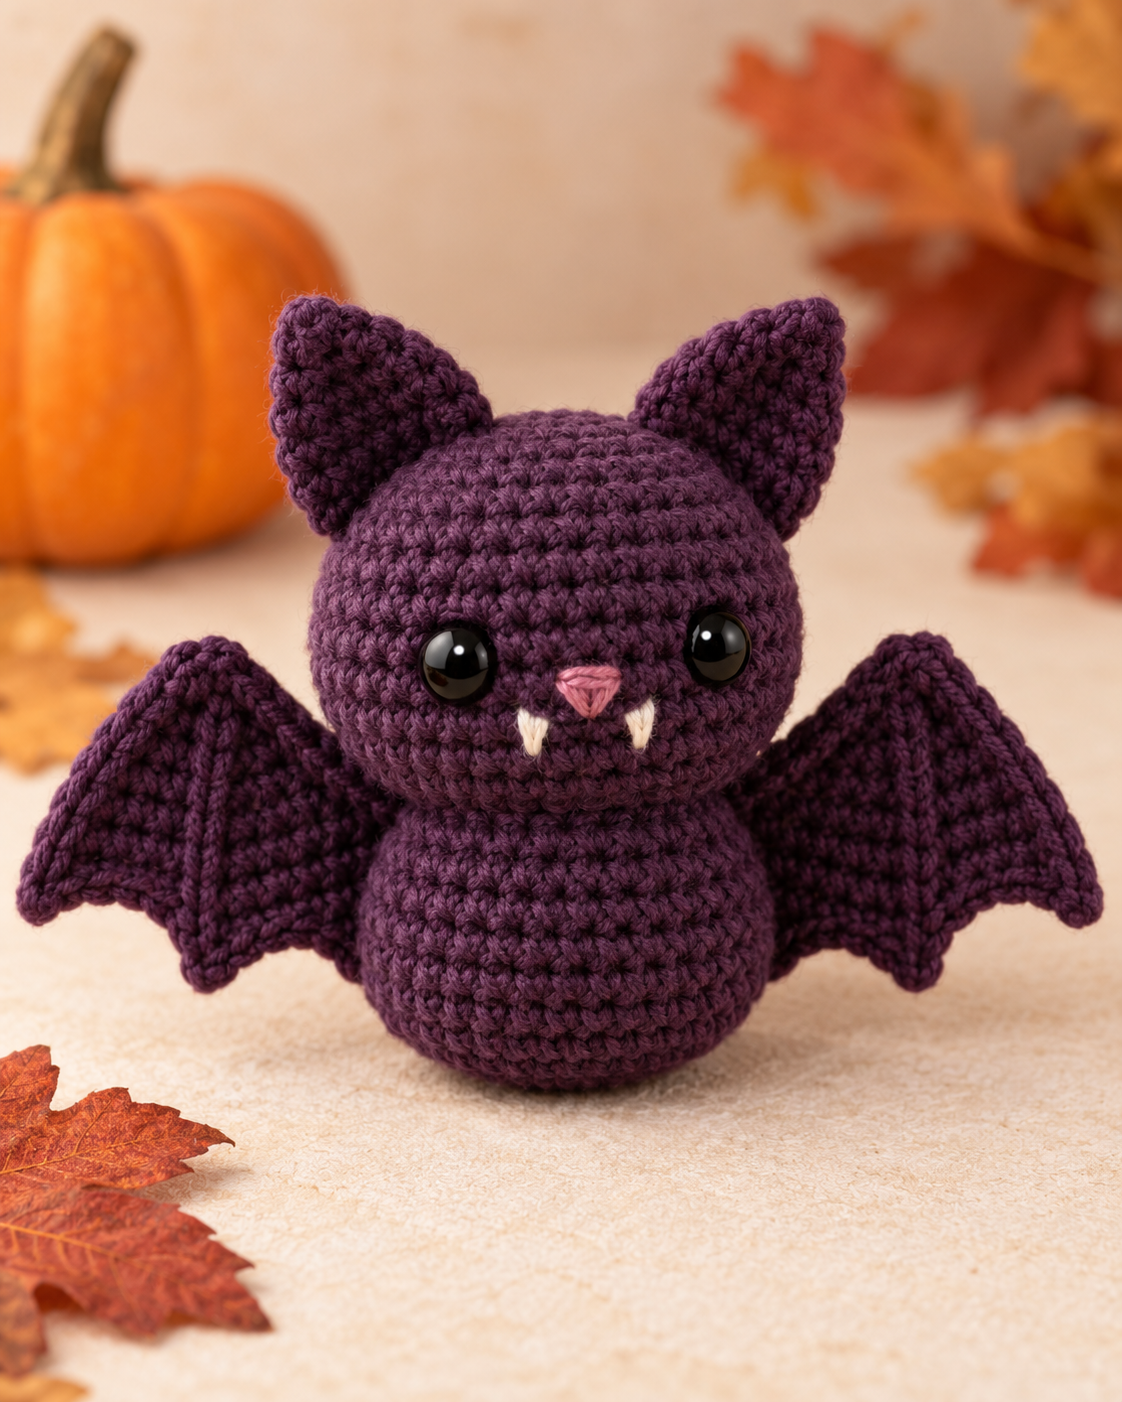
This free mini bat crochet pattern makes a compact spooky-cute amigurumi with a one-piece head and body, simple flat ears, stepped wings, glossy eyes, and two tiny embroidered fangs.
The construction uses basic amigurumi shaping plus straightforward sewing, making it a good easy project for a confident beginner who is comfortable with a magic ring, single crochet, increases, decreases, and joining small pieces.
This mini bat crochet pattern keeps the construction compact, with a continuous head and body plus simple flat ears and wings.
Pattern note: This original pattern is a working draft and has not yet been physically tested. The images are visual guides for the intended construction, so please follow the written stitch counts and instructions.
Jump to the pattern
Materials
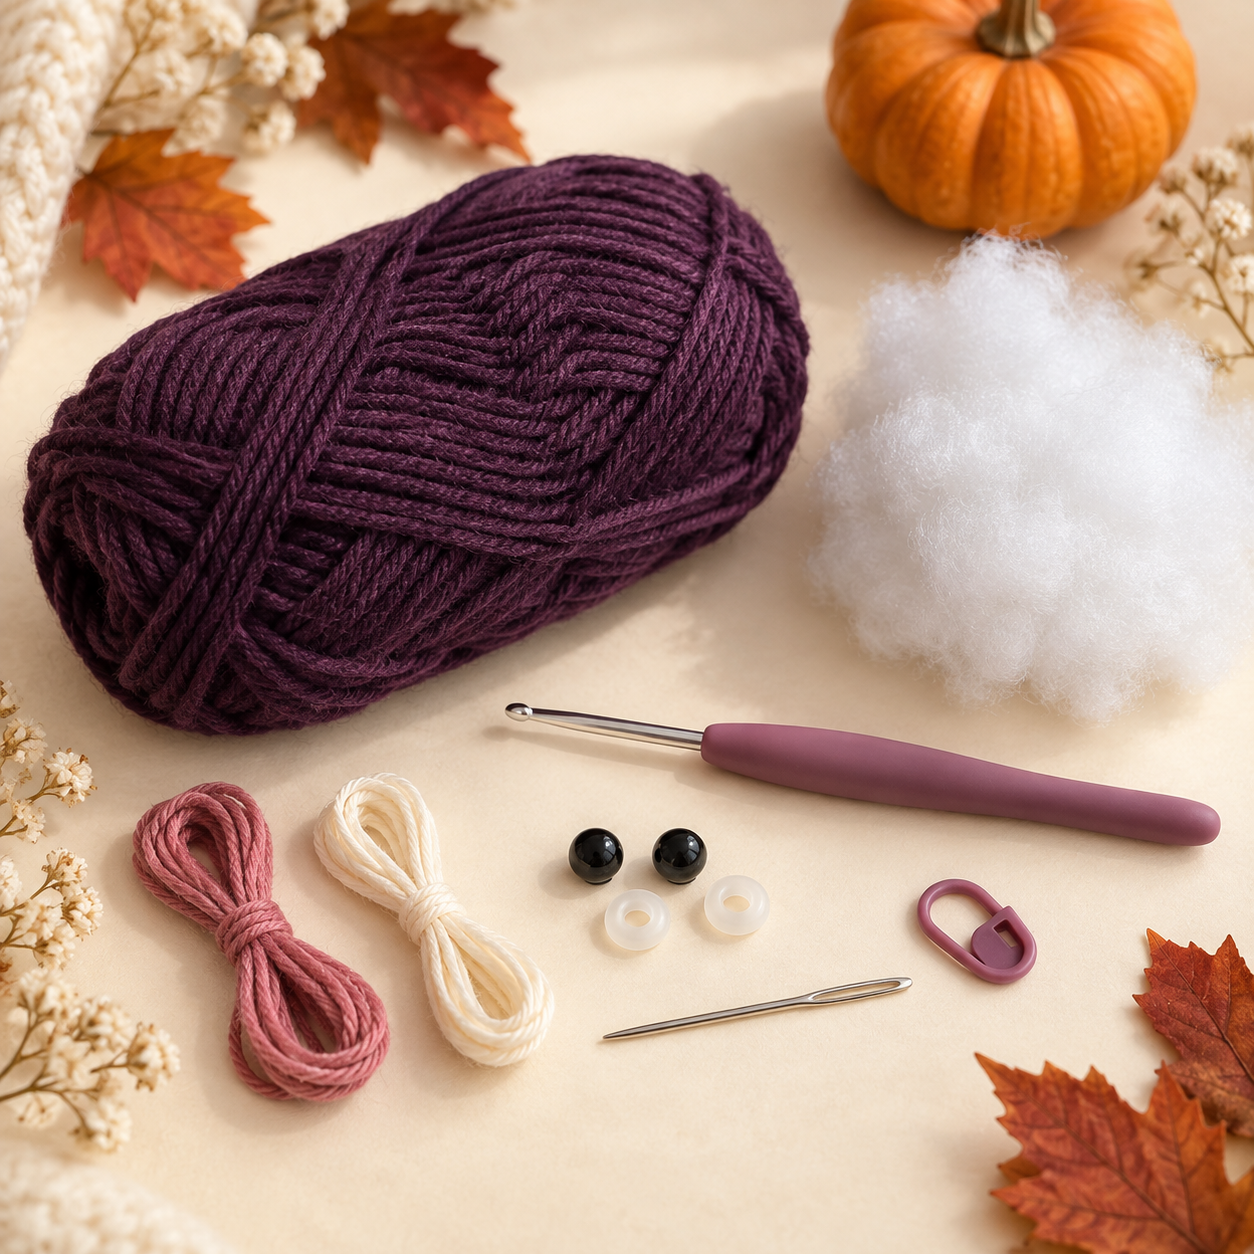
- DK/light worsted smooth yarn in deep plum or aubergine
- 2.5 mm crochet hook
- Two 7 mm black safety eyes
- Polyester fiberfill
- Tapestry needle
- Stitch marker
- Small amount of dusty-rose embroidery floss for the nose
- Small amount of ivory embroidery floss for two tiny fangs
Safety: Plastic safety eyes can be a choking hazard. For babies or very young children, use securely embroidered eyes instead.
Abbreviations
| Abbreviation | Meaning |
|---|---|
| MR | magic ring |
| ch | chain |
| sc | single crochet |
| inc | 2 sc in the same stitch |
| dec | invisible decrease |
| sl st | slip stitch |
| st/sts | stitch/stitches |
| FO | fasten off |
These instructions use standard US crochet terminology. If you want a quick reference, see the Craft Yarn Council crochet abbreviations list.
Work the main piece in continuous spirals. Use a stitch marker to mark the first stitch of each round. Eye placement and sewn-piece placement are provisional because this draft has not yet been physically tested.
Head and body
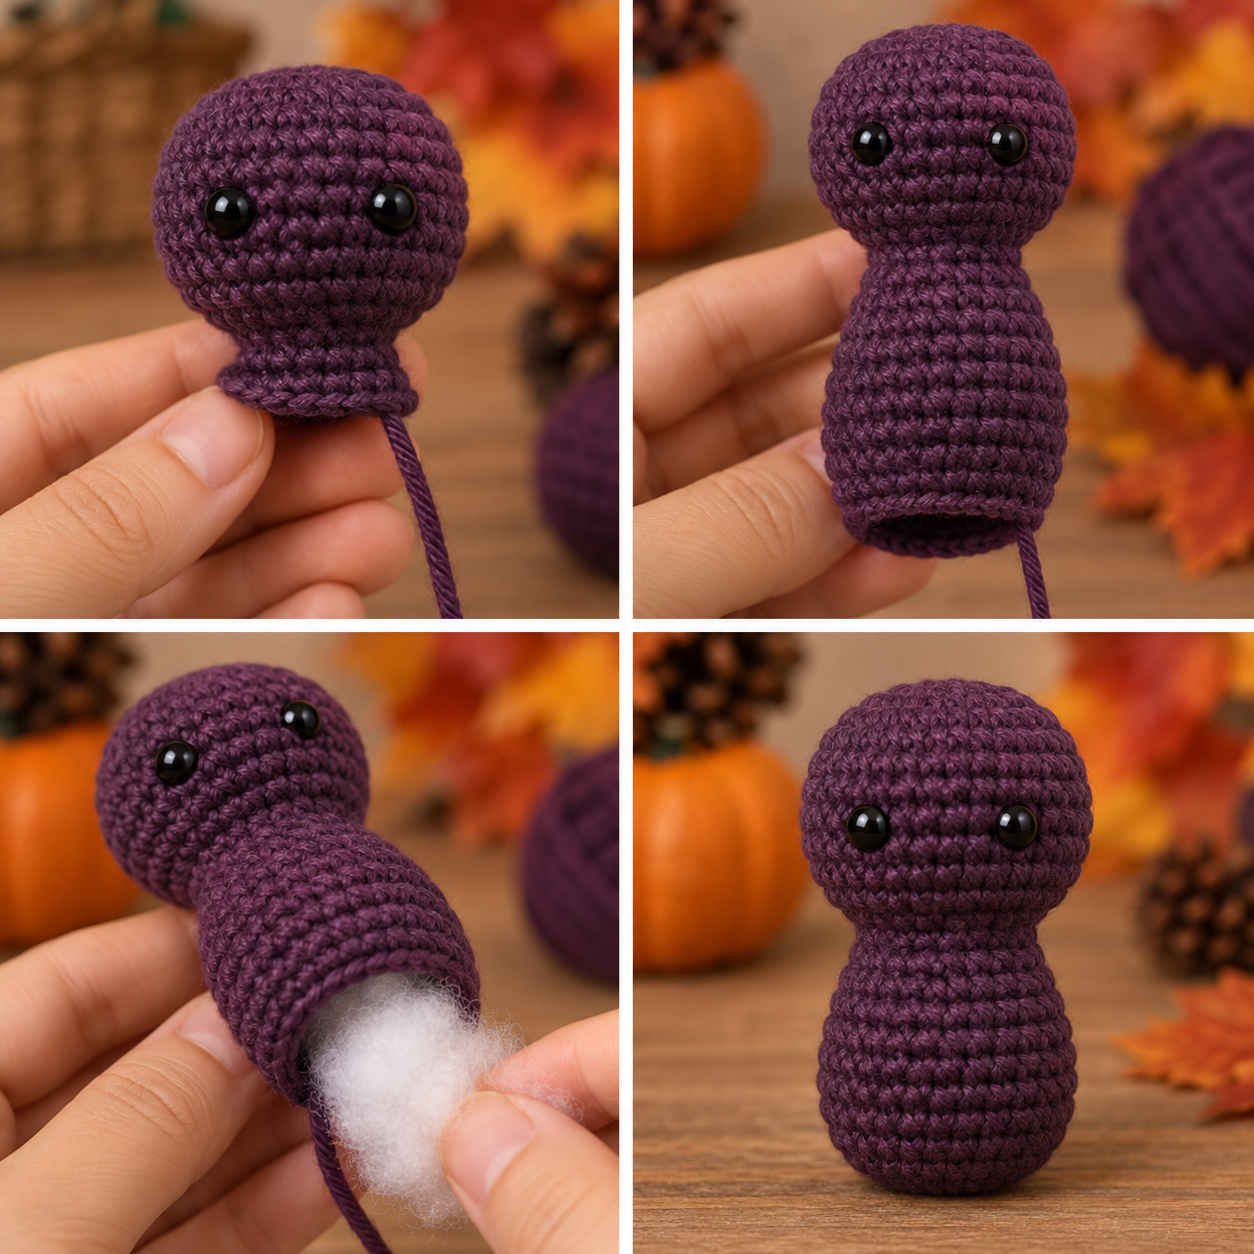
The head and body are worked as one continuous stuffed piece. The head grows first, narrows into a small neck, and then expands again for the body.
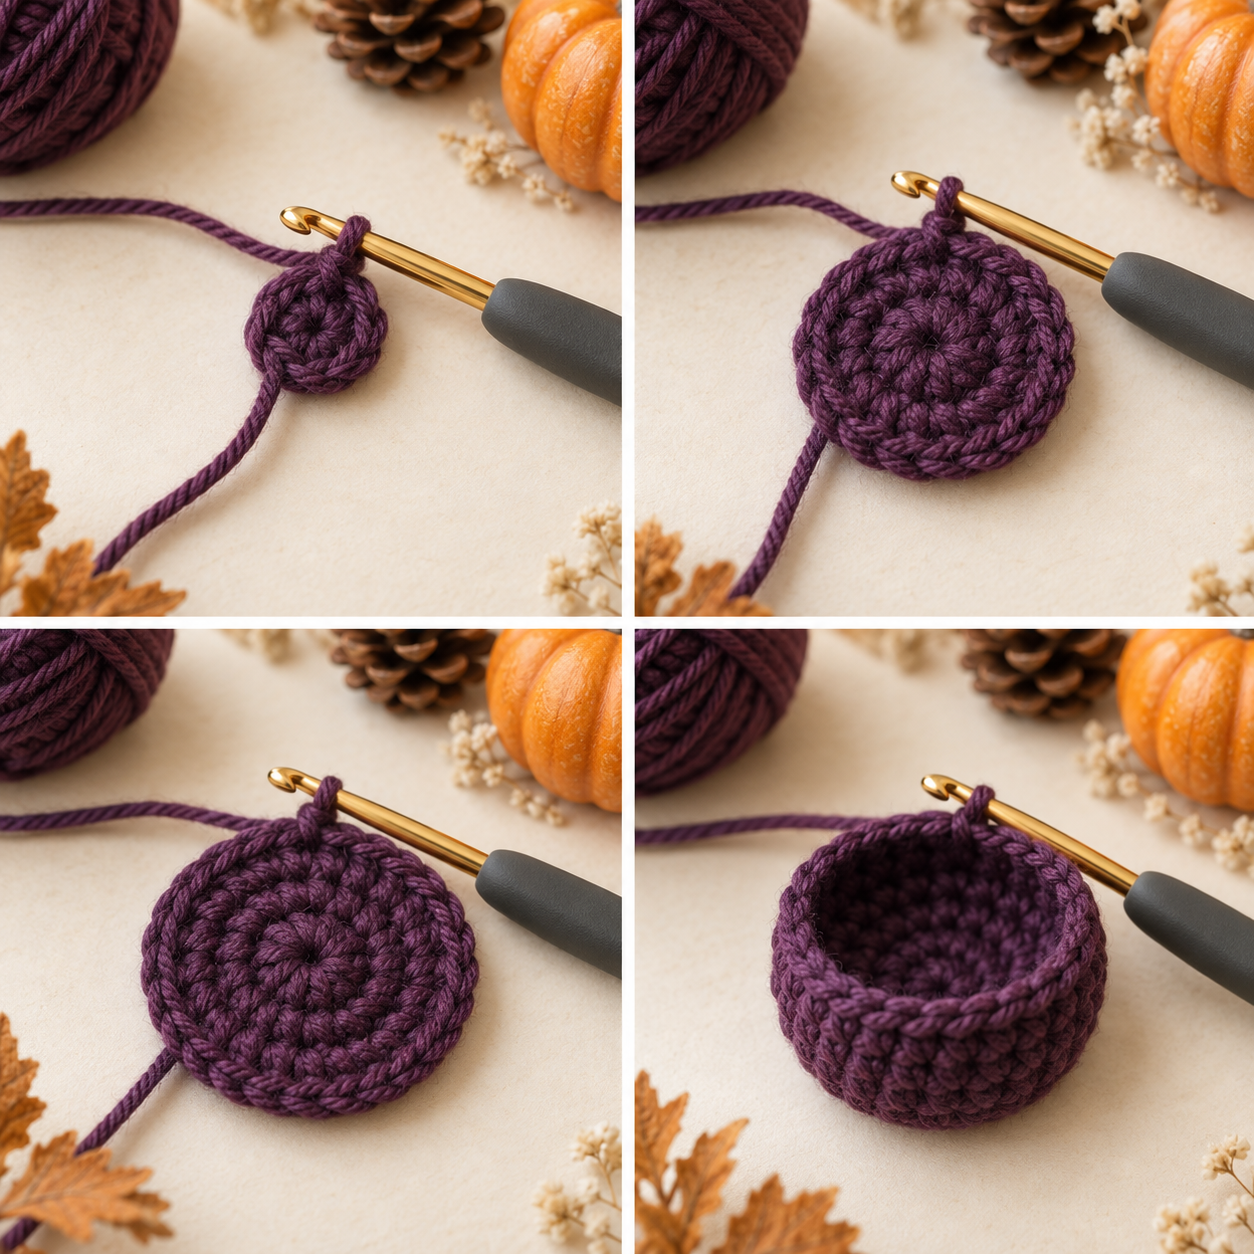
Place the safety eyes between R6 and R7, centered on the front and provisionally about 6 stitches apart. Check that they look balanced before installing the washers.
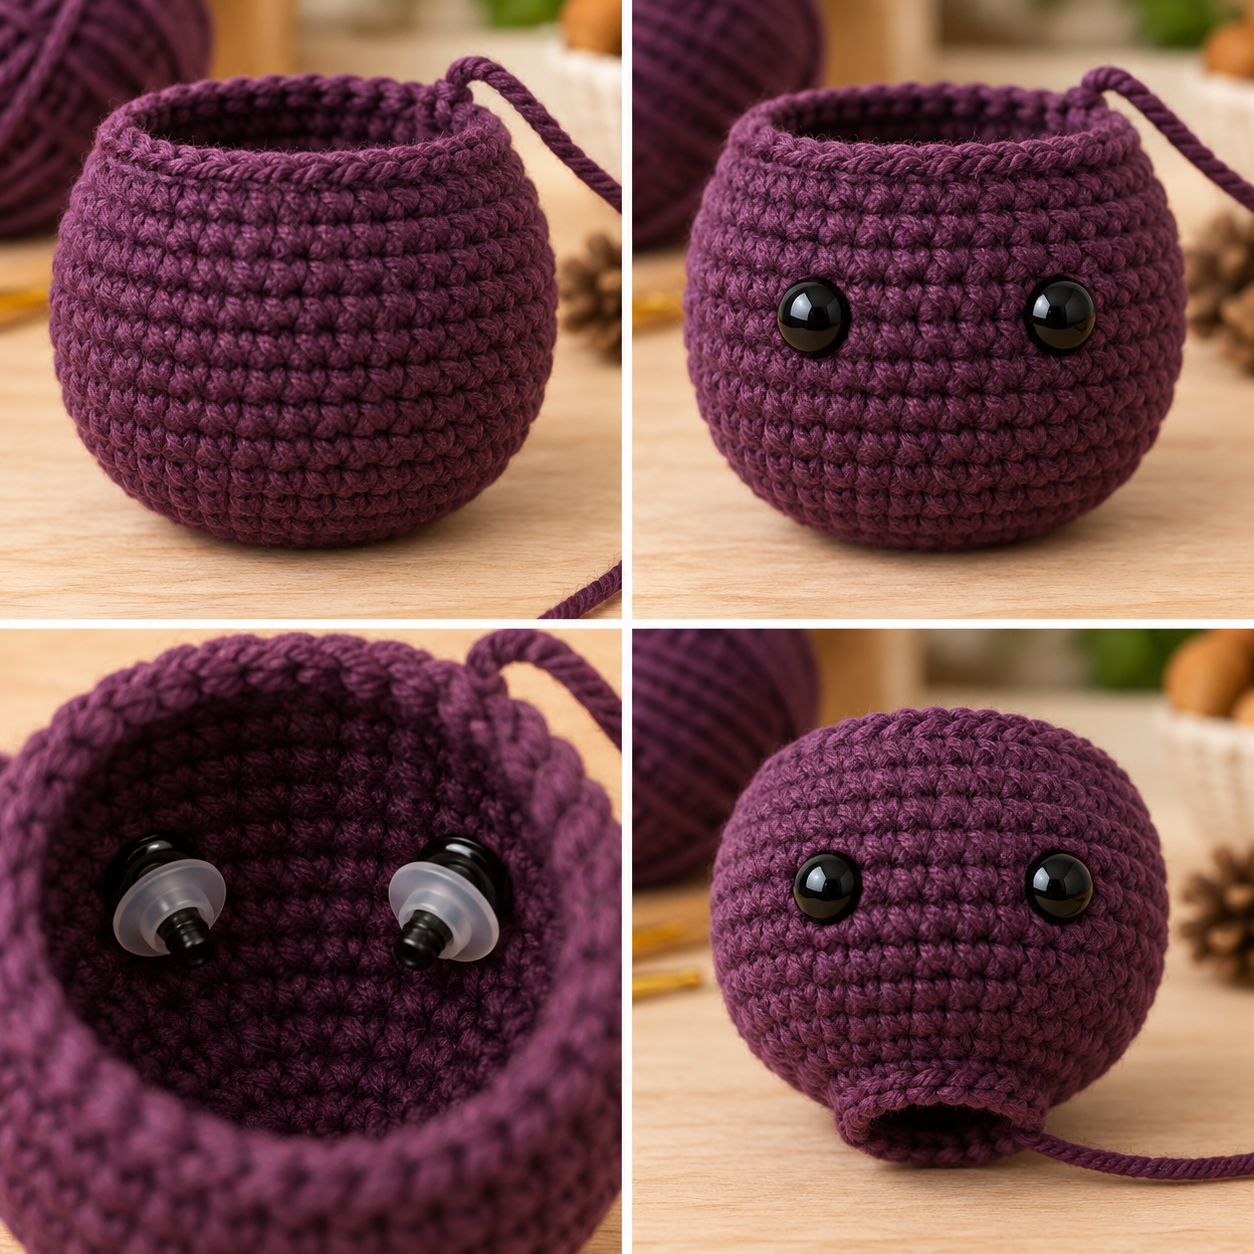
Install the safety-eye washers now while inside access is still open.
Stuff the head and body gradually. Keep the shape rounded without packing it so firmly that the stitches stretch.
Ears — make 2
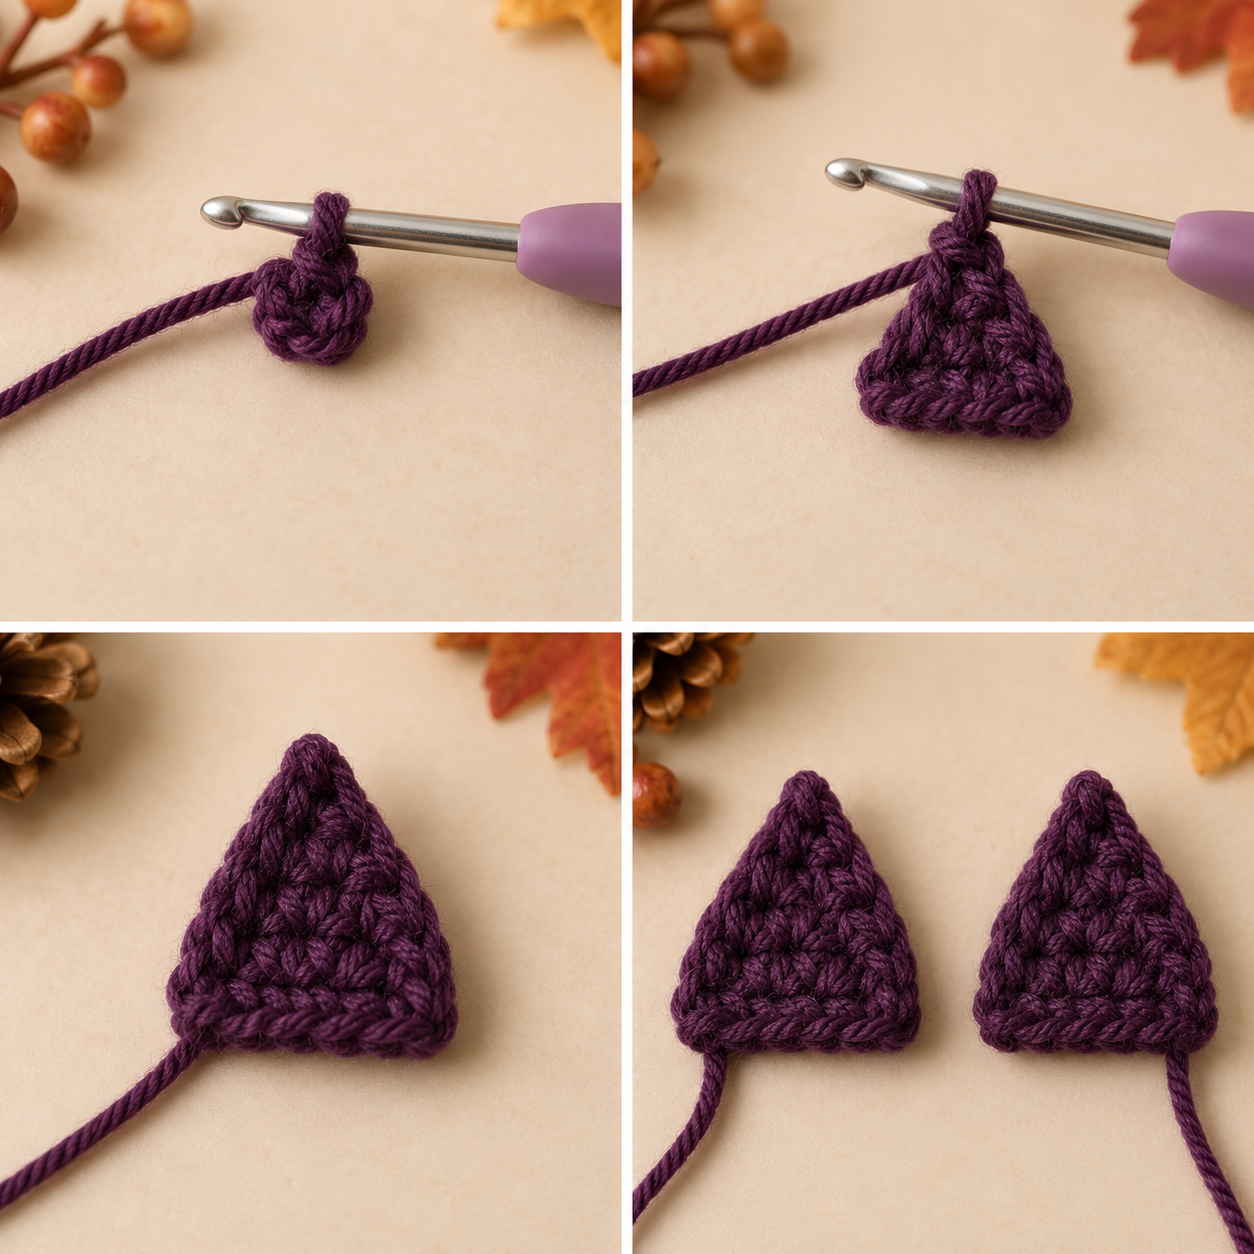
Keep the ears flat and unstuffed.
Wings — make 2
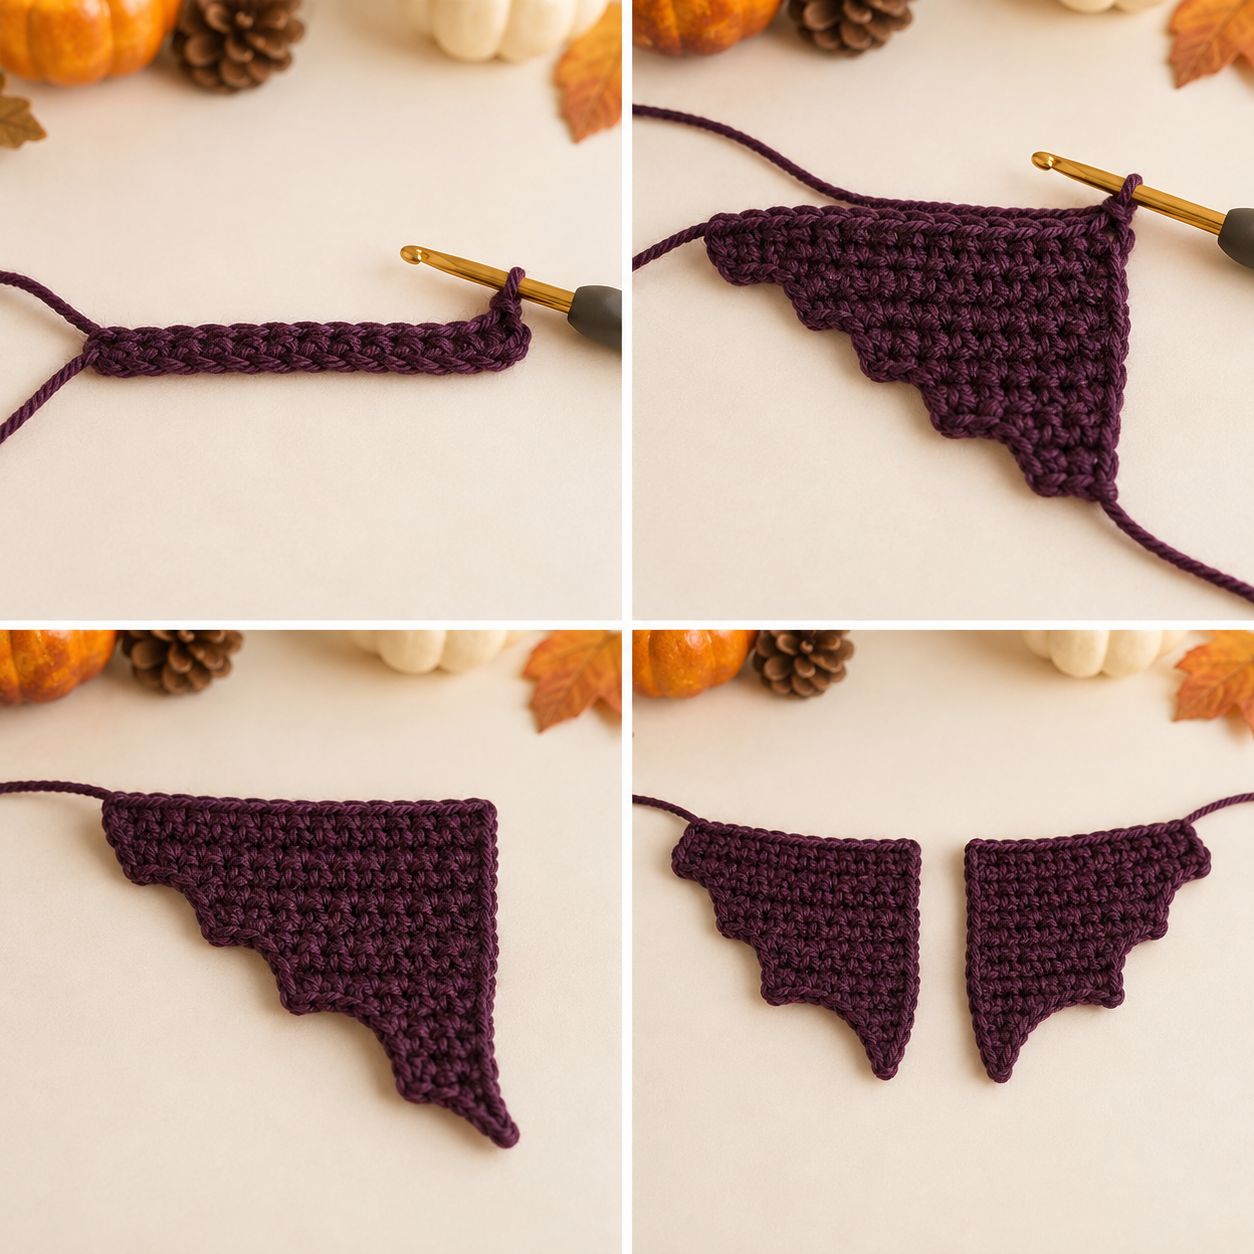
The wings are flat. Their long straight edge is sewn to the body, while the stepped edge remains free to create the bat-wing outline. Make both pieces the same and flip one during assembly so they mirror each other.
Assembly and face
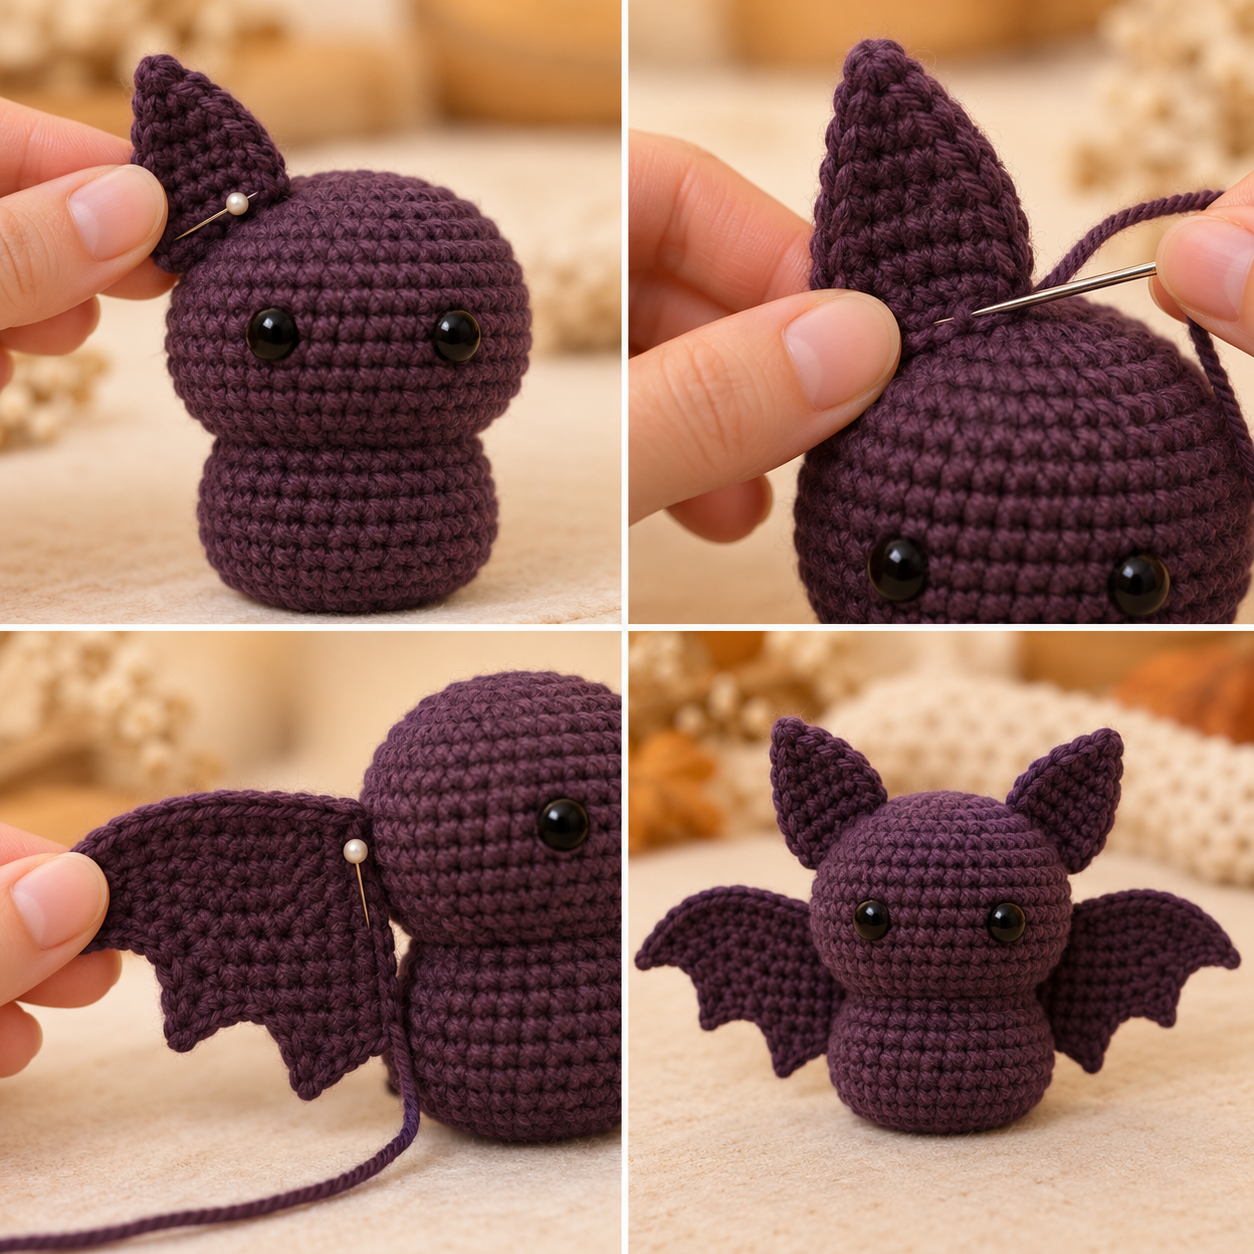
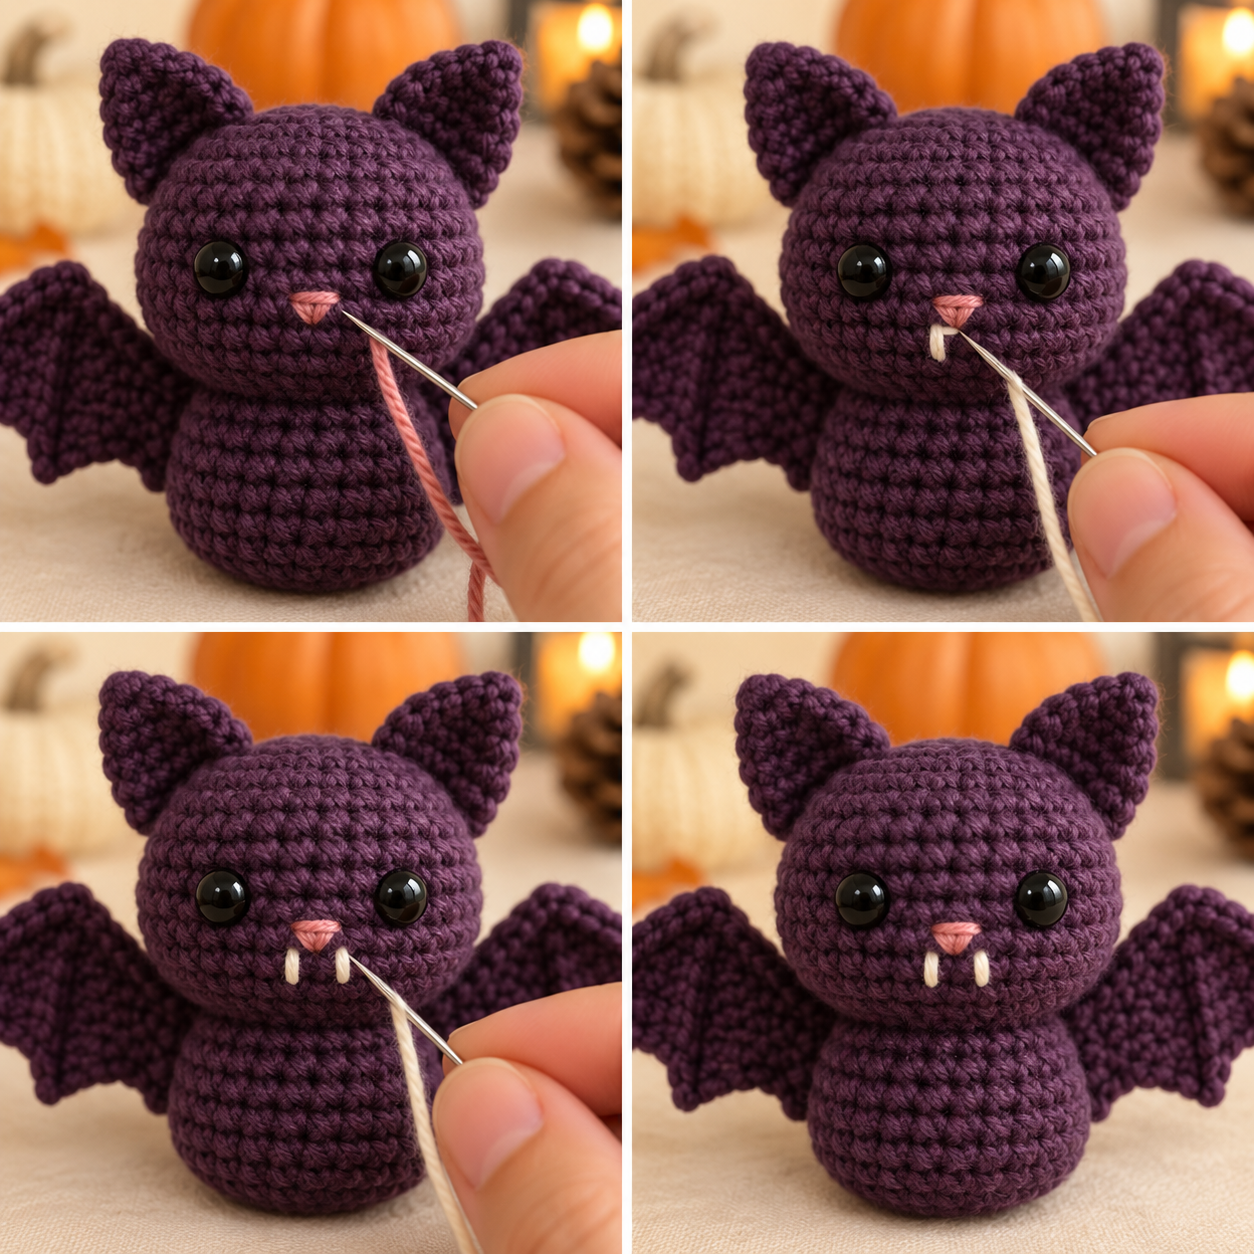
Tips for a neat mini bat
Keep the wings flat. They are not stuffed. Light blocking with your fingers can help the stepped outline read more clearly before sewing.
Check symmetry before sewing. Pin both ears and both wings first, view the bat from the front, and adjust placement before making permanent stitches.
Do not overstuff the neck. A little definition between the wider head and smaller body helps the bat keep its compact character shape.
Mini bat crochet pattern FAQ
Is this mini bat crochet pattern no-sew?
No. The head and body are one continuous piece, but the two ears and two wings are crocheted separately and sewn on.
Is this mini bat crochet pattern suitable for beginners?
The pattern uses basic amigurumi stitches and simple flat pieces, so it is positioned as easy for a confident beginner. You should already be comfortable with a magic ring, single crochet, increasing, decreasing, and basic sewing.
How big is the finished bat?
The design is intentionally compact, but the exact finished measurement has not been physically verified yet. Yarn weight, hook size, and tension will also change the final size.
Can I use embroidered eyes instead of safety eyes?
Yes. Embroidered eyes are the safer choice for babies and very young children. If you choose them, place the embroidery where the safety eyes would normally sit.
Can I use plush yarn?
You can experiment with a thicker yarn and a suitable hook, but the pattern was drafted around smooth DK/light worsted yarn and has not been physically tested in plush yarn. Expect the finished size and proportions to change.