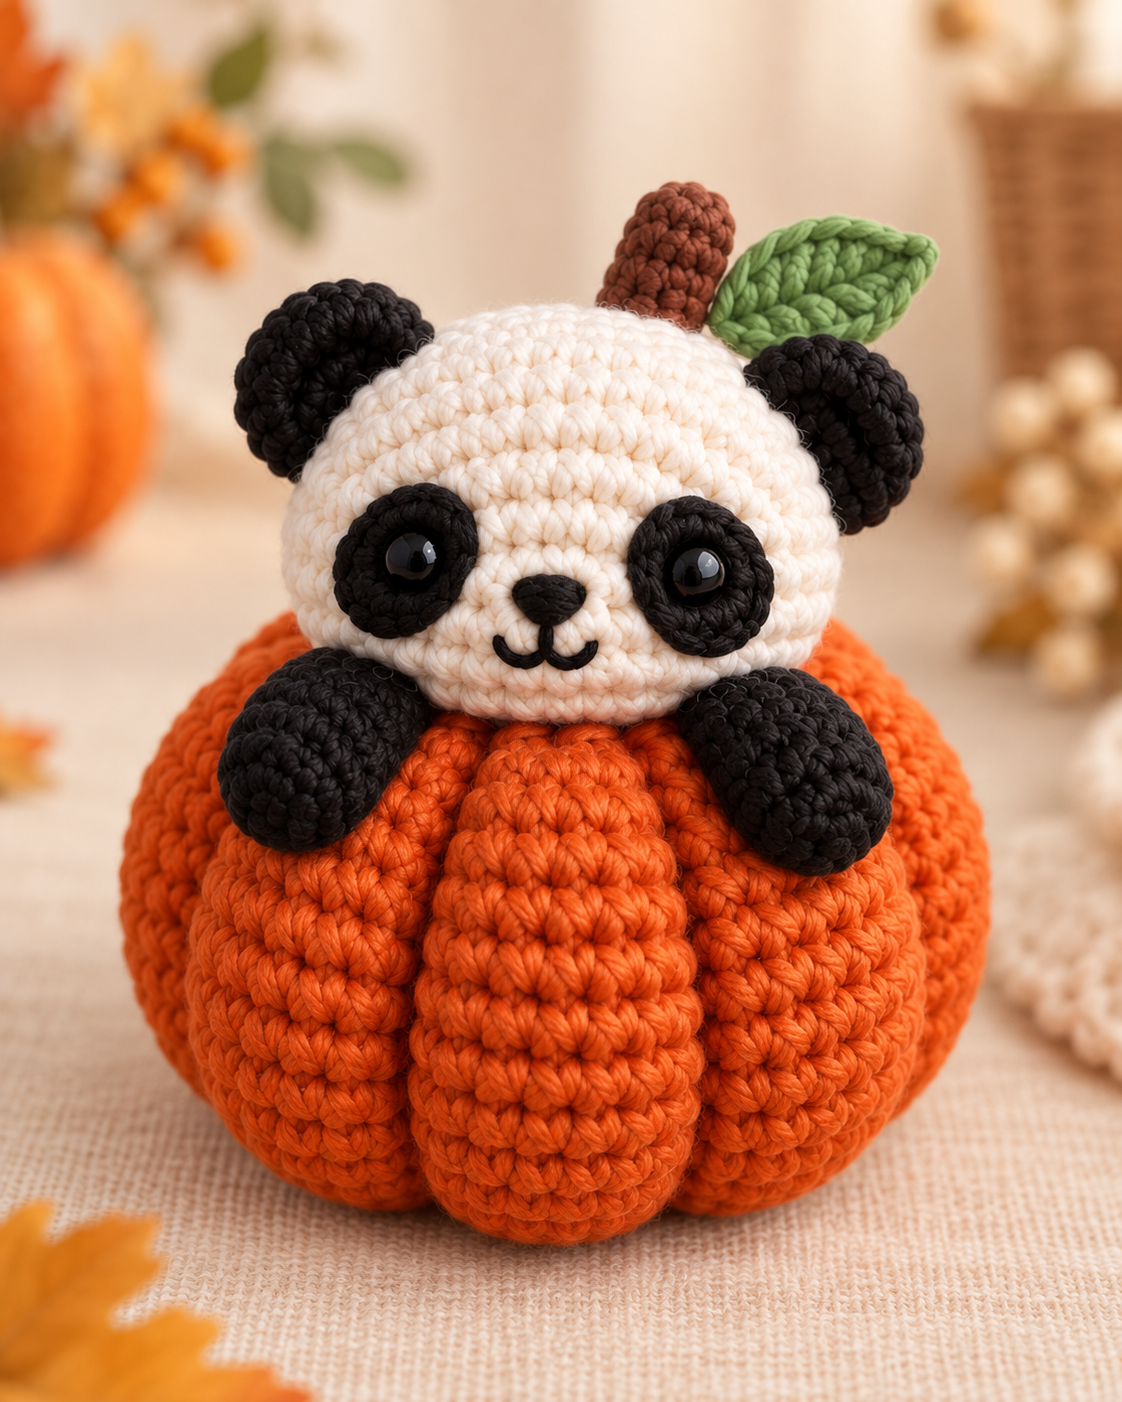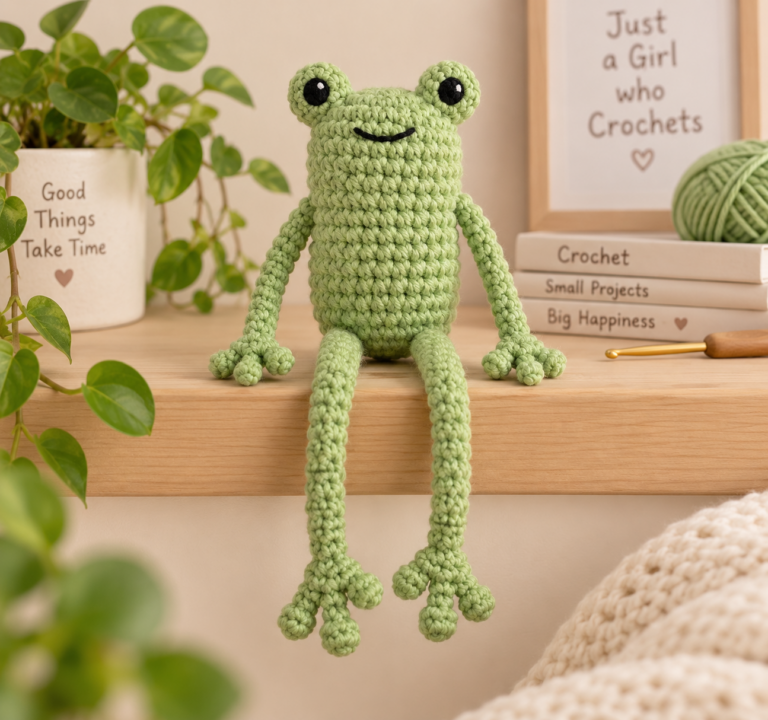

This free pumpkin panda crochet pattern combines a classic black-and-white panda with a round, ribbed orange pumpkin for a cute fall amigurumi project. The panda peeks over the pumpkin with its paws resting at the front, while a small brown stem and green leaf finish the seasonal look.
The pumpkin is crocheted as one stuffed shape and sculpted afterward to create six rounded ribs. The panda head, eye patches, ears, arms, stem, and leaf are made separately and assembled step by step.
If you already feel comfortable with single crochet, increases, decreases, working around a foundation chain, basic embroidery, stuffing, and sewing amigurumi pieces together, this project is designed as an advanced-beginner pattern.
Pattern status: This original pattern is a working draft and has not been physically tested. AI-generated tutorial images illustrate the intended construction. Use the written stitch counts rather than counting stitches visible in the images.
Pumpkin Panda Crochet Pattern Overview
The finished design contains a stuffed orange pumpkin sculpted into six ribs, a cream panda head, two flat black eye patches, two black ears, two black arms, an embroidered nose and smile, one brown stem, and one flat green leaf.
Table of Contents
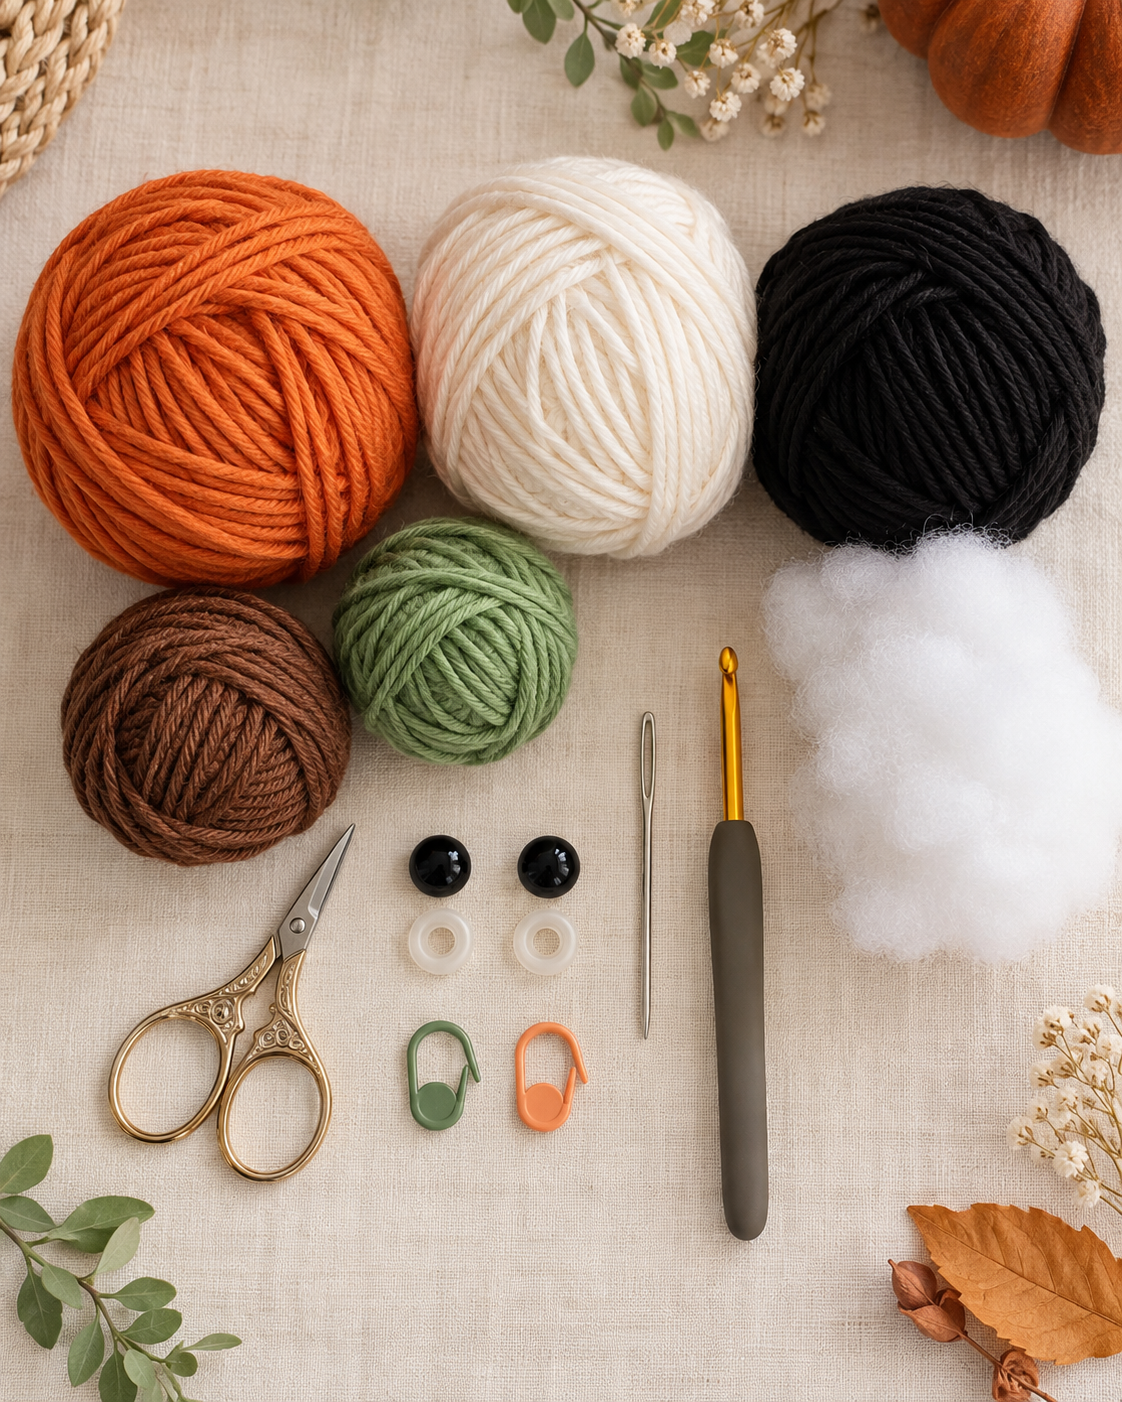
Materials
- #4 medium/worsted yarn in pumpkin orange
- #4 medium/worsted yarn in cream or warm white
- #4 medium/worsted yarn in black
- Small amount of brown yarn
- Small amount of muted green yarn
- 3.25 mm crochet hook, or a hook that creates a firm amigurumi fabric with your yarn
- Two 10–12 mm safety eyes
- Polyester fiberfill
- Tapestry needle
- Stitch marker
- Scissors
Safety note: Plastic safety eyes can be a choking hazard. For a baby or very young child, embroider the eyes instead. You can also review the CPSC small-parts safety guidance for information about choking hazards.
Crochet Abbreviations
This pattern uses standard US crochet terminology.
| Abbreviation | Meaning |
|---|---|
| MR | Magic ring |
| ch | Chain |
| sc | Single crochet |
| inc | Increase — 2 sc in the same stitch |
| dec | Invisible decrease |
| sl st | Slip stitch |
| hdc | Half double crochet |
| dc | Double crochet |
| st / sts | Stitch / stitches |
| FO | Fasten off |
Pattern Notes
- Work in continuous rounds unless the instructions say otherwise.
- Use a stitch marker to mark the first stitch of each round.
- Keep the fabric firm enough that fiberfill does not show through the stitches.
- Stuff the pumpkin firmly but keep it rounded rather than tall.
- Do not stuff the eye patches, ears, or leaf.
- The panda arms are only lightly stuffed in the rounded hand area; the upper section remains mostly unstuffed.
- Eye, ear, and arm placement is provisional because this working draft has not yet been physically tested.
- The written stitch counts are the technical source of truth if a tutorial image appears to show a different number of stitches.
Before sewing: Pin the panda head and arms to the pumpkin first and view the project directly from the front. The sculpted pumpkin ribs make useful reference points for keeping the left and right sides balanced.
Step 1: Crochet the Pumpkin Body
Use pumpkin-orange yarn. The pumpkin begins as a simple round amigurumi shape. The ribs are added later with sculpting yarn, so do not try to crochet separate pumpkin sections.
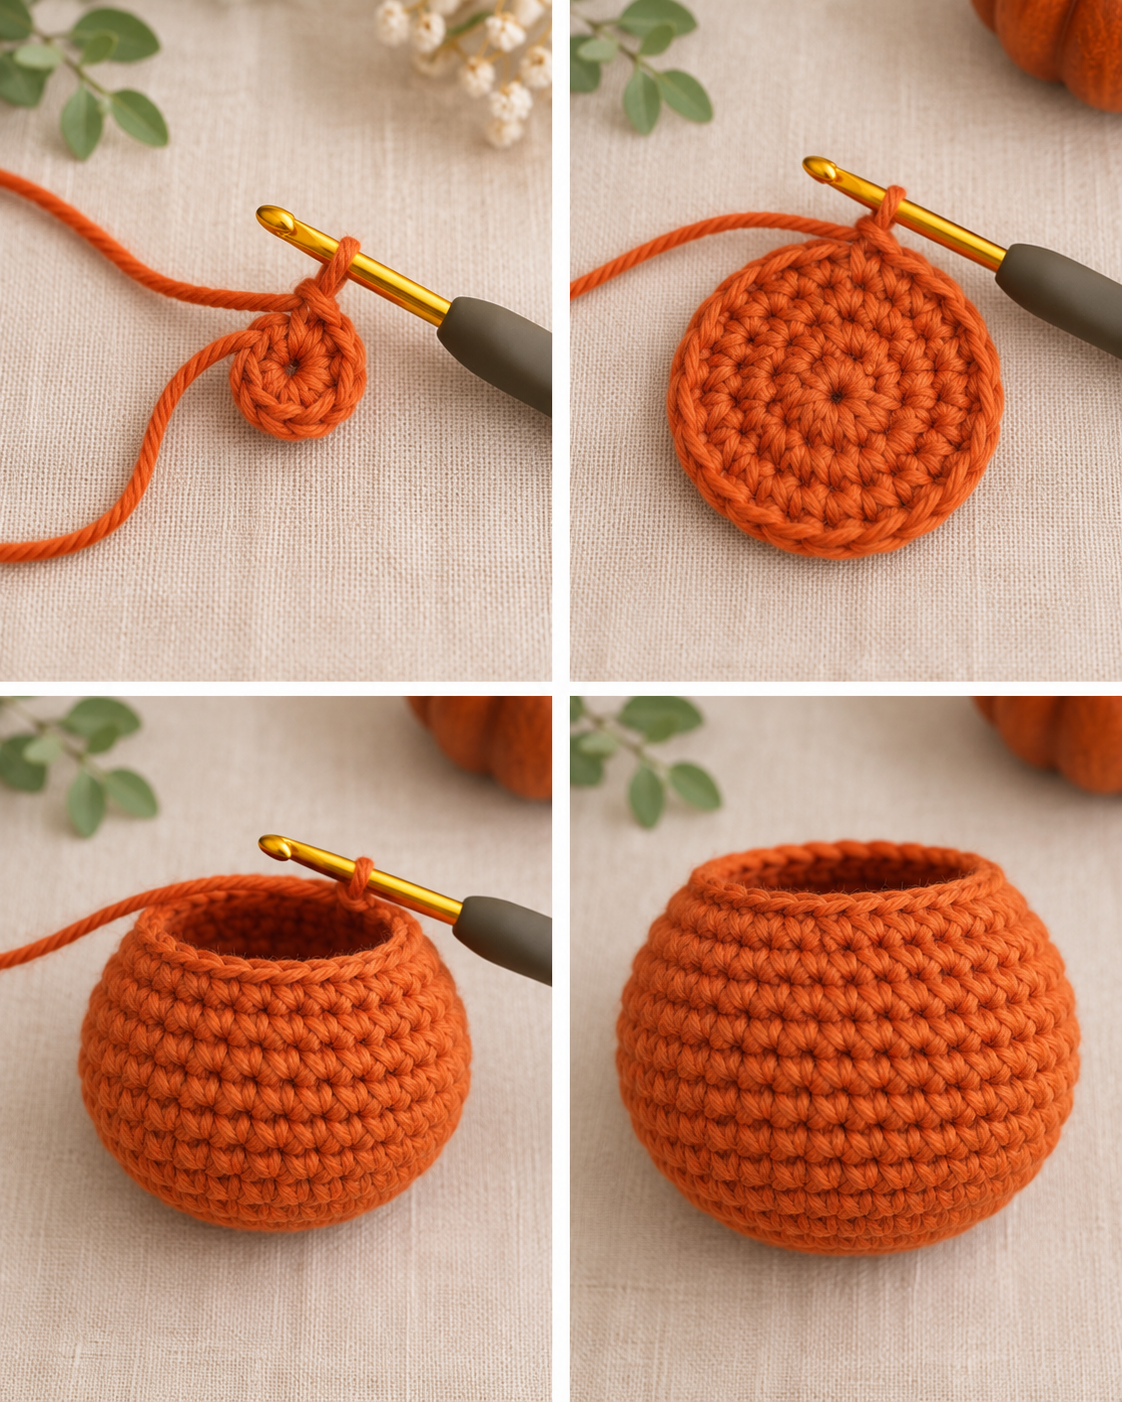
Shape, Stuff and Close the Pumpkin
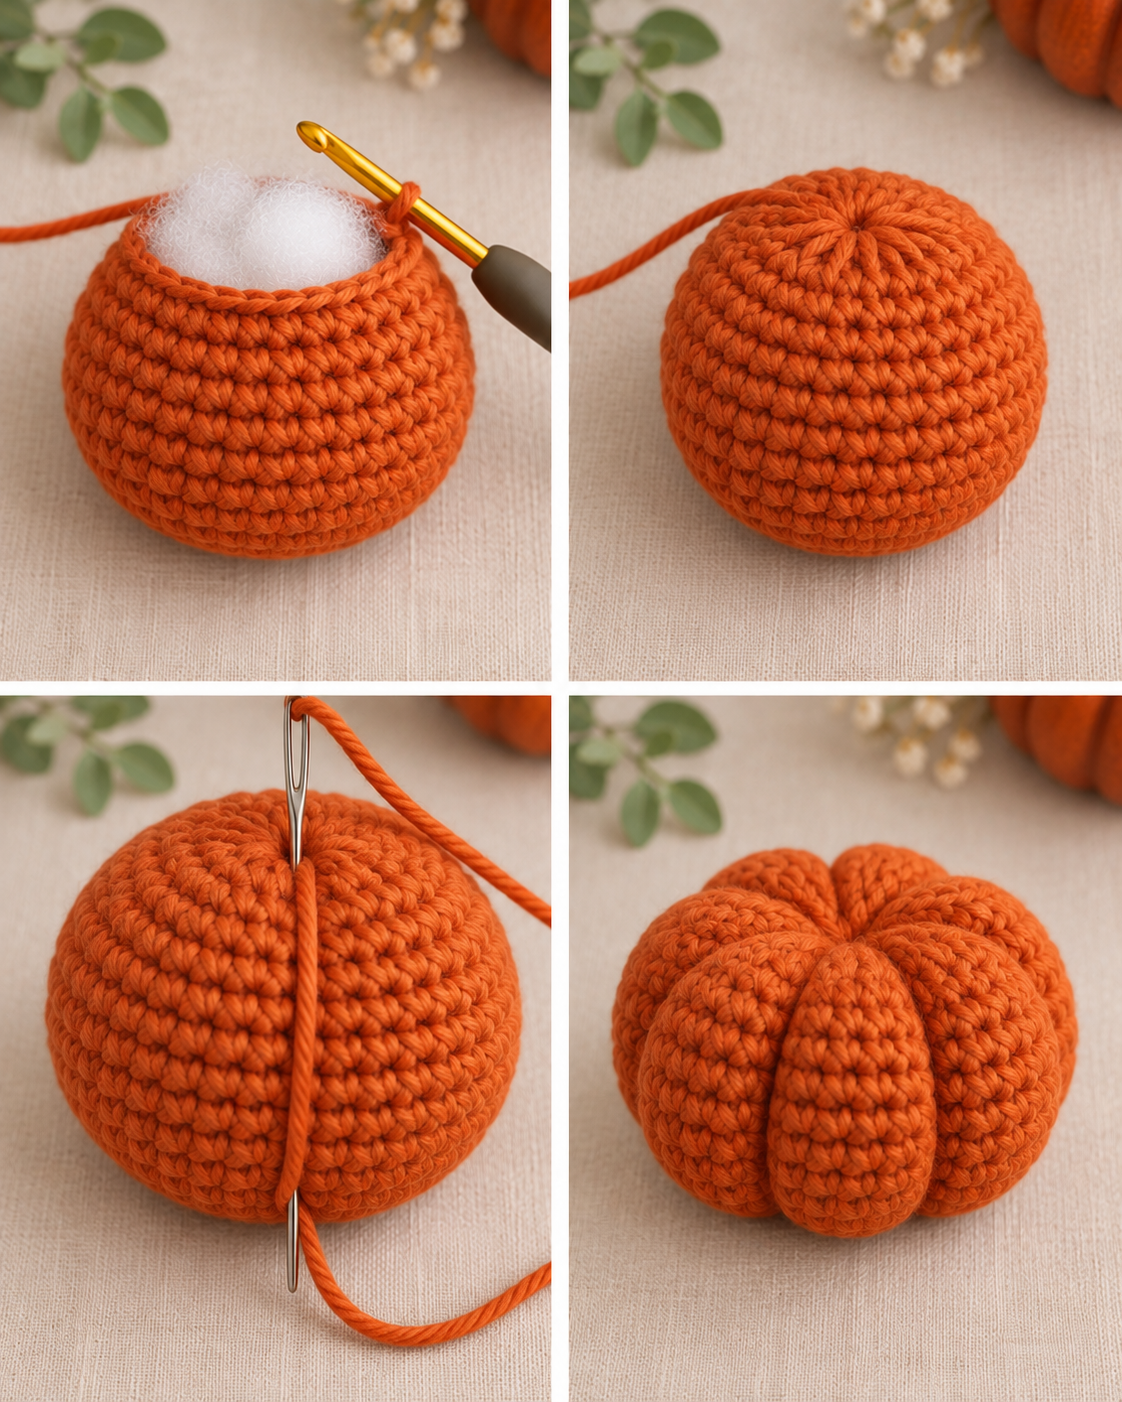
Begin stuffing firmly, keeping the shape rounded rather than tall.
Finish stuffing firmly, FO, and close the remaining opening completely.
Sculpt Six Pumpkin Ribs
- Thread a long length of orange yarn onto a tapestry needle.
- Bring the needle from the bottom center of the pumpkin and out through the top center.
- Carry the yarn down the outside of the pumpkin to the bottom center.
- Pull gently until a visible groove forms.
- Pass the needle through the body again from bottom center to top center.
- Repeat around the pumpkin to create 6 approximately even grooves.
- Secure the yarn at the bottom.
Pull firmly enough to define the ribs, but not so tightly that the pumpkin collapses.
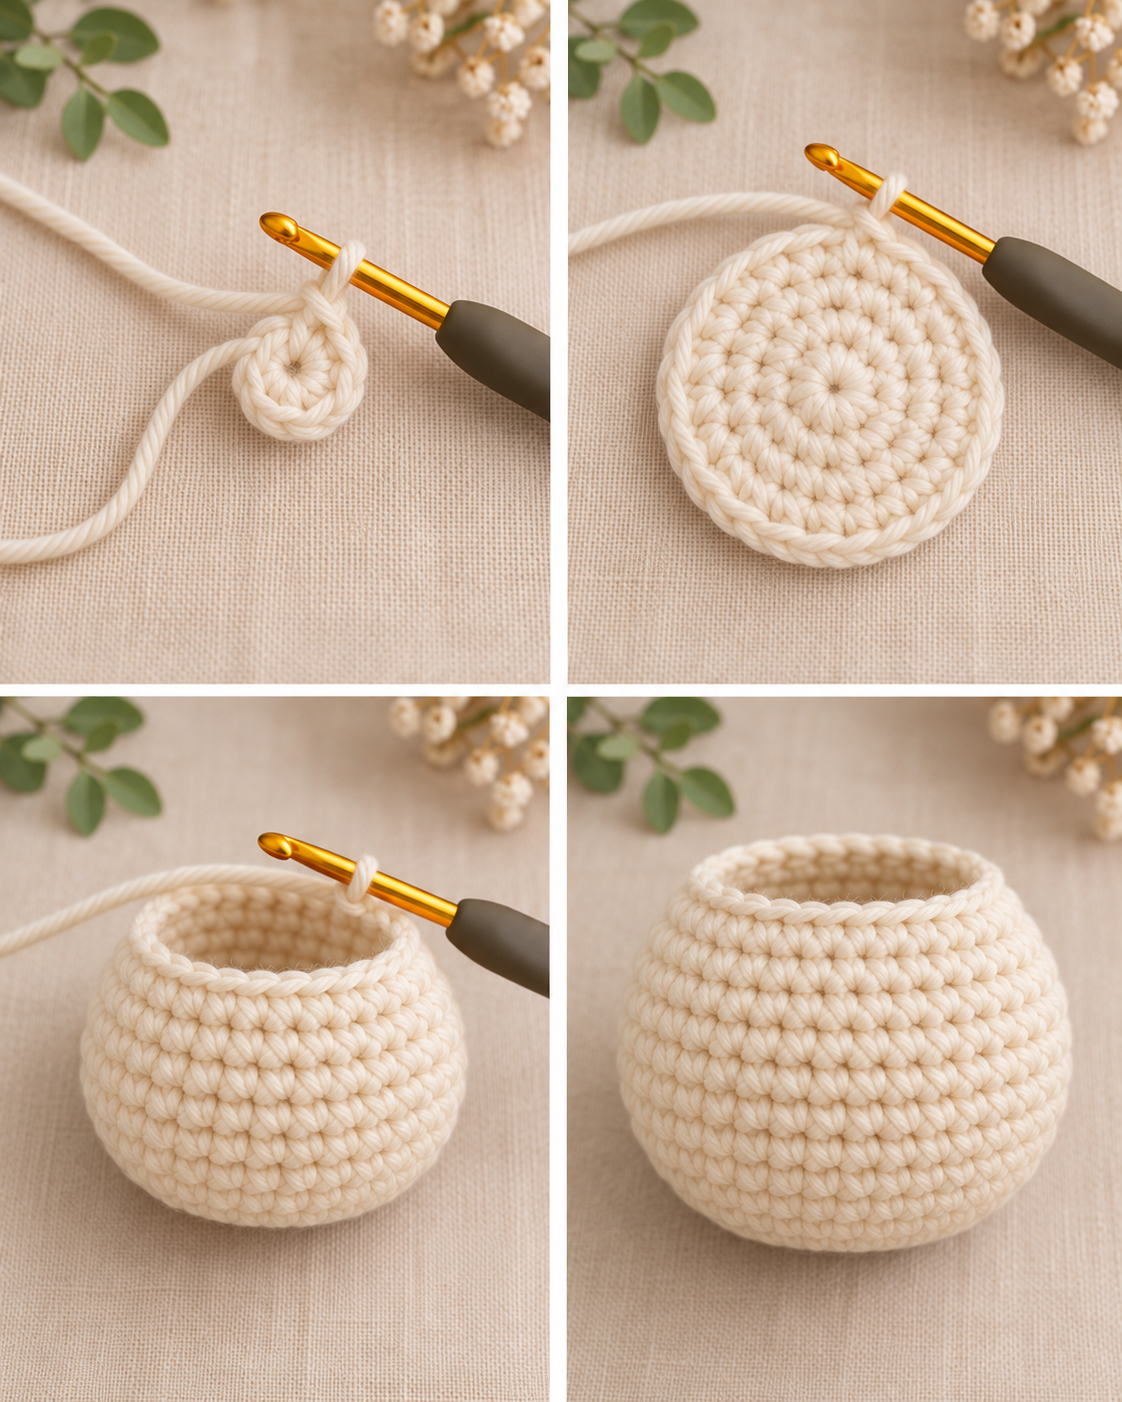
Step 2: Crochet the Panda Head
Use cream or warm-white yarn. Keep the head open while the face and safety eyes are installed.
Stop here temporarily. Do not stuff yet.
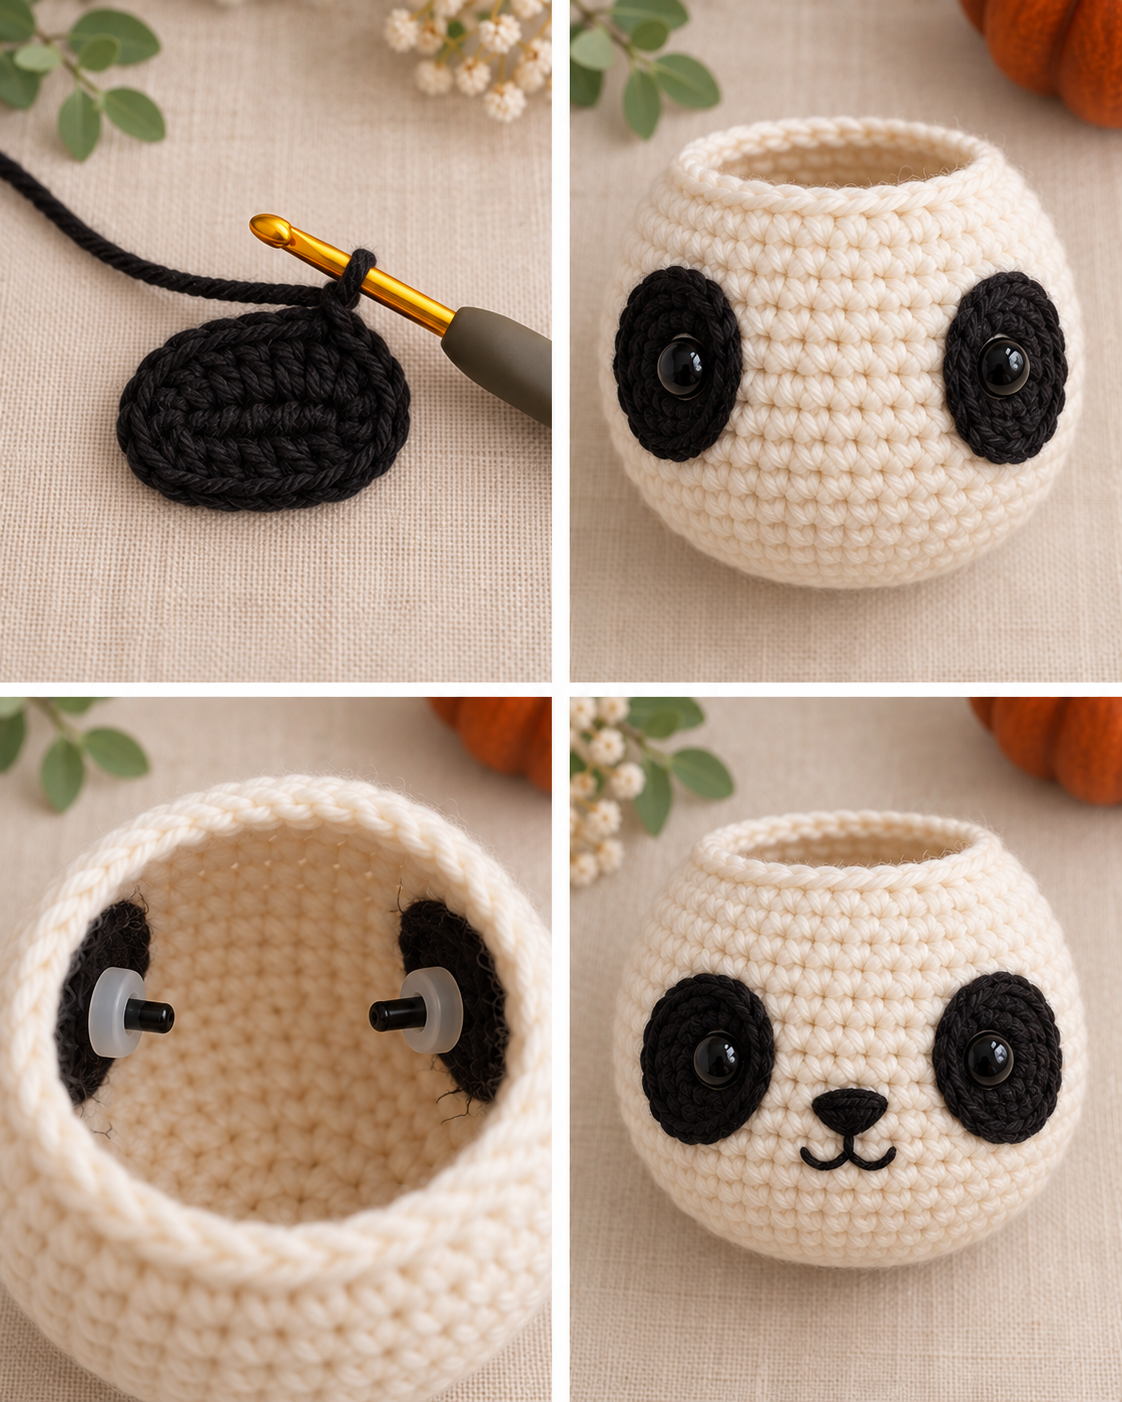
Step 3: Panda Eye Patches and Face
Black Eye Patches — Make 2
Ch 5.
FO, leaving a long sewing tail. Do not stuff.
Install the Panda Face
Placement is provisional because the pattern has not yet been physically tested.
- Position the patches approximately across head Rounds 8–11.
- Angle them slightly toward the center.
- Start with the eye centers around Rounds 9–10, roughly 7 stitches apart center-to-center.
- Pass each safety-eye stem through the black patch and then through the cream head.
- Check symmetry before attaching the washers.
- Install the washers from inside the still-open head.
- Sew the patches securely.
- Embroider a small black nose, short vertical stitch, and curved smile.
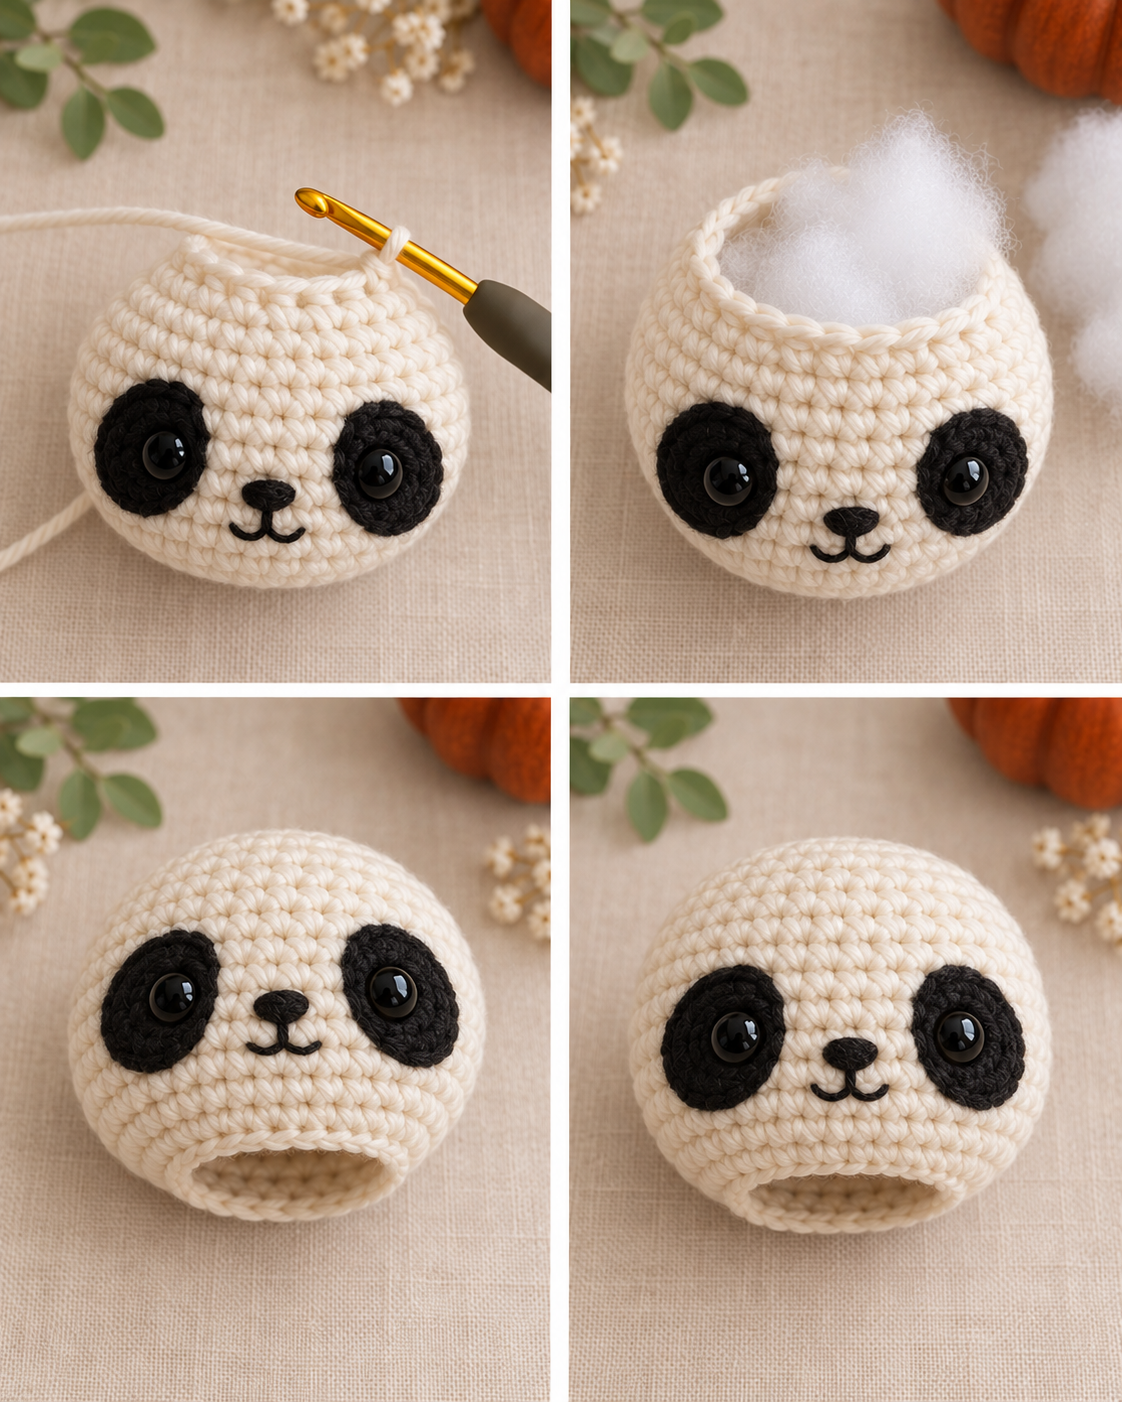
Step 4: Finish and Stuff the Panda Head
Stuff the head firmly and shape the cheeks evenly.
Do not close the base. Keep the final 18-stitch opening for attachment to the pumpkin.
FO, leaving a long sewing tail.
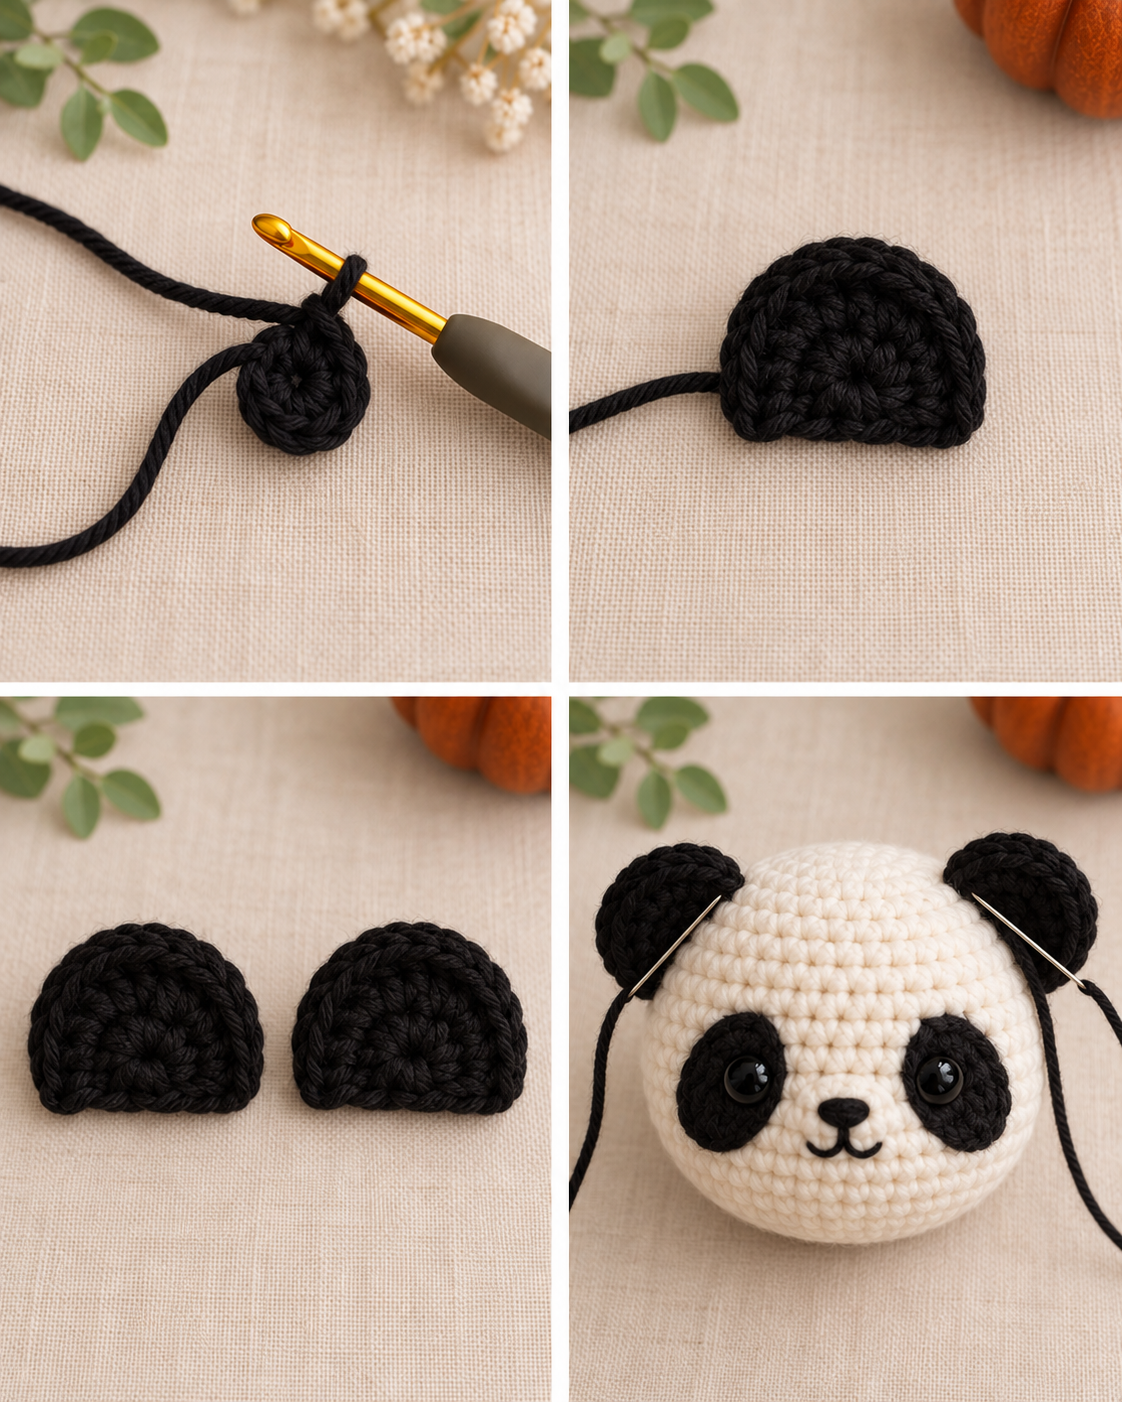
Step 5: Panda Ears — Make 2
FO, leaving a long tail. Do not stuff. Flatten each ear lightly and sew them symmetrically to the upper sides of the head, approximately across Rounds 3–6 as a provisional starting point.
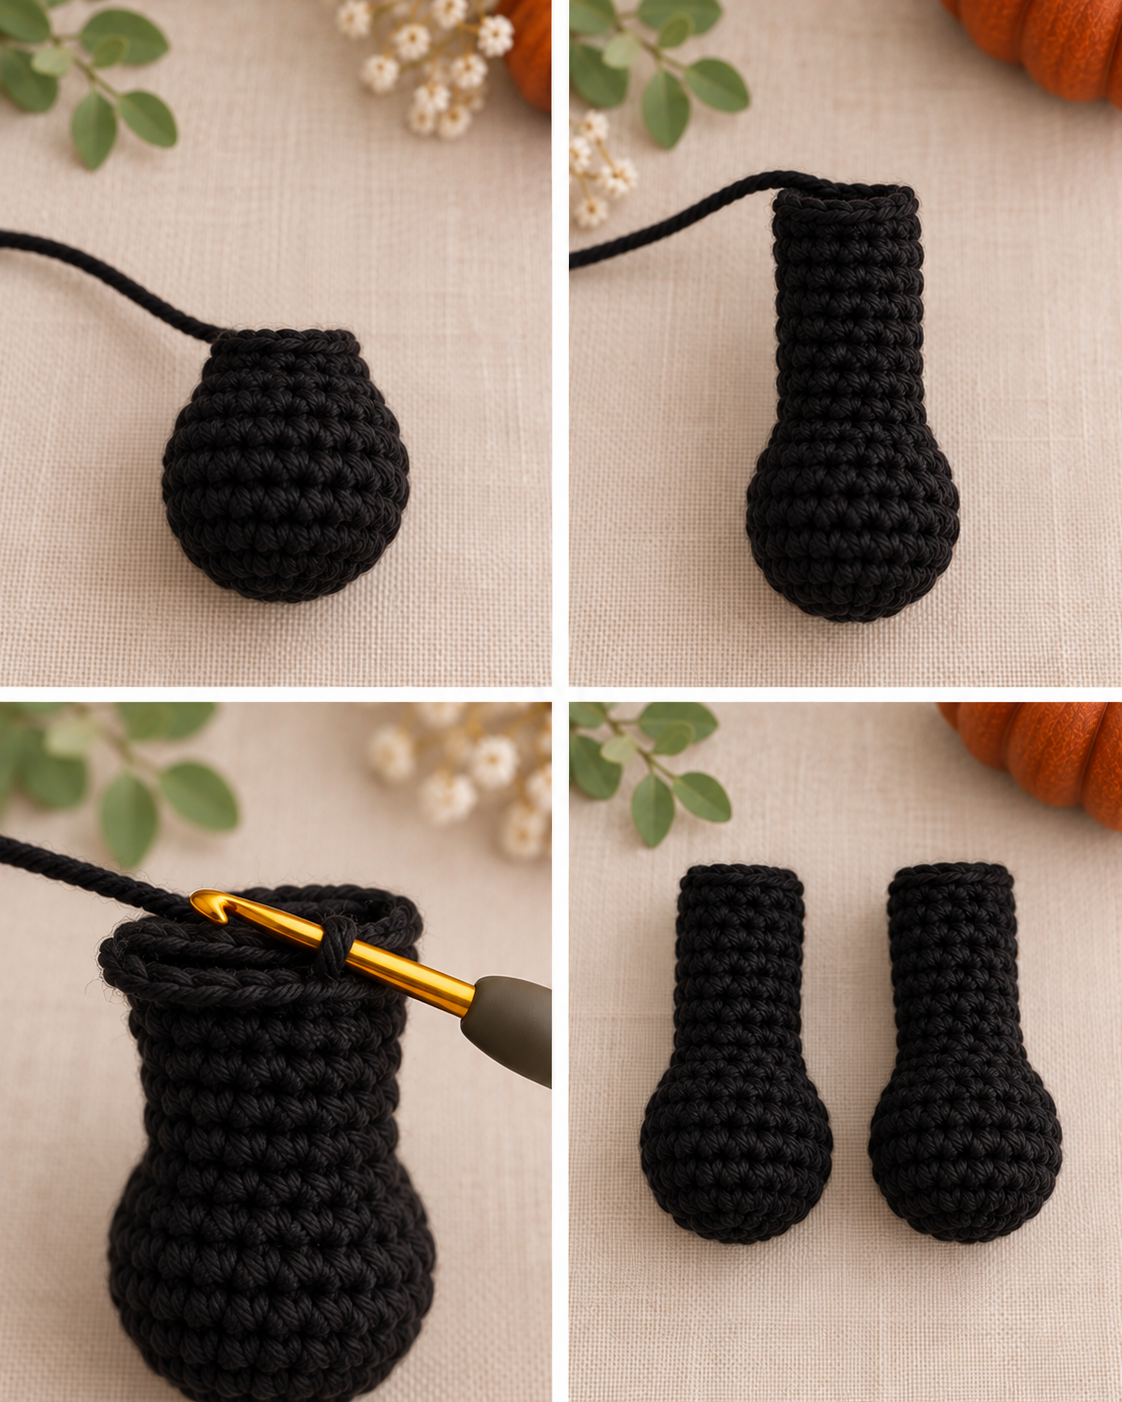
Step 6: Panda Arms — Make 2
Add only a small amount of stuffing to the rounded hand. Keep the upper half mostly unstuffed.
Flatten the open end and crochet through both layers:
FO, leaving a long tail.
Step 7: Pumpkin Stem and Leaf
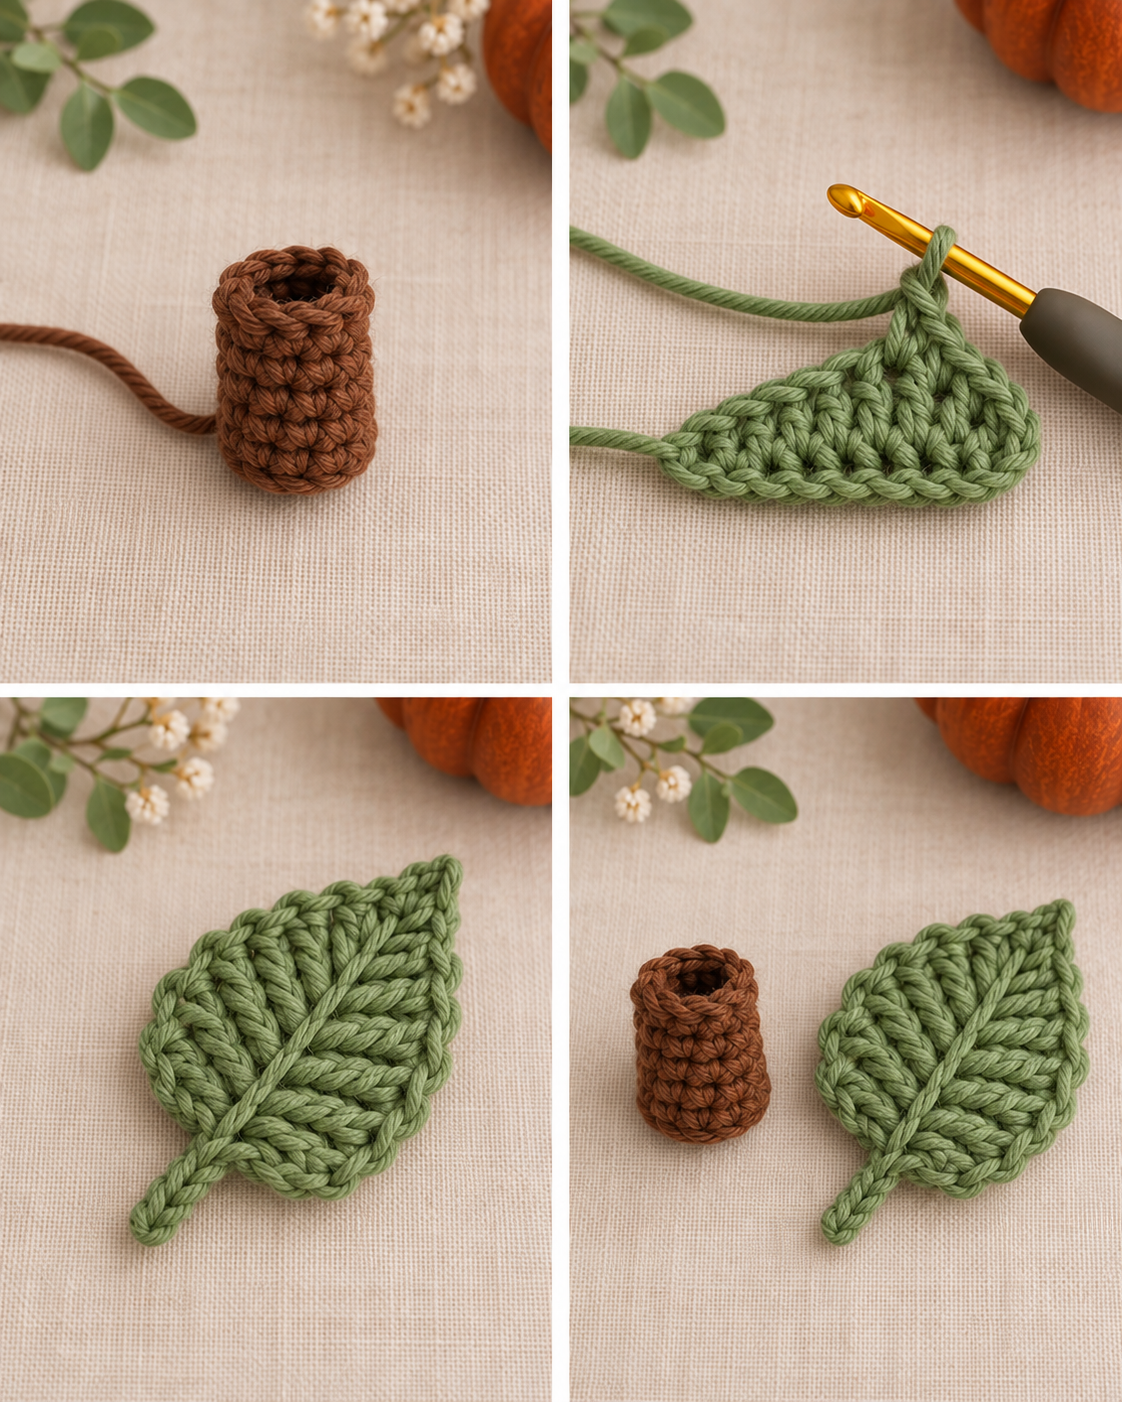
Brown Stem
FO, leaving a long sewing tail. Do not heavily stuff.
Green Leaf
Ch 7. Starting in the second chain from the hook:
sl st, sc, hdc, dc, hdc, 3 sc in the final chain.
Continue along the opposite side:
hdc, dc, hdc, sc, sl st.
FO, leaving a sewing tail. Keep the leaf flat.
Step 8: Assemble the Pumpkin Panda
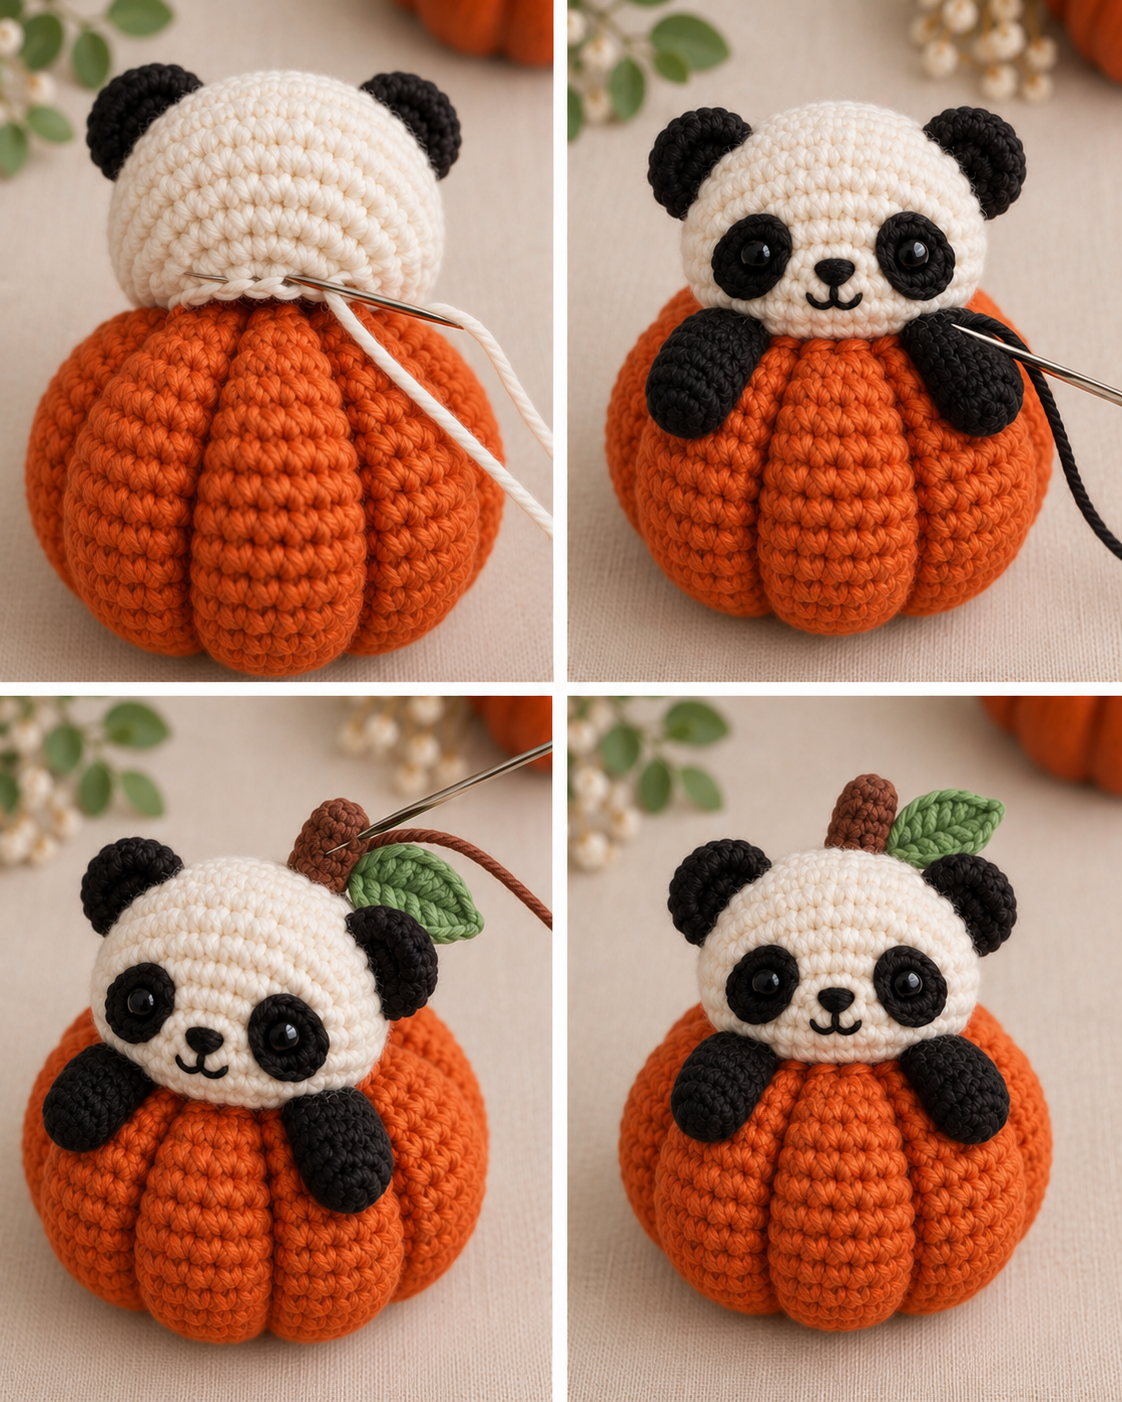
Attach the Panda Head
Choose the most attractive side of the pumpkin as the front. Center the open 18-stitch base of the panda head over the closed top of the pumpkin.
Sew securely around the entire head opening.
Attach the Arms
Position one arm on each upper-front side of the pumpkin. Angle the paws slightly inward and use equivalent pumpkin ribs as symmetry references.
Sew the flattened closed tops firmly to the pumpkin.
Attach the Stem
Sew the brown stem slightly behind and to one side of the panda head.
Attach the Leaf
Sew the base of the green leaf beside the stem and let the pointed end extend outward over the pumpkin.
Pumpkin Panda Tips and Troubleshooting
My pumpkin still looks like a ball
Make sure it is fully stuffed and closed before sculpting. Pull each outside strand gradually until the six grooves become visible.
The ribs are uneven
Establish all six sections before permanently tightening the sculpting yarn. Compare the spacing and adjust the tension first.
The panda head leans to one side
Pin the head before sewing and use the pumpkin grooves as visual reference lines.
The arms do not match
Check that both arms use the same stitch counts and the same amount of light stuffing in the rounded hand area.
The stem looks attached to the panda
Move it slightly farther behind or to one side before sewing. The stem belongs visually to the pumpkin.
Pumpkin Panda Crochet Pattern FAQ
Is this pumpkin panda crochet pattern no-sew?
No. Several separately crocheted components are sewn together during assembly.
Are the pumpkin ribs crocheted separately?
No. The pumpkin is made as one stuffed piece, then sculpted into six sections with orange yarn.
Why does the panda head stay open at the bottom?
The final 18-stitch opening provides the edge used to sew the head directly to the closed pumpkin.
Can I embroider the eyes?
Yes. Embroidered eyes are the safer choice for babies and very young children.
Can I use another yarn weight?
You can experiment with another yarn weight, but the finished proportions and size may change. Choose a hook that creates firm amigurumi fabric.
How large is the finished pumpkin panda?
The finished size has not yet been physically verified, so no exact measurement is claimed.
Should I count stitches in the tutorial photos?
No. Follow the written round counts. The images are visual construction guides rather than stitch-count references.
Your Finished Pumpkin Panda Amigurumi
The finished panda should look as though it is peeking over a plump orange pumpkin, with the black paws resting naturally over the front and the brown stem and green leaf visible above.